Refreshing Lemon Coconut Bliss Bars: A Delightful Dessert Experience
In the realm of delightful desserts, few treats can rival the refreshing taste and creamy texture of Lemon Coconut Bliss Bars. These bars are not only a feast for the senses with their zesty lemon flavor and tropical coconut twist, but they also offer a healthy alternative to traditional sweets. Made with wholesome ingredients like Greek yogurt and coconut milk, these bars are perfect for satisfying your sweet tooth without the guilt. Whether you’re enjoying them on a hot summer day or serving them at a gathering, this recipe is bound to impress. In this article, we will guide you through crafting these delicious bars, exploring their benefits, and providing insights into why they are a must-try recipe.
Understanding the Key Ingredients
Before diving into the preparation of Lemon Coconut Bliss Bars, it’s essential to understand the key ingredients that will come together to create this delightful treat. Each component plays a crucial role in flavor, texture, and nutritional value.
Exploring Greek Yogurt’s Role in the Recipe
Greek yogurt is a cornerstone of this recipe, not only for its creamy texture but also for its health benefits. Packed with protein and probiotics, Greek yogurt contributes to a satisfying, guilt-free dessert option. The thick consistency of Greek yogurt adds a rich creaminess that elevates the overall mouthfeel of the bars. Additionally, its tangy flavor complements the sweetness of the coconut and the brightness of the lemons, creating a balanced profile that keeps you coming back for more.
The Importance of Coconut Milk
Coconut milk is another vital ingredient that brings a tropical flair to the Lemon Coconut Bliss Bars. There are different types of coconut milk available, including light coconut milk and full-fat coconut milk. For this recipe, full-fat coconut milk is recommended as it adds a luscious creaminess and a rich flavor that pairs beautifully with the lemon. Furthermore, coconut milk is a source of healthy fats, which can help keep you feeling full and satisfied. The subtle sweetness of coconut milk enhances the tartness of the lemons, creating a harmonious blend that delights the palate.
Lemon: The Star Ingredient
Lemon is undoubtedly the star ingredient in this recipe. Not only does it provide a burst of bright flavor, but it also brings numerous health benefits. Fresh lemons are rich in vitamin C, which supports the immune system and contributes to healthy skin. The balance of acidity and sweetness in desserts is crucial, and lemon achieves this perfectly. In our bars, both the juice and the zest are used to maximize flavor development. The zest adds a concentrated lemon essence, intensifying the overall taste and aroma of the bars.
Sweetening Your Bliss Bars
When it comes to sweetening your Lemon Coconut Bliss Bars, you have options. While honey and maple syrup are both natural sweeteners that can be used, they offer different flavors and sweetness levels. Honey tends to be sweeter than maple syrup, so if you prefer a less sugary bar, consider using maple syrup and adjusting the quantity to your taste. This flexibility allows you to customize the sweetness to your liking, ensuring that your bliss bars are just the right amount of sweet.
The Addition of Shredded Coconut
Finally, unsweetened shredded coconut adds an essential texture contrast to the creamy bars. Not only does it provide a delightful chew, but it also offers nutritional advantages, such as fiber and healthy fats. Incorporating shredded coconut enhances the tropical theme of the bars and provides an added layer of flavor that complements both the lemon and the coconut milk.
Step-by-Step Preparation of Lemon Coconut Bliss Bars
With a clear understanding of the ingredients, we can move on to the preparation of these delicious Lemon Coconut Bliss Bars. The process is straightforward, but organization is key to success in the kitchen.
Preparing Your Ingredients for Success
Before you begin cooking, it’s essential to practice “mise en place,” a French culinary term meaning “everything in its place.” This involves measuring and preparing all your ingredients before starting the actual cooking process. This step not only streamlines the workflow but also reduces the chance of missing an ingredient.
When it comes to lemons, proper zesting and juicing are crucial. Use a microplane or a zester to carefully remove the outer yellow layer of the lemon peel, avoiding the bitter white pith underneath. For juicing, a handheld citrus juicer or a simple fork can be effective tools to extract every last drop of juice.
Mixing the Wet Ingredients
Once your ingredients are prepped, it’s time to mix the wet ingredients. Begin by combining the Greek yogurt, coconut milk, lemon juice, and lemon zest in a mixing bowl. For a smooth mixture, you can use an electric mixer or a whisk to blend everything until it’s creamy and well combined. Adding a splash of vanilla extract at this stage can enhance the flavor profile, bringing warmth and depth to the bars.
Incorporating the Dry Ingredients
After achieving a smooth mixture of wet ingredients, it’s time to fold in the dry ingredients. This step is where the balance of textures comes into play. Gently add the dry ingredients to the wet mixture, being careful not to deflate the mixture. The goal is to maintain airiness while ensuring that everything is well incorporated. A pinch of sea salt is essential in this step; it not only enhances the overall flavor but also balances the sweetness and acidity, creating a more complex taste.
Setting Up Your Baking Dish
Finally, choose a baking dish suitable for the dimensions of your bars. A square or rectangular dish works well for this recipe. Line the dish with parchment paper, allowing some overhang to make removing the bars easier once they are set. Pour the mixture into the prepared dish, spreading it evenly with a spatula. This step ensures that the bars will cook uniformly, achieving the perfect texture throughout.
As you prepare to bake your Lemon Coconut Bliss Bars, the combination of zesty lemon, creamy coconut, and the wholesome goodness of Greek yogurt is sure to tantalize your taste buds. Stay tuned for the next part of the article, where we will guide you through the baking process and provide tips for the perfect finish to these delicious treats.
How to Properly Line a Baking Dish with Parchment Paper
Lining your baking dish correctly is crucial for easy removal of the Lemon Coconut Bliss Bars after they are frozen. Here’s how to do it:
1. Choose the Right Size: Select a baking dish that is 8×8 inches for this recipe. This size will yield the perfect thickness for your bars.
2. Cut the Parchment Paper: Cut a piece of parchment paper that is slightly longer than the sides of the dish. This extra length will create little handles, making it easier to lift the bars out later.
3. Insert the Parchment: Place the parchment paper in the dish, pressing it into the corners and along the sides. It should cover the bottom and sides of the dish. If the paper doesn’t hold its shape, you can lightly grease the dish first to help it stick.
4. Secure the Edges: To keep the parchment in place while you pour in the mixture, you can use small pieces of tape on the corners of the dish to hold it down.
Tips for Ensuring Easy Removal of the Bars
To guarantee that your Lemon Coconut Bliss Bars come out of the baking dish effortlessly, consider these tips:
– Use Non-Stick Spray: Lightly spray the parchment paper with a non-stick cooking spray. This adds an extra layer of protection and helps prevent sticking.
– Cool Completely: Once your bars have set in the freezer, allow them to sit at room temperature for a few minutes before attempting to lift them out. This slight warming can help loosen any edges that may have adhered to the dish.
– Use a Sharp Knife: If the edges seem stuck, run a sharp knife around the sides of the bars before lifting them out. This will create a clean separation between the bars and the dish.
Pouring and Freezing for the Perfect Texture
The Importance of Spreading the Mixture Evenly
When you pour your mixture into the lined baking dish, it’s vital to spread it evenly across the surface. Use a rubber spatula to help ensure that the mixture reaches all corners of the dish. This not only promotes even freezing but also results in uniform bar thickness, enhancing both texture and flavor.
Understanding Freezing Times and What to Look for When Checking Firmness
Freezing times can vary based on your freezer’s temperature, but generally, you’ll want to freeze the bars for at least 4-6 hours. To check for firmness:
– Touch Test: Gently press the surface of the bars with your fingertip. If it feels solid and doesn’t leave an imprint, it’s ready to be enjoyed.
– Visual Inspection: The top of the bars should appear slightly glossy, indicating that they have set properly.
Cutting and Serving the Bliss Bars
Techniques for Slicing Frozen Desserts
Once your bars are fully frozen, it’s time to cut them into perfect squares:
1. Use a Warm Knife: Run your knife under hot water and dry it off. The warmth will help slice through the bars without cracking them.
2. Cutting Strategy: Start by cutting the bars into halves or quarters before slicing into smaller squares. This method ensures that you get even pieces while maintaining the integrity of the entire batch.
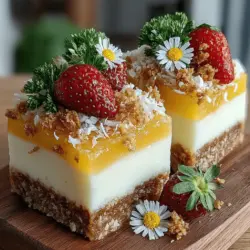
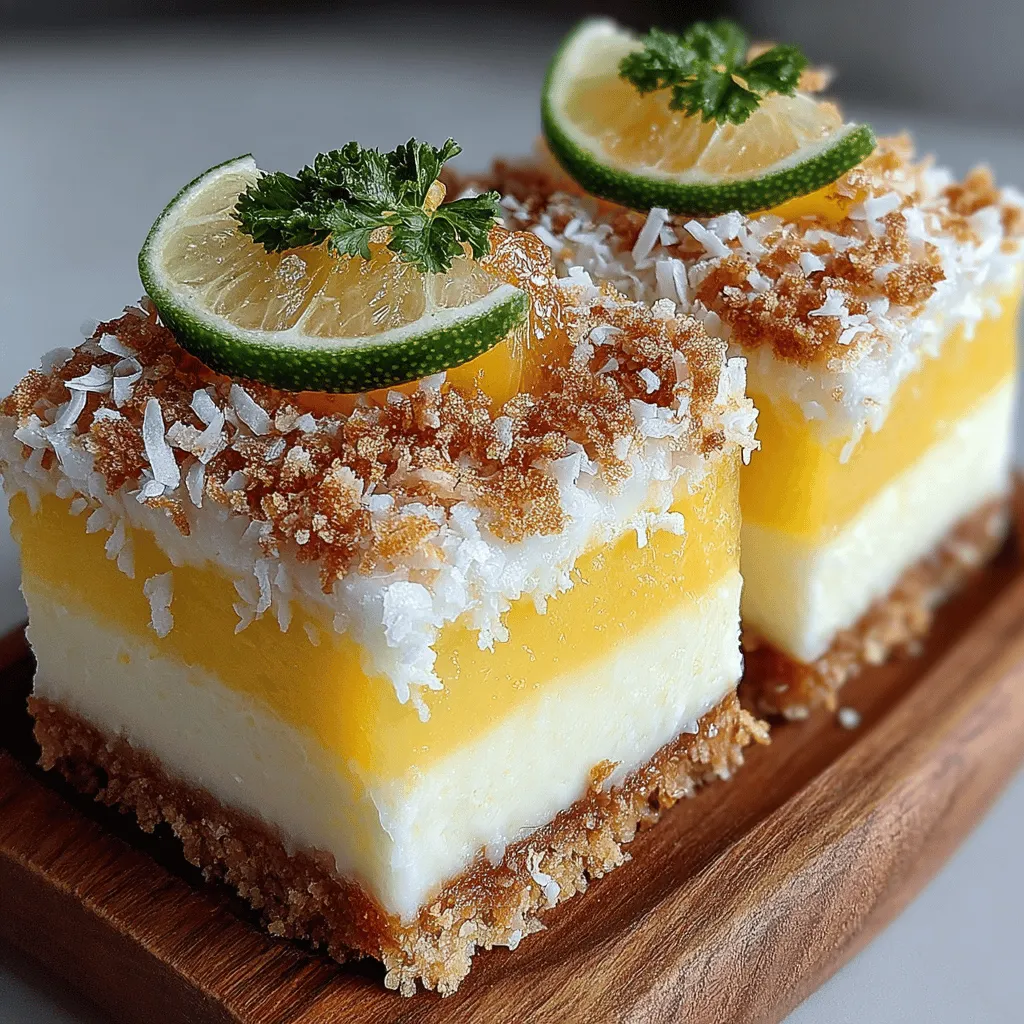
Presentation Tips for Enhancing Visual Appeal
Presentation can elevate your Lemon Coconut Bliss Bars from simple to spectacular:
– Garnish with Coconut Flakes: Before serving, sprinkle some toasted coconut flakes on top for added texture and visual interest.
– Fresh Fruit Accents: Pair the bars with fresh berries or slices of citrus to create a vibrant plate that’s appealing to the eye.
– Serve on a Decorative Platter: Using a beautiful serving platter can enhance the overall presentation. Consider adding mint leaves for a pop of color.
Optional Enhancements and Variations
Creative Toppings for Added Flavor
Enhancing your Lemon Coconut Bliss Bars can be as simple as adding toppings:
– Fresh Fruit Ideas: Slices of fresh strawberries, raspberries, or even a drizzle of passion fruit can complement the citrus notes of lemon and the creaminess of coconut.
– Toasted Coconut: Toasted coconut not only adds a delightful crunch but also intensifies the coconut flavor. Simply toast unsweetened coconut flakes in a dry skillet over medium heat until golden.
Exploring Flavor Variations
Don’t hesitate to experiment with different flavors:
– Substituting Fruits or Extracts: Consider substituting lime for lemon for a zesty twist or adding a few drops of almond extract for a nutty flavor.
– Adapting the Recipe for Seasonal Ingredients: In the summer, try incorporating fresh peaches or mangoes into the mixture. In the fall, consider adding spices like cinnamon or nutmeg for a cozy flavor profile.
Nutritional Benefits of Lemon Coconut Bliss Bars
Evaluating the Health Aspects of the Ingredients
Understanding the nutritional content of your Lemon Coconut Bliss Bars is essential. Here’s a breakdown:
– Calories and Fats: Each bar contains approximately 150 calories, with healthy fats coming primarily from coconut.
– Sugar Content: Using natural sweeteners like honey or maple syrup keeps the sugar content in check while still providing the sweetness you crave.
– Benefits of Yogurt and Coconut: The yogurt adds creaminess and probiotics, while coconut provides healthy fats and dietary fiber, making these bars a nutritious dessert option.
Why These Bars Are a Guilt-Free Dessert Option
These bliss bars are not just tasty; they are a smart choice for satisfying your sweet tooth:
– Natural Sweeteners: By using natural sweeteners, you can enjoy a dessert that minimizes the risk of sugar crashes while still being delicious.
– Satisfying Cravings Without Excess Sugar: The combination of coconut and lemon provides a refreshing flavor that can satisfy cravings without overwhelming sweetness.
Storing and Enjoying Your Bars
Best Practices for Storing Leftovers
To maintain the quality of your Lemon Coconut Bliss Bars, follow these storage tips:
– Freezer Storage: Keep the bars in an airtight container in the freezer. They can last up to three months if stored properly.
– Layer with Parchment: If you stack the bars, place parchment paper between layers to prevent sticking.
Tips for Thawing and Serving Later
When you’re ready to enjoy your bars again:
– Thawing Method: Remove the bars from the freezer and let them sit at room temperature for about 15-20 minutes before serving. This allows them to soften slightly for the best texture.
– Serving Suggestions: Consider pairing the bars with a cup of herbal tea or a refreshing iced beverage for a delightful treat any time of the day.
Exploring Serving Ideas
– Pairing with Beverages: Lemon Coconut Bliss Bars pair wonderfully with a variety of drinks. A nice glass of iced lemonade or mint tea can enhance the refreshing experience.
– Using Bars in Creative Ways: Crumble the bars over a bowl of yogurt or blend them into smoothies for an extra creamy texture and burst of flavor.
Conclusion
Lemon Coconut Bliss Bars are a delightful blend of health and flavor, encapsulating the essence of summer in every bite. With their creamy texture and refreshing taste, these bars serve as a perfect treat for any occasion, whether it’s a family picnic, a party, or simply a way to enjoy a sweet moment at home. By following the outlined steps and understanding the benefits of each ingredient, you can create a dessert that not only satisfies your cravings but also nourishes your body. The versatility of this recipe allows for personal adaptations, ensuring that it can be enjoyed by everyone, regardless of dietary preferences. Indulging in these blissful bars is a delicious way to embrace healthier dessert options without compromising on taste.