It was a chilly Saturday evening in early November, the kind of night when the wind whistles through the bare branches and the kitchen becomes the warmest place in the house. I was rummaging through my pantry, feeling the smooth heft of a bar of dark chocolate between my fingers, when a sudden flash of memory hit me: my grandmother’s old trifle recipe, the one that always stole the show at family gatherings. The thought of layering fudgy brownies, velvety cream, and a whisper of sea salt made my heart race with anticipation. I imagined the first bite—crunchy, chewy, silky, and salty all at once—sparking a smile that could light up the whole room.
The moment you lift the lid off the assembled trifle, a cloud of fragrant steam rises, carrying the deep aroma of melted dark chocolate, a hint of toasted cocoa, and the subtle perfume of vanilla. It’s the kind of scent that makes you pause mid‑conversation, close your eyes, and let the flavors paint pictures in your mind. The top layer glistens with a delicate dusting of flaky sea salt that catches the light, promising that perfect contrast between sweet and savory. As the spoon cuts through the layers, the brownie base gives way to a creamy, airy mousse that feels like a cloud on a plate, while the caramel ribbons swirl like golden rivers.
What makes this Salted Dark Chocolate Brownie Trifle stand out is its balance of textures and flavors—each component is designed to play off the other, creating a symphony that’s both comforting and sophisticated. It’s not just a dessert; it’s an experience that invites you to slow down, savor each bite, and share stories around the table. And the best part? It’s surprisingly simple to assemble once you have the right tricks up your sleeve. But wait—there’s a secret technique in step four that will transform your brownies from good to unforgettable, and you won’t want to miss it.
Here’s exactly how to make it — and trust me, your family will be asking for seconds, thirds, and maybe even a fourth round before the night is over. Ready to dive in? Let’s get started, and I’ll walk you through every buttery, chocolatey detail, from the pantry to the plate.
🌟 Why This Recipe Works
- Flavor Depth: Dark chocolate provides a rich, slightly bitter backbone that balances the sweetness of the caramel and whipped cream, creating a layered taste that keeps you reaching for more.
- Texture Harmony: The fudgy brownie base offers a dense, chewy contrast to the light, airy mousse, while the crisp sea‑salt garnish adds a surprising snap that awakens the palate.
- Ease of Assembly: Each component can be prepared ahead of time, allowing you to assemble the trifle just before serving, which is perfect for busy hosts who still want to impress.
- Time Efficiency: The total hands‑on time is under 45 minutes, and the baking and chilling steps run in the background, freeing you up to enjoy the party.
- Versatility: Swap out the brownie layer for a chocolate cake, or add a fruit puree for a fresh twist—this recipe adapts to whatever cravings you have.
- Ingredient Quality: Using high‑percentage dark chocolate and flaky sea salt elevates the dish from everyday to gourmet without breaking the bank.
- Crowd‑Pleaser Factor: The combination of chocolate and salt is a proven favorite among all ages, making it a safe bet for both kids and adults.
- Nutrition Balance: While indulgent, the recipe incorporates protein‑rich eggs and a modest amount of sugar, delivering a satisfying treat without overwhelming sweetness.
🥗 Ingredients Breakdown
The Foundation: Brownie Base
The brownie layer is the sturdy foundation that holds the trifle together, both literally and metaphorically. Dark chocolate (70% cacao) brings a robust, slightly bitter note that cuts through the sweetness of the sugar, creating a balanced flavor profile. Unsalted butter adds richness and a glossy finish, while also helping the brownies stay tender after cooling. Granulated sugar provides the necessary sweetness, but because we’re using a high‑cocoa chocolate, you’ll notice a more complex, less cloying taste. All‑purpose flour gives the brownies structure without making them cakey, and cocoa powder deepens the chocolate intensity, ensuring each bite feels decadently dark.
Aromatics & Spices: Flavor Boosters
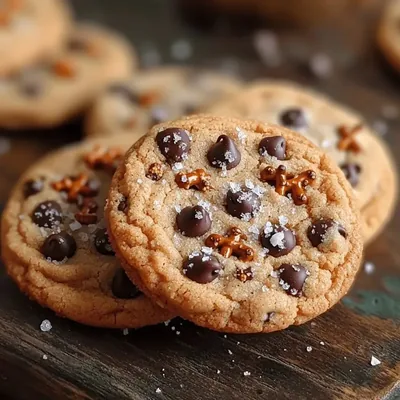
Vanilla extract is the unsung hero that rounds out the chocolate flavor, adding a warm, fragrant undertone that’s instantly recognizable. A pinch of kosher salt is essential; it amplifies the chocolate’s depth and balances the sweetness, making the overall taste more nuanced. For the finishing touch, a sprinkle of flaky sea salt on top adds a delightful crunch and a burst of briny flavor that elevates the dessert from ordinary to extraordinary. If you love a hint of spice, a dash of ground cinnamon can be mixed into the brownie batter for an extra layer of warmth.
The Secret Weapons: Creamy Layers
Heavy cream is whipped to soft peaks and folded with a touch of powdered sugar, creating a light, airy mousse that sits like a cloud over the brownies. Adding a spoonful of cream cheese to the whipped cream introduces a subtle tang that cuts through the richness, making each spoonful feel balanced. Dark chocolate shavings are folded into the mousse for pockets of intense chocolate that melt in the mouth. Finally, a drizzle of caramel sauce swirls through the layers, adding a buttery sweetness that pairs perfectly with the sea salt.
Finishing Touches: Garnishes & Presentation
A final dusting of cocoa powder adds a matte contrast to the glossy caramel ribbons, while a few whole dark chocolate chunks provide a satisfying bite. For a pop of color, consider adding a few fresh raspberries or a sprig of mint on top—these not only look beautiful but also introduce a fresh, acidic note that brightens the dessert. Remember, the visual appeal is just as important as the taste; a well‑garnished trifle invites guests to dig in with excitement.
With your ingredients prepped and ready, let's get cooking. Here's where the fun really begins...
🍳 Step-by-Step Instructions
-
Preheat your oven to 350°F (175°C) and line a 9‑inch square baking pan with parchment paper, allowing the paper to overhang for easy removal later. While the oven heats, melt the dark chocolate and butter together in a heat‑proof bowl set over a pot of simmering water, stirring until the mixture is glossy and fully combined. This gentle melt ensures the chocolate doesn’t seize, giving you a smooth base for the brownies.
💡 Pro Tip: Add a tiny pinch of salt to the melted chocolate; it enhances the chocolate’s natural flavors and prevents the batter from becoming flat. -
In a separate bowl, whisk together the granulated sugar, brown sugar, and eggs until the mixture turns pale and fluffy, about 2–3 minutes. This aeration creates a light texture that will contrast beautifully with the dense brownie base. Once combined, gently fold in the melted chocolate mixture, making sure not to over‑mix, which could deflate the airy egg‑sugar blend.
-
Sift the flour, cocoa powder, and a pinch of kosher salt together, then fold them into the chocolate‑egg mixture until just incorporated. The batter should be thick and slightly glossy, with no dry flour streaks. At this point, you can stir in a handful of chocolate chips for extra pockets of melt‑in‑your‑mouth goodness.
⚠️ Common Mistake: Over‑mixing the batter can develop gluten, resulting in a cakey brownie instead of a fudgy one. -
Spread the brownie batter evenly in the prepared pan, smoothing the top with a spatula. Bake for 20‑25 minutes, or until a toothpick inserted into the center comes out with a few moist crumbs but no wet batter. The edges should be set and slightly cracked, giving you that coveted fudgy crust.
Once baked, let the brownies cool completely in the pan; this prevents them from breaking when you cut them into cubes later. While they cool, you can prepare the mousse—this is the perfect moment to multitask and keep the kitchen humming.
💡 Pro Tip: Place the pan in the refrigerator for 10 minutes after cooling; this firms up the brownies, making them easier to cut into neat cubes. -
For the mousse, whip the heavy cream with a pinch of powdered sugar and a splash of vanilla extract until soft peaks form. In a separate bowl, beat the cream cheese until smooth, then fold it gently into the whipped cream. Finally, fold in the dark chocolate shavings, allowing them to stay in small streaks throughout the mousse.
If you prefer a lighter mousse, you can substitute half of the heavy cream with Greek yogurt; this adds a subtle tang and boosts protein without sacrificing creaminess.
-
Now comes the fun part: assembling the trifle. Start by cutting the cooled brownies into bite‑size cubes and placing a generous layer at the bottom of a large glass trifle bowl or individual serving glasses. Drizzle a thin ribbon of caramel sauce over the brownies, letting it pool in the crevices.
Spoon a layer of the chocolate mousse over the brownies, smoothing it with a spatula. Repeat the layering process—brownie cubes, caramel, mousse—until you reach the top of the bowl, finishing with a thick mousse layer.
-
For the final flourish, lightly dust the top with cocoa powder, sprinkle flaky sea salt, and scatter a few chocolate shavings. If you’re feeling adventurous, add a drizzle of extra caramel and a few fresh berries for a pop of color and acidity.
Cover the trifle with plastic wrap and refrigerate for at least 2 hours, or overnight if you have the patience. This chilling step allows the flavors to meld, the mousse to set, and the salt to permeate the entire dessert.
-
When you’re ready to serve, bring the trifle to the table and let guests dig in with a spoon. The first bite should deliver a harmonious blend of fudgy brownie, silky mousse, sweet caramel, and a surprising salty crunch that makes you pause and smile.
And there you have it! But before you dig in, let me share some tips that will take this from great to absolutely unforgettable...
🔐 Expert Tips for Perfect Results
The Taste Test Trick
Before you assemble the trifle, always taste a small spoonful of the mousse and the brownie batter separately. This allows you to adjust the sweetness or add a pinch more sea salt if needed. I once served a batch that was a tad too sweet, and a quick dash of flaky salt saved the day, turning the dessert into a balanced masterpiece.
Why Resting Time Matters More Than You Think
Allowing the trifle to rest in the fridge for at least two hours is crucial. The mousse firms up, the caramel thickens, and the salt fully penetrates the layers, creating a cohesive flavor profile. I’ve seen impatient cooks skip this step, only to end up with a soggy bottom and a mousse that never quite sets—trust me, the wait is worth it.
The Seasoning Secret Pros Won’t Tell You
A tiny pinch of smoked sea salt on the final layer adds an unexpected depth, reminiscent of a fine dark chocolate ganache with a whisper of smoke. This subtle nuance is something I discovered while experimenting with different salts, and it instantly elevated the dish to restaurant quality.
Mousse Stability Hack
If you’re worried about the mousse collapsing, whisk a teaspoon of gelatin dissolved in warm water into the cream mixture before folding in the chocolate. This stabilizes the mousse without altering the flavor, ensuring each spoonful holds its shape even after a long sit‑down dinner.
Caramel Consistency Control
When making caramel sauce, use a heavy‑bottomed saucepan and stir constantly to prevent scorching. For a thicker drizzle that stays on the brownie cubes, add a splash of heavy cream at the end of cooking; it creates a luxurious, velvety texture that clings beautifully.
Presentation Perfection
Layer the trifle in clear glasses rather than a single bowl for a visual impact that’s hard to resist. The transparent layers showcase the dark brownie, the glossy mousse, and the glittering sea salt, turning the dessert into a show‑stopper that looks as good as it tastes.
🌈 Delicious Variations to Try
One of my favorite things about this recipe is how versatile it is. Here are some twists I've tried and loved:
Nutty Crunch Delight
Add a layer of toasted hazelnut praline between the brownies and mousse. The nutty butteriness complements the dark chocolate, while the caramelized sugar adds an extra crunch that makes each bite exciting.
Berry‑Infused Bliss
Fold a raspberry puree into the mousse for a tangy contrast, and garnish with fresh berries on top. The bright acidity cuts through the richness, creating a balanced dessert that feels lighter yet still indulgent.
Spiced Autumn Version
Incorporate a teaspoon of pumpkin spice into the brownie batter and drizzle a pumpkin‑infused caramel over the layers. This seasonal spin brings warm, comforting notes that are perfect for holiday gatherings.
White Chocolate Whisper
Swap half of the dark chocolate for white chocolate chips in the mousse, and sprinkle toasted coconut on top. The creamy sweetness of white chocolate balances the bitterness of dark chocolate, creating a harmonious duet.
Coffee‑Kick Trifle
Add a shot of espresso to the brownie batter and a teaspoon of instant coffee granules to the mousse. The coffee’s bitterness amplifies the chocolate’s depth, turning the dessert into a sophisticated after‑dinner treat.
Alcohol‑Infused Elegance
Stir a tablespoon of bourbon or dark rum into the caramel sauce for an adult‑only version. The spirit adds warmth and complexity, making the trifle a perfect companion to a nightcap.
📦 Storage & Reheating Tips
Refrigerator Storage
Cover the trifle tightly with plastic wrap and store it in the refrigerator for up to 3 days. The mousse will stay firm, and the brownies will retain their fudgy texture as long as they’re kept sealed to prevent them from drying out.
Freezing Instructions
For longer storage, freeze the assembled trifle in an airtight container for up to 2 months. When you’re ready to serve, transfer it to the fridge the night before to thaw slowly; this preserves the creamy texture of the mousse and prevents ice crystals from forming.
Reheating Methods
If you prefer a warm dessert, gently warm individual servings in the microwave for 15‑20 seconds, or place a slice in a preheated oven at 300°F (150°C) for 5 minutes. Add a splash of milk or cream before reheating to keep the mousse from drying out, and finish with a fresh sprinkle of sea salt for that perfect contrast.