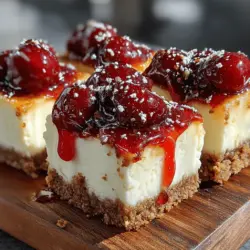
Frozen Yogurt Cherry Cheesecake Slices: A Refreshing Delight
As the temperatures rise and summer approaches, the craving for cold, sweet treats intensifies. Frozen desserts are a perennial favorite during warmer months, offering a delightful way to cool down while indulging in something sweet. Among the myriad of options available, Frozen Yogurt Cherry Cheesecake Slices stand out as a healthier yet equally delicious choice. This recipe combines the rich, creamy flavors of traditional cheesecake with the lightness of frozen yogurt, topped off with a vibrant cherry layer that adds a perfect tartness.
The appeal of Frozen Yogurt Cherry Cheesecake Slices lies in their balanced flavor profile—a seamless blend of luscious cheesecake and the refreshing zing of cherries. This dessert not only satisfies your sweet tooth but also presents a guilt-free indulgence, making it a perfect treat for summer gatherings, backyard barbecues, or simply a cool snack on a hot day.
Understanding the Ingredients
To master the art of Frozen Yogurt Cherry Cheesecake Slices, it’s essential to understand the key ingredients that contribute to its deliciousness. Each component plays a vital role in achieving the perfect texture and flavor, ensuring that every bite is a delightful experience.
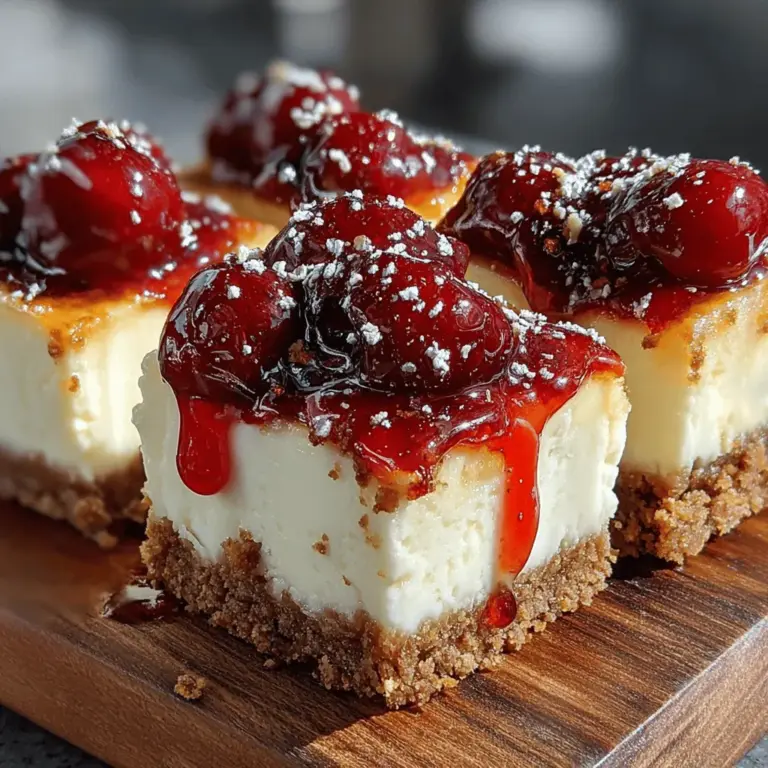
Graham Cracker Crumbs: The crust serves as the foundation of this dessert, and graham cracker crumbs are the star of the show. They not only provide a crunchy texture but also infuse the dessert with a subtly sweet, buttery flavor. The right crust is crucial for stability and creates a delicious contrast to the creaminess of the filling.
Greek Yogurt: A healthier alternative to traditional cream, Greek yogurt is a key ingredient in this recipe. It offers a tangy flavor and a creamy texture that complements the richness of the cheesecake. Additionally, Greek yogurt is packed with protein and probiotics, making it a nutritious choice without compromising taste.
Cream Cheese and Sour Cream: These ingredients work together to create the rich, smooth filling that cheesecake lovers adore. Cream cheese provides the signature flavor and creamy consistency, while sour cream adds a slight tang and enhances the overall richness. Together, they create a luscious filling that perfectly balances the tartness of the cherries.
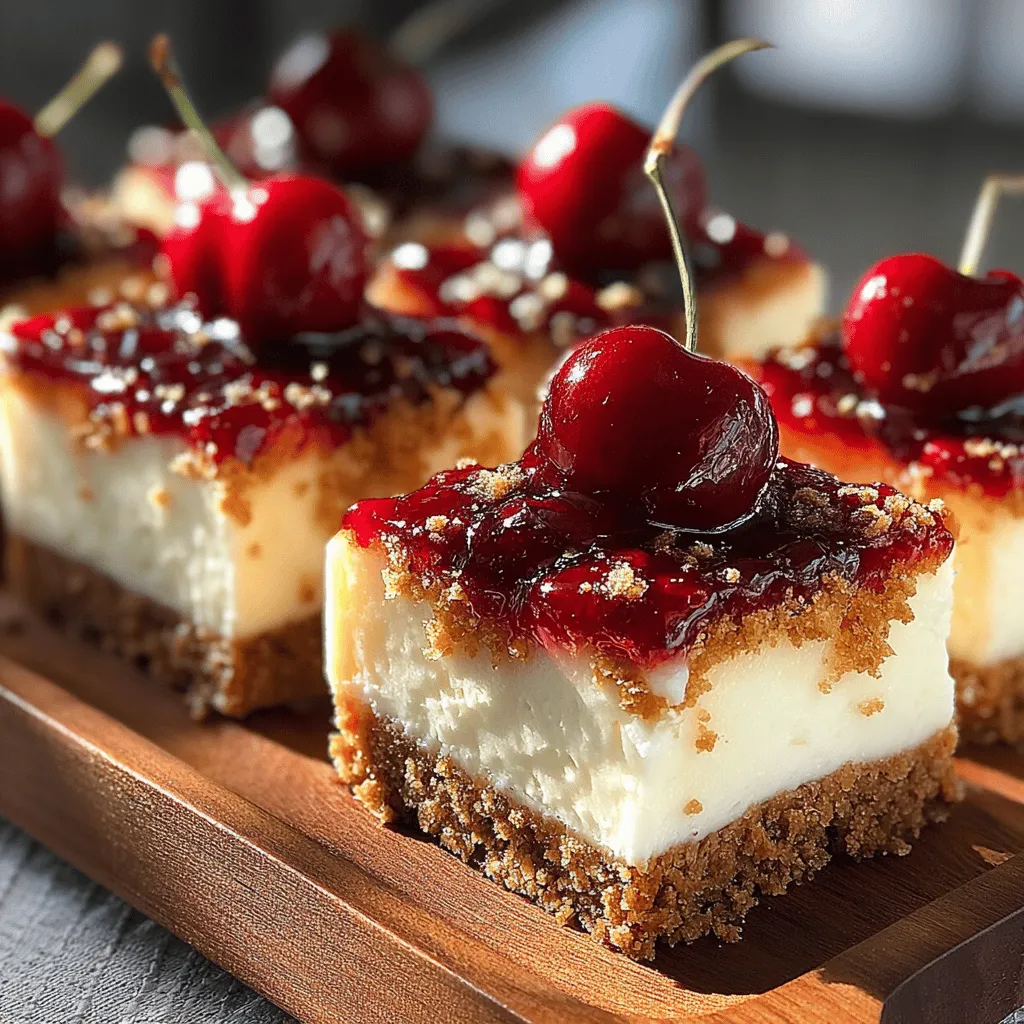
Cherries: The star of the topping, cherries introduce a burst of flavor that elevates the entire dessert. Whether you choose fresh or frozen cherries, this fruit adds a vibrant color and a delightful tartness that cuts through the creaminess of the cheesecake. Fresh cherries lend a juicy, crunchy texture, while frozen cherries can be just as delicious and are often more convenient, allowing for year-round enjoyment.
Step-by-Step Recipe Breakdown
Now that we’ve explored the essential ingredients, let’s dive into the initial steps of preparing Frozen Yogurt Cherry Cheesecake Slices. This process is straightforward and allows you to appreciate the beauty of making a frozen dessert from scratch.
Preparing the Crust
Begin by preheating your oven to 350°F (175°C). While the oven warms up, gather your graham cracker crumbs and melted butter. The combination of these two ingredients forms the base of your cheesecake slices.
In a medium-sized mixing bowl, combine 1 and ½ cups of graham cracker crumbs with ½ cup of melted butter. The butter acts as a binding agent, helping the crumbs hold together when pressed into the pan. Mix the two until the crumbs are evenly coated and have a consistency similar to wet sand.
Next, take a 9×9-inch baking dish or a similar-sized pan and lightly grease it to prevent sticking. Pour the graham cracker mixture into the pan and use the back of a measuring cup or your fingers to firmly press the crumbs into an even layer along the bottom. This step is crucial; a well-formed crust provides stability and enhances the overall flavor of the cheesecake. Once pressed down, bake the crust in the preheated oven for about 10 minutes, or until it turns golden brown. Let it cool completely while you prepare the filling.
Making the Cheesecake Filling
With the crust cooling, it’s time to focus on the cheesecake filling. In a large mixing bowl, add 8 ounces of softened cream cheese and 1 cup of Greek yogurt. For added richness, include ½ cup of sour cream. Using an electric mixer, beat these ingredients together on medium speed until the mixture is smooth and creamy. This step is vital; ensuring there are no lumps in your cream cheese will lead to a silky-smooth filling.
Once the mixture is well-combined, add ½ cup of granulated sugar and 1 tablespoon of vanilla extract. Continue to beat until the sugar is fully dissolved and incorporated. The sweetness of the sugar balances out the tanginess of the yogurt and cream cheese, creating a harmonious flavor that complements the cherry topping.
After achieving a smooth consistency, pour the cheesecake filling over the cooled graham cracker crust. Use a spatula to spread it evenly, ensuring that it reaches the edges of the pan. The filling should sit at an even height across the crust, ready for the final layer of cherries.
In the next steps, you’ll prepare the cherry topping, which will crown your cheesecake slices with a burst of flavor. Stay tuned for a simple yet delicious cherry sauce that will complete this refreshing dessert.
Assembling the Cheesecake
Once you have prepared your crust and filling, it’s time to assemble the Frozen Yogurt Cherry Cheesecake Slices. Begin by ensuring that your crust has cooled completely before adding the filling. This step is crucial because a warm crust can melt your filling, leading to a soggy texture.
Spreading the Filling Evenly
Pour the cheesecake filling onto your prepared crust, using a spatula to spread it evenly. Start from the center and work your way to the edges, ensuring that the filling reaches all corners of the crust. For a smooth finish, you can also use an offset spatula, which allows for a controlled application of the filling. If you’re looking for a visually appealing presentation, consider reserving a small amount of the filling to swirl into the top layer for a marbled effect.
Importance of Freezing Time
Once the filling is spread evenly, place the cheesecake in the freezer. It is essential to freeze the cheesecake for at least six hours, but overnight is ideal. This duration allows the flavors to meld together while ensuring that the texture remains firm. A properly frozen cheesecake will slice easily, making it perfect for serving. Avoid cutting the cheesecake before it has fully frozen, as this can lead to messy, uneven slices.
Preparing the Cherry Topping
While your cheesecake is freezing, you can prepare the cherry topping. Start by washing and pitting fresh cherries. In a saucepan, combine the cherries with a bit of sugar and a splash of lemon juice. The sugar draws out the natural juices of the cherries, creating a delicious syrup.
Cooking Process of the Cherries
Heat the mixture over medium heat, stirring occasionally. As the cherries cook, they will begin to soften and release their juices. This process typically takes about 5-10 minutes. You want to cook the cherries just until they are tender but not mushy, allowing for a nice texture in your topping.
The Role of Cornstarch
To thicken the cherry mixture, you can incorporate cornstarch. Mix one tablespoon of cornstarch with a tablespoon of cold water to create a slurry. Add this to the cherry mixture, stirring constantly until it thickens, which should take just a minute or two. The cornstarch acts as a thickening agent, giving your cherry topping a glossy finish and preventing it from becoming too runny. If you prefer a more natural topping, you can skip the cornstarch altogether; the cherries will still be delicious, albeit a bit more liquid.
Serving Suggestions
Frozen Yogurt Cherry Cheesecake Slices are versatile and can be served on various occasions. They are perfect for summer barbecues, birthday parties, or as a refreshing dessert after a hearty meal. The cheesecake’s light texture makes it an ideal choice for warm weather.
Garnishing and Pairing Ideas
For a beautiful presentation, serve the cheesecake slices on a chilled plate, drizzling the cherry topping over each slice just before serving. You can also garnish with a dollop of whipped cream or a sprinkle of crushed nuts for added texture. Pairing the cheesecake with a light dessert wine or a refreshing iced tea can enhance the overall dining experience. Consider serving alongside fresh mint leaves for a pop of color and a hint of freshness.
Nutritional Benefits
One of the standout features of this recipe is its health benefits compared to traditional cheesecake. The use of Greek yogurt not only provides a rich, creamy texture but also adds a significant protein boost. Greek yogurt is lower in sugar and higher in protein than regular yogurt, making it an excellent choice for a healthier dessert.
Comparing Nutritional Profiles
When comparing Frozen Yogurt Cherry Cheesecake Slices to traditional cheesecake, you will find that this recipe is significantly lower in calories and fat. While a typical slice of cheesecake can pack a hefty caloric punch, our version allows you to enjoy a delicious dessert without the guilt. Additionally, incorporating fresh fruits like cherries adds vitamins, minerals, and antioxidants, further enhancing the nutritional profile of your dessert.
Benefits of Fresh Fruits
Fruits are an essential component of any healthy diet, and cherries are no exception. They are low in calories and high in fiber, making them a perfect topping for this cheesecake. Cherries are also rich in antioxidants, which can help reduce inflammation and promote heart health. By including fresh fruits in your dessert, you not only elevate the flavor but also increase its health benefits.
Storage and Shelf Life
If you find yourself with leftovers (which is unlikely considering how delicious these slices are), storing them properly is key to maintaining their freshness. First, make sure the cheesecake has fully frozen before attempting to store it.
Best Practices for Storing Leftovers
Wrap each slice individually in plastic wrap or aluminum foil, then place them in an airtight container. This method prevents freezer burn and keeps the cheesecake slices fresh for up to three months. When you’re ready to enjoy the leftovers, simply remove them from the freezer and let them thaw in the refrigerator for a few hours before serving.
Freezing Techniques
If you prefer to freeze the entire cheesecake instead of individual slices, ensure that it is well-wrapped to prevent any air exposure. A layer of plastic wrap followed by aluminum foil is ideal for preventing freezer burn. When stored this way, the cheesecake can last for several months without losing its texture or flavor.
Conclusion
The Frozen Yogurt Cherry Cheesecake Slices present a delightful balance between creamy cheesecake and refreshing cherry topping. This recipe allows you to indulge in a sweet treat without compromising your health goals. With its light texture, vibrant flavors, and nutritional benefits, this cheesecake is a guilt-free dessert option that satisfies cravings while being a fantastic addition to any gathering.
We encourage you to try this recipe and discover how easy it is to create a delicious and wholesome dessert that everyone will love. Whether it’s for a special occasion or just a midweek treat, these cheesecake slices are sure to impress. Enjoy the process of making this delightful dessert and share it with friends and family for a memorable experience!