Introduction
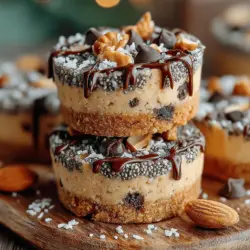
Frozen Yogurt Nut Butter Energy Disks are more than just a delectable snack; they represent a fusion of flavor and nutrition that caters to the modern health-conscious individual. These creamy, nutty disks are perfect for a quick pick-me-up during a busy day or a revitalizing post-workout treat. By combining the rich, tangy goodness of Greek yogurt with the satisfying creaminess of nut butter and the wholesome heartiness of oats, these energy disks offer a guilt-free indulgence that doesn’t compromise on taste.
In an era where convenience often overshadows nutrition, this recipe provides an easy solution to fuel your body while satisfying your cravings. Packed with protein, healthy fats, and essential nutrients, Frozen Yogurt Nut Butter Energy Disks are ideal for anyone striving to maintain a balanced lifestyle without sacrificing flavor. Whether you’re a fitness enthusiast or simply looking for a healthier snack option, you’ll find these energy disks an excellent addition to your dietary repertoire.
In the sections that follow, we will delve into the ingredients that make up this delightful recipe, shedding light on their individual health benefits, and walk you through the preparation process step-by-step. Additionally, we will discuss variations of the recipe, so you can customize these energy disks to suit your taste and nutritional needs.
Understanding the Ingredients
Greek Yogurt: The Creamy Base
At the heart of these energy disks is Greek yogurt, a staple in many health-conscious kitchens. Renowned for its thick, creamy texture, Greek yogurt is not just a delicious base; it’s also a nutritional powerhouse. Rich in protein—approximately double that of regular yogurt—Greek yogurt supports muscle recovery and growth, making it an excellent choice for those engaged in regular physical activity.
Moreover, Greek yogurt is a fantastic source of probiotics, which are beneficial bacteria that promote gut health. A healthy gut can positively influence digestion, immunity, and even mental health. Including Greek yogurt in your diet can help maintain a balanced microbiome, contributing to overall wellness. Additionally, its lower sugar content compared to traditional yogurts makes it a smarter choice for those monitoring their sugar intake.
Nut Butter: A Source of Healthy Fats
Next, we have nut butter, which plays a crucial role in the flavor and nutritional profile of these energy disks. Whether you prefer almond, peanut, or cashew butter, each type offers unique health benefits that contribute to a balanced diet. Nut butters are rich in healthy fats, particularly monounsaturated fats, which are known to support heart health by lowering bad cholesterol levels.
Almond butter, for instance, is a great source of vitamin E, an antioxidant that helps combat oxidative stress in the body. Peanut butter, on the other hand, is packed with protein and magnesium, supporting muscle function and energy production. Cashew butter provides a creamy texture and is rich in minerals such as zinc and iron. By incorporating nut butter into your energy disks, you not only enhance the flavor but also add a satisfying dose of healthy fats that keep you feeling fuller for longer.
Sweeteners: Honey vs. Maple Syrup
When it comes to sweetening your Frozen Yogurt Nut Butter Energy Disks, the choice between honey and maple syrup can significantly impact flavor and health benefits. Honey, with its natural sweetness, boasts a range of antioxidants and can provide quick energy, making it a favorite among athletes. It also has antimicrobial properties, which can aid in digestion and overall health.
On the other hand, maple syrup offers a unique flavor profile that is both sweet and slightly earthy. It contains essential minerals like manganese and zinc, and it has a lower glycemic index compared to honey, which may be preferable for those concerned about blood sugar levels. When deciding which sweetener to use, consider your personal taste preferences and any dietary restrictions. You can also adjust the quantity of sweetener based on how sweet you like your energy disks.
Oats: The Whole Grain Component
Oats are another essential ingredient in this recipe, serving as the whole grain component that adds not only substance but also nutritional value. Rolled oats are rich in fiber, which is beneficial for digestive health and can help to lower cholesterol levels. The soluble fiber found in oats, particularly beta-glucan, has been linked to improved heart health and stable blood sugar levels.
When selecting oats for your energy disks, it’s important to understand the differences between types. Rolled oats are steamed and flattened, making them quick to cook while retaining their nutritional benefits. Steel-cut oats, although less processed, take longer to prepare and have a chewier texture. Instant oats, while convenient, often contain added sugars and preservatives, making rolled oats the best choice for a wholesome snack. By incorporating rolled oats into your energy disks, you enhance their nutritional profile while adding a satisfying chewy texture.
Chocolate Chips and Nuts: Adding Flavor and Texture
No energy disk would be complete without the indulgent addition of chocolate chips and nuts. Chocolate chips provide a touch of sweetness and a layer of indulgence that elevates these disks from simple snacks to delightful treats. Dark chocolate chips, in particular, are a great option, as they contain antioxidants and can enhance heart health.
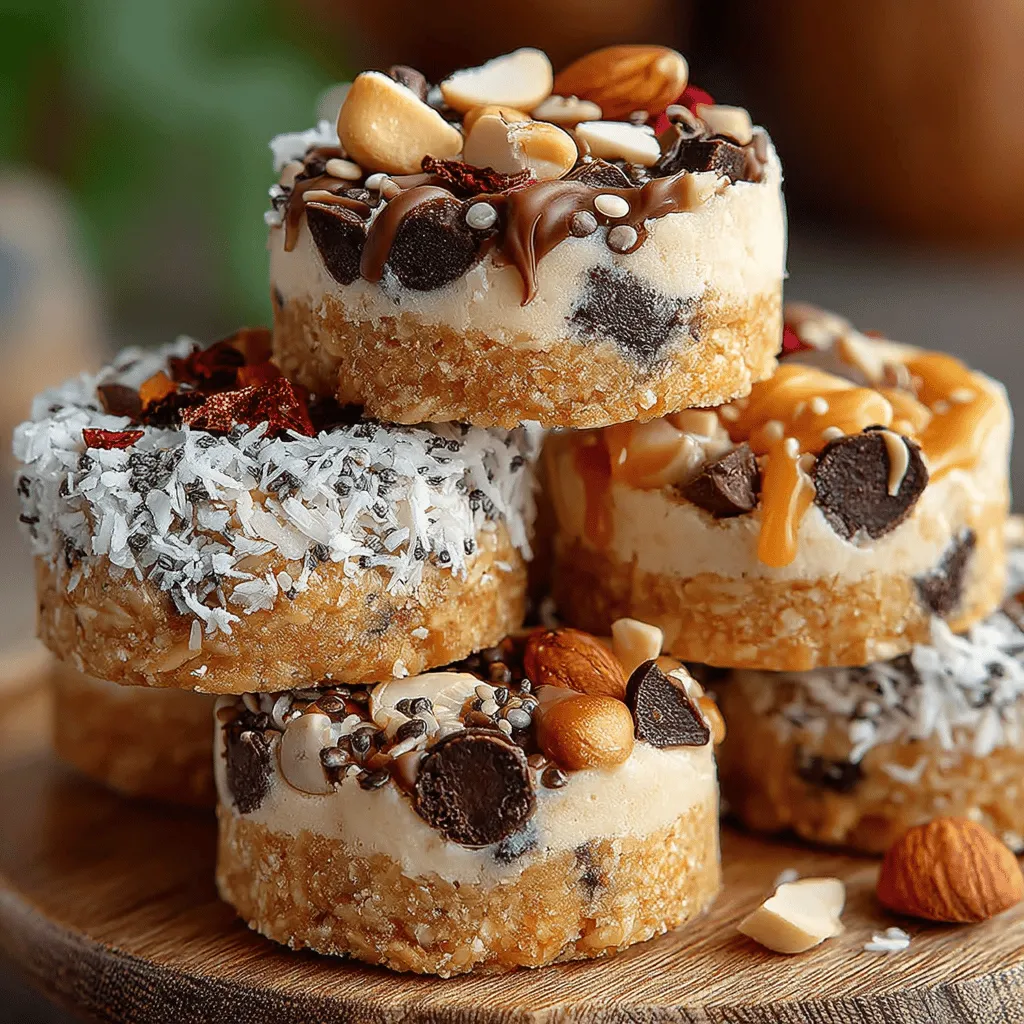
Nuts, whether you choose walnuts, almonds, or pecans, contribute not only flavor but also a crunch that contrasts beautifully with the creamy yogurt and nut butter mixture. They are rich in omega-3 fatty acids, which are known for their anti-inflammatory properties, and are packed with antioxidants that combat oxidative stress. Including nuts in your Frozen Yogurt Nut Butter Energy Disks not only adds texture but also enhances their nutritional value, making them a truly wholesome snack option.
Step-by-Step Guide to Making Frozen Yogurt Nut Butter Energy Disks
Mixing the Ingredients
To create the perfect Frozen Yogurt Nut Butter Energy Disks, the mixing process is crucial for achieving a smooth and consistent base. Start by combining the Greek yogurt and nut butter in a mixing bowl. Using a whisk or an electric mixer, blend these two ingredients together until they form a creamy, homogeneous mixture. This step is essential, as it ensures that the nut butter is evenly distributed throughout the yogurt, allowing for a balanced flavor in every bite.
Once the yogurt and nut butter are well combined, it’s time to incorporate your chosen sweetener. Drizzle in the honey or maple syrup and mix thoroughly until fully integrated. The mixture should be rich and creamy at this stage, setting the foundation for the remaining ingredients.
Incorporating the Dry Ingredients
Next, it’s time to fold in the dry ingredients, which include the rolled oats, chocolate chips, and nuts. Begin by adding the rolled oats to the creamy mixture, gently folding them in with a spatula. It’s important to be gentle during this step to avoid breaking down the oats, which should retain some texture in the finished product. Once the oats are well incorporated, add the chocolate chips and nuts, folding them in until they are evenly distributed throughout the mixture.
This stage is where you can customize your energy disks further. If you like a more chocolatey flavor, consider adding extra chocolate chips. For a nuttier taste, increase the quantity of nuts or try incorporating different varieties. The goal is to achieve a balanced flavor profile, ensuring that each bite is a delightful combination of creamy, crunchy, and sweet.
Preparing the Mold
Once your mixture is well combined, it’s time to prepare your mold. You can use silicone molds for easy removal or line a baking dish with parchment paper for a more traditional approach. If you’re using silicone molds, simply spoon the mixture into each cavity, filling them to the top. For a baking dish, spread the mixture evenly, pressing it down gently to create a compact layer.
The final step in the preparation process is to smooth the top of the mixture using a spatula, ensuring an even surface. This will help the energy disks hold their shape once frozen. After the mixture is evenly spread or filled into molds, place it in the freezer for at least two hours, allowing the disks to firm up completely.
Stay tuned for the next part of our article, where we will discuss the final steps to complete your Frozen Yogurt Nut Butter Energy Disks, explore variations of the recipe, and delve into the nutritional benefits and potential uses of these tasty treats.
Choosing the Right Molds
When it comes to making Frozen Yogurt Nut Butter Energy Disks, the type of mold you choose can significantly impact your experience. Silicone molds are highly recommended for this recipe, as they offer flexibility and non-stick properties that make it easier to remove the disks once they are frozen. Unlike rigid plastic molds, silicone molds can be gently squeezed to release the disks without breaking them. If you don’t have silicone molds, consider using muffin tins lined with parchment paper or greased with a bit of oil. Lining or greasing the molds is crucial because it prevents the mixture from sticking, ensuring that your energy disks come out intact and maintain their shape.
Filling the Molds
Once you have your molds ready, it’s time to fill them with the energy disk mixture. The key to achieving a uniform texture and avoiding air pockets is to pack the mixture firmly. Use a spoon to scoop the mixture into each mold, then press it down with the back of the spoon or your fingers. This process eliminates any air pockets that could lead to uneven freezing. Fill each mold to the top, as the disks will shrink slightly as they freeze. If you want to create even more visually appealing disks, consider using a spatula to smooth the tops for a polished finish.
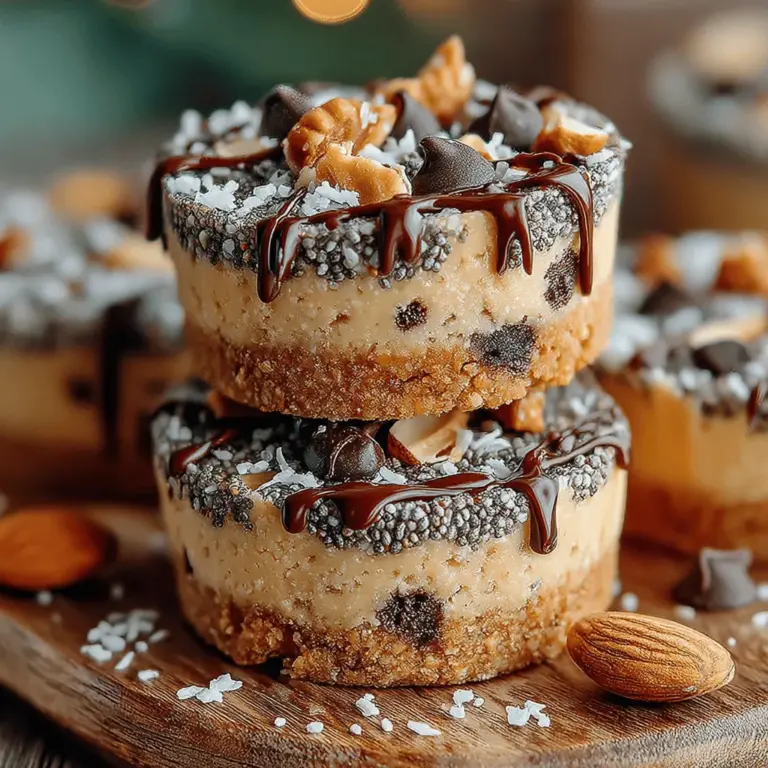
Adding Optional Toppings
Customization is one of the best features of the Frozen Yogurt Nut Butter Energy Disks recipe. You can enhance the flavor, nutrition, and texture by adding a variety of toppings. Consider sprinkling shredded coconut, chia seeds, or even a few dark chocolate chips on top of each filled mold before freezing. Shredded coconut not only adds a delightful chewiness but also provides healthy fats and fiber. Chia seeds contribute omega-3 fatty acids, protein, and antioxidants, making them an excellent addition. Feel free to get creative and experiment with different toppings to discover your favorite combinations.
Freezing and Storage
The Freezing Process
Freezing is a critical step in making Frozen Yogurt Nut Butter Energy Disks, as it helps solidify the mixture and enhances the overall texture. When the mixture is frozen, the water within it forms ice crystals, which create a smooth and creamy consistency when properly blended. For optimal results, place the filled molds in the freezer for at least 4-6 hours, or until they are completely solid. It’s important to keep the molds level during this time to ensure even freezing. Once frozen, the energy disks should release easily from the molds, providing you with perfectly shaped snacks.
Storage Tips
To maintain the freshness and flavor of your Frozen Yogurt Nut Butter Energy Disks, proper storage is essential. Once removed from the molds, place the disks in an airtight container or freezer-safe bag. If you’re stacking them, consider placing a piece of parchment paper between each disk to prevent sticking. These energy disks can be stored in the freezer for up to three months without losing their quality. For convenience, you can also portion them into single servings, making them easy to grab on busy days.
Nutritional Benefits of Frozen Yogurt Nut Butter Energy Disks
Balanced Macronutrients
One of the standout features of Frozen Yogurt Nut Butter Energy Disks is their balanced macronutrient profile. Each disk provides a combination of protein, healthy fats, and carbohydrates, making them an excellent energy source. The yogurt contributes protein and calcium, vital for muscle recovery and bone health. Nut butter adds healthy fats, which promote satiety and provide sustained energy. The oats in the mixture offer complex carbohydrates, ensuring that you feel full and energized for longer periods. This balanced macronutrient breakdown makes these energy disks suitable for a pre- or post-workout snack or a quick breakfast on the go.
Vitamins and Minerals
In addition to macronutrients, Frozen Yogurt Nut Butter Energy Disks are packed with essential vitamins and minerals. For instance, yogurt is a great source of calcium, which is vital for bone health, while nut butter provides magnesium, a mineral that plays a key role in muscle function and energy production. The oats contribute fiber, which aids in digestion and promotes a healthy gut. If you choose to include toppings like chia seeds, you’ll also add vitamin E and antioxidants, further enhancing the nutritional profile of these energy disks.
Suitable for Various Diets
One of the many advantages of this recipe is its versatility. Frozen Yogurt Nut Butter Energy Disks can easily accommodate a range of dietary preferences. They are vegetarian-friendly and can be made gluten-free by using certified gluten-free oats. For those following a vegan diet, simply substitute regular yogurt with a plant-based yogurt alternative and opt for a nut butter that aligns with your dietary restrictions. This adaptability makes it easy for anyone to enjoy the benefits of these delicious energy disks without compromising their dietary choices.
Creative Variations of the Recipe
Flavor Infusions
While the original recipe is delicious on its own, there’s plenty of room for creativity. Consider adding flavor infusions to elevate your Frozen Yogurt Nut Butter Energy Disks. For a chocolatey twist, mix in cocoa powder or melted dark chocolate. If you prefer a spiced flavor, try incorporating cinnamon or nutmeg into the mixture. Fruit purees, such as banana or strawberry, can also add natural sweetness and a unique taste. Experimenting with these variations allows you to create different flavor profiles, ensuring that you never get bored with this simple yet satisfying snack.
Dietary Adjustments
For those with nut allergies, there’s no need to miss out on the goodness of Frozen Yogurt Nut Butter Energy Disks. Substitute the nut butter with sunflower seed butter or tahini, both of which provide healthy fats and a similar texture. Additionally, if you’re looking for gluten-free options, ensure you select oats that are certified gluten-free to avoid cross-contamination. These adjustments ensure that everyone can enjoy the benefits of these energy disks, regardless of dietary restrictions.
Conclusion
Frozen Yogurt Nut Butter Energy Disks are a versatile and nutritious snack that can be easily customized to suit individual tastes and dietary needs. By understanding the ingredients and following the simple preparation steps outlined in this article, you can create a batch of these energy disks that not only taste great but also support your health and wellness goals. Whether enjoyed as a quick breakfast, a post-workout snack, or a sweet treat, these energy disks are sure to become a staple in your kitchen. So, gather your ingredients, choose your molds, and get ready to indulge in a snack that’s not only delicious but also packed with nutrition. Enjoy the satisfaction of knowing you’ve created a wholesome treat that can fuel your day and delight your taste buds!