Introduction
In a world increasingly focused on healthy eating, homemade snacks have become a coveted choice for those seeking nutritious yet delicious options. One such delightful creation is the Nutty Berry Bliss Bars. These energy-packed bars are not only satisfying to the taste buds but also offer a wonderful balance of flavor and nutrition, making them an ideal snack for any time of the day. Whether you’re powering through a busy morning, need an afternoon pick-me-up, or are looking for a post-workout treat, these bars promise to deliver both taste and energy.
What makes the Nutty Berry Bliss Bars particularly appealing is their versatility. With a base of wholesome ingredients, you can easily tailor them to suit your dietary preferences or use whatever you have on hand. From using different types of nut butters to experimenting with various fruit jams, these bars allow for endless customization. The result? A healthy, homemade snack that satisfies your cravings while keeping you on track with your nutritional goals.
Understanding the Ingredients
To truly appreciate the Nutty Berry Bliss Bars, it’s important to understand the key ingredients that contribute to their taste and health benefits. Each component plays a crucial role, enhancing both flavor and texture while providing valuable nutrients.
Peanut Butter: Types and Health Benefits
At the heart of these bliss bars is peanut butter, a beloved ingredient known for its rich flavor and creamy texture. Whether you prefer creamy or crunchy peanut butter, both options bring a delightful nuttiness to the bars. Beyond taste, peanut butter is a powerhouse of nutrition. It is packed with protein, healthy fats, and essential vitamins and minerals. The monounsaturated fats found in peanut butter can help promote heart health and provide sustained energy, making it a perfect ingredient for a snack that fuels your day.
Honey vs. Maple Syrup: Sweetener Options and Their Properties
Sweeteners play a vital role in enhancing the flavor profile of the Nutty Berry Bliss Bars. While honey is commonly used for its natural sweetness and thick consistency, maple syrup serves as a wonderful alternative for those seeking a vegan option. Both sweeteners provide unique flavors; honey adds floral notes while maple syrup infuses a delightful caramel-like essence. Whichever you choose, both options bring their own set of health benefits, including antioxidants and anti-inflammatory properties.
Importance of Vanilla Extract for Flavor Enhancement
To elevate the flavor of the Nutty Berry Bliss Bars, a splash of vanilla extract is essential. This simple ingredient adds depth and warmth to the overall taste of the bars, creating a comforting aroma that will fill your kitchen as they bake. Vanilla extract also has potential antioxidant properties, making it a flavorful addition that doesn’t compromise nutritional value.
Rolled Oats: Nutritional Profile and Fiber Content
Another fundamental ingredient in our bliss bars is rolled oats. Not only do they provide a chewy texture, but they are also an excellent source of dietary fiber. This fiber aids in digestion and helps keep you feeling full longer, making rolled oats a staple in many healthy snacks. Additionally, oats are rich in vitamins and minerals, including iron, magnesium, and B vitamins, which support overall health and energy levels.
Baking Powder and Salt: Role in Texture and Taste
Baking powder and a pinch of salt might seem like minor players in this recipe, but they play significant roles in achieving the perfect texture and enhancing flavor. Baking powder acts as a leavening agent, helping the bars rise slightly during baking, creating a light and airy texture. Meanwhile, salt is a flavor enhancer that balances sweetness and brings out the other flavors in the bars, ensuring a deliciously satisfying treat.
Optional Ingredients
The Nutty Berry Bliss Bars are highly customizable, allowing you to incorporate optional ingredients based on your taste preferences. Here are a few variations to consider:
Chopped Nuts: Nutritional Value and Texture
Adding chopped nuts can provide a delightful crunch and an extra boost of nutrition. Nuts such as almonds, walnuts, or pecans are rich in healthy fats, protein, and fiber, contributing to the overall health benefits of the bars. They also add a satisfying texture that contrasts beautifully with the chewy oats.
Fruit Jams: Types and Flavor Combinations
The fruit jam layer is a standout feature of the Nutty Berry Bliss Bars, providing sweetness and a burst of fruity flavor. You can use any type of fruit jam that you enjoy, such as raspberry, strawberry, or apricot. Each type brings its unique taste and can be mixed and matched to create your perfect flavor combination. This layer not only adds sweetness but also moisture to the bars, preventing them from becoming too dry.
Chocolate Chips: Optional Sweetness and Indulgence
For those with a sweet tooth, consider adding chocolate chips to the mixture. Dark chocolate chips, in particular, can provide a rich, indulgent flavor while still being a healthier option compared to milk chocolate. They can elevate the bliss bars to a dessert-like experience while still keeping them nutritious.
Preparation Steps for Nutty Berry Bliss Bars
Now that we’ve covered the essential ingredients, it’s time to dive into the preparation steps for creating your Nutty Berry Bliss Bars. Follow these detailed instructions for a successful baking session that yields delicious results.
Preheating the Oven and Preparing the Baking Dish
Begin by preheating your oven to 350°F (175°C). This temperature is ideal for baking the bars to achieve a golden-brown color and firm texture. While the oven heats up, prepare your baking dish. A square or rectangular dish works well for this recipe, typically measuring around 8×8 inches or 9×13 inches, depending on how thick you want the bars to be.
To prevent sticking and ensure easy removal of the bars once baked, line the baking dish with parchment paper. This simple step will make it easier for you to lift the bars out of the pan and cut them into neat squares once they have cooled.
Mixing Wet Ingredients
In a large mixing bowl, start by combining your wet ingredients. This includes your peanut butter, chosen sweetener (honey or maple syrup), and vanilla extract. Use a spatula or a whisk to mix these ingredients thoroughly until they form a smooth and creamy consistency. If you’re using natural peanut butter, it may take a bit more effort to combine the ingredients, but the resulting texture will be worth it.
Tips for Achieving a Smooth Consistency
To help achieve a smooth consistency, consider warming your peanut butter slightly in the microwave for about 15-20 seconds. This will make it easier to mix with the other wet ingredients. Just be careful not to overheat it, as you want it to be warm but not hot.
Combining Dry Ingredients
In a separate bowl, mix your dry ingredients. This includes rolled oats, baking powder, and salt. It’s important to mix these ingredients separately to ensure that the baking powder is evenly distributed throughout the oats. This step will help your bars rise evenly when baking, resulting in a better texture.
Integrating Wet and Dry Mixtures
Once your wet and dry ingredients are ready, it’s time to bring them together. Pour the dry oat mixture into the bowl with the wet ingredients. Using a spatula, gently fold the dry ingredients into the wet mixture until fully combined. At this stage, you should expect a thick, cohesive mixture that is sticky but manageable.
Discuss the Expected Thick Consistency
The mixture for your Nutty Berry Bliss Bars should be thick enough to hold its shape when pressed into the baking dish. If it seems too dry, you can add a splash of water or an extra drizzle of honey or maple syrup to help it bind together. Conversely, if it seems too wet, simply add a bit more rolled oats until you achieve the desired consistency.
Layering the Bliss Bars
With your mixture prepared, it’s time to layer the bliss bars for baking.
Spreading the Oat Mixture in the Baking Dish
Transfer the oat mixture into the prepared baking dish. Using your spatula or your hands, press the mixture evenly into the bottom of the dish. Make sure to compact it well, as this will help the bars hold together once baked. Aim for an even thickness across the surface for consistent baking.
Adding the Fruit Jam Layer
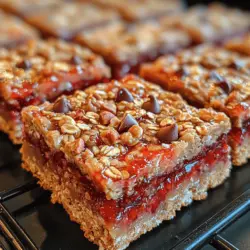
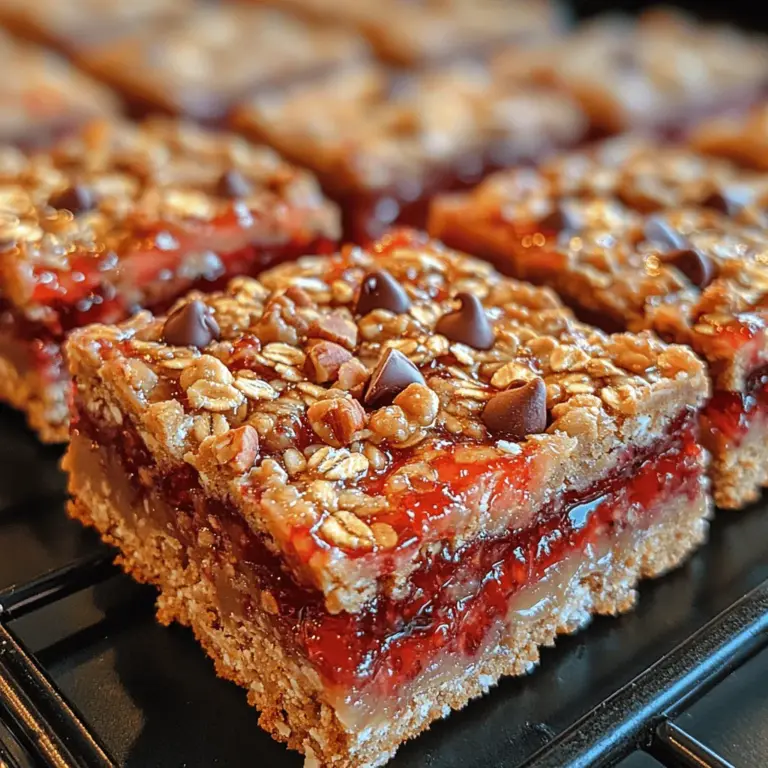
Now comes the fun part—adding the fruit jam layer. Spoon your chosen fruit jam over the pressed oat mixture. Use a spatula or the back of a spoon to spread the jam evenly across the surface, leaving a small border around the edges to prevent it from bubbling over during baking. The fruit jam not only adds sweetness but also creates a beautiful, vibrant layer that enhances the overall visual appeal of your Nutty Berry Bliss Bars.
—
As we prepare to bake these Nutty Berry Bliss Bars, we can already envision the delightful combination of flavors and textures that awaits. With the right balance of nutty goodness, fruity sweetness, and chewy oats, these bars are sure to be a hit in your home. Stay tuned for the next part of this article, where we’ll discuss baking times, cooling tips, and how to store these delicious snacks for maximum freshness.

Techniques for Even Distribution
When preparing your Nutty Berry Bliss Bars, achieving an even distribution of ingredients is crucial for both texture and flavor. Start by ensuring that all dry ingredients, such as oats, nuts, and seeds, are thoroughly mixed before adding any wet components. This promotes uniform flavor throughout the bars.
Once you’ve combined the wet and dry ingredients, use a spatula or your hands to mix everything together. The key is to fold gently but thoroughly, ensuring that oats and nuts are evenly coated in the sticky mixture. When transferring the mixture to your baking dish, use a rubber spatula to spread it out evenly. This means pushing the mixture into the corners and smoothing the top, which will ensure that every bite delivers the same delightful taste.
Topping with the Remaining Oat Mixture
To create a delightful textural contrast, consider setting aside a portion of your oat mixture to sprinkle on top of the bars before baking. This topping adds an appealing crunch and provides a beautiful visual element. Once the base layer is evenly distributed and pressed into the baking dish, take the reserved oat mixture and carefully crumble it over the top. Ensure that the crumbles are evenly scattered to cover the surface, which will help create a consistent texture and flavor.
Tips for Proper Crumbling and Pressing
When it comes to crumbling and pressing your oat mixture, the method is key. If the mixture feels too sticky or difficult to work with, lightly wet your hands or spatula. This will help prevent sticking while you press down firmly. Aim for a compact layer that holds together well, but don’t over-press, as this can lead to a denser bar. An even layer of pressure will allow your bars to bake uniformly and maintain a soft and chewy texture.
Optional Chocolate Topping
For those who desire an extra layer of indulgence, an optional chocolate topping can elevate your Nutty Berry Bliss Bars to new heights. Simply melt dark or semi-sweet chocolate in a microwave-safe bowl, stirring every 30 seconds until smooth. Once the bars have cooled slightly after baking, drizzle the melted chocolate over the top. This not only enhances the flavor but also adds a touch of elegance to your homemade snack.
How Chocolate Enhances the Overall Flavor Profile
Incorporating chocolate into the Nutty Berry Bliss Bars beautifully complements the natural sweetness of the dried fruits and the nuttiness of the oats and nuts. The rich, creamy texture of the chocolate balances the chewy density of the bars, creating a multi-layered taste experience. Furthermore, chocolate is known for its antioxidant properties, making it a delicious and health-conscious addition.
Baking Process
Baking Time and Temperature
Preheat your oven to 350°F (175°C). Bake the Nutty Berry Bliss Bars for about 25-30 minutes. The right temperature and time balance are essential; too hot can lead to burnt edges while insufficient time might leave the center undercooked.
Signs to Look for to Determine Doneness
As your bars bake, monitor them closely. They are done when the edges start to turn a golden brown and the center appears set. You can also perform the toothpick test: insert a toothpick into the center; it should come out clean or with a few moist crumbs—not wet batter.
Cooling and Slicing
After removing the bars from the oven, allow them to cool in the baking dish for at least 10-15 minutes. Cooling is essential for slicing, as it helps the bars firm up and hold their shape. If you slice them too early, they may crumble or fall apart.
Importance of Cooling for Slicing
Allowing the bars to cool completely (about 30 minutes) makes it easier to achieve clean, even slices. If you’re impatient and slice them while warm, you may end up with jagged edges and a messy presentation. For optimal results, let the bars sit at room temperature, or refrigerate them for a firmer texture.
Suggested Shapes and Sizes for Serving
When slicing your Nutty Berry Bliss Bars, think about the occasion. For a snack, cut them into smaller, bite-sized squares or rectangles. For a more substantial treat, opt for larger bars. Customize the size to suit your needs, keeping in mind that smaller portions are perfect for parties, while larger bars can serve as a wholesome breakfast on-the-go.
Nutritional Benefits of Nutty Berry Bliss Bars
Overview of the Health Benefits of the Main Ingredients
Nutty Berry Bliss Bars are not just a tasty treat; they are also packed with nutrition. The combination of oats, nuts, and dried fruits provides an array of health benefits. Oats are a great source of fiber, which aids in digestion and helps maintain stable blood sugar levels. Meanwhile, nuts contribute protein and healthy fats, making these bars a satisfying snack.
Proteins, Healthy Fats, and Fiber Content
Each serving of Nutty Berry Bliss Bars delivers a balanced array of macronutrients. The oats provide complex carbohydrates, while nuts like almonds or walnuts contribute essential proteins and beneficial omega-3 fatty acids. The inclusion of dried fruits adds natural sugars and additional fiber, rounding out the nutritional profile of these bars.
Addressing Dietary Preferences
These bars are highly adaptable, making them a suitable option for various dietary preferences. Whether you’re gluten-free or vegan, you can easily customize the ingredients to meet your needs.
Gluten-Free Options Using Oats
To ensure your Nutty Berry Bliss Bars are gluten-free, source certified gluten-free oats. This guarantees that cross-contamination with gluten-containing grains during processing is avoided.
Vegan Adaptations with Specific Ingredients
For a vegan version, replace honey with maple syrup or agave nectar and ensure that all other ingredients, including chocolate, are dairy-free. This simple substitution allows everyone to enjoy these delicious treats without compromising their dietary choices.
Serving Suggestions
Ideas for Pairing with Beverages
Pair your Nutty Berry Bliss Bars with a variety of beverages for a delightful snack or dessert experience. A warm cup of herbal tea, coffee, or even a smoothie complements the flavor profile beautifully. For a refreshing option, serve the bars with cold almond milk or a berry-infused sparkling water.
Creative Ways to Present the Bars for Gatherings
When hosting gatherings, presentation can elevate even the simplest treats. Arrange your Nutty Berry Bliss Bars on a decorative platter, garnished with fresh berries or edible flowers for an eye-catching display. You can also wrap individual bars in parchment paper tied with twine for a rustic, homemade touch that your guests will love.
Potential Toppings or Accompaniments
Consider serving your bars with a dollop of yogurt or a spread of nut butter on the side for added creaminess and flavor. A sprinkle of cinnamon or a drizzle of honey can also enhance the taste and make the snack feel even more indulgent.
Storage and Shelf Life
Best Practices for Storing Nutty Berry Bliss Bars
To keep your Nutty Berry Bliss Bars fresh and delicious, store them in an airtight container. This prevents moisture and air exposure, both of which can affect the texture and taste of the bars.
Discussion on Room Temperature vs. Refrigeration
These bars can be stored at room temperature for up to a week. If you want to extend their shelf life, consider refrigerating them, which will keep them fresh for up to two weeks. Just ensure that they are properly sealed to avoid absorbing any odors from the fridge.
Tips for Extending Shelf Life While Maintaining Taste
For prolonged freshness, you can also freeze the bars. Cut them into individual pieces and wrap each bar in plastic wrap before placing them in a freezer-safe bag. They can last for up to three months in the freezer. Simply thaw them at room temperature or pop them in the microwave for a few seconds before enjoying.
Conclusion
Nutty Berry Bliss Bars are a delightful fusion of flavors and textures, combining the heartiness of oats, the crunch of nuts, and the sweetness of dried fruits. This simple recipe not only provides a quick and nutritious snack but also adapts easily to fit various dietary needs, ensuring that everyone can enjoy them.
Whether you’re looking for a healthy breakfast option, an after-school snack, or a sweet treat to share with friends, these bars deliver on taste and satisfaction. Embrace the process of creating homemade snacks, and relish in the joy of healthy eating. With just a few simple steps, you can craft a delicious treat that nourishes your body and soul. Enjoy your Nutty Berry Bliss Bars!