
Introduction
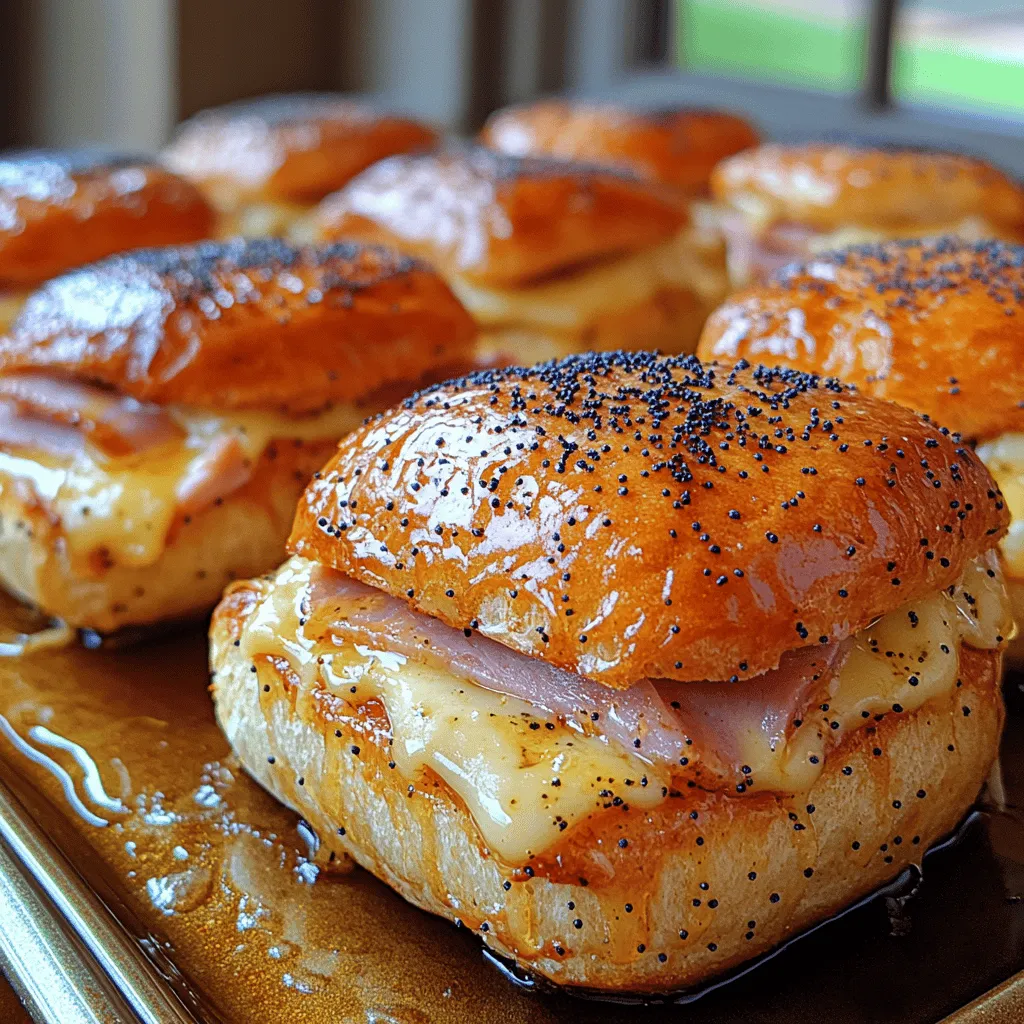
If you’re searching for the perfect crowd-pleasing dish that can elevate any gathering, look no further than Melty Ham & Cheese Sliders. These delightful mini sandwiches pack a punch of flavor and are incredibly easy to prepare, making them an ideal choice for parties, game days, or casual family dinners. The combination of savory ham, gooey Swiss cheese, and a buttery topping creates a mouthwatering treat that will have everyone coming back for seconds.
What makes these sliders so appealing is their versatility. They can be served as a hearty appetizer, a satisfying lunch, or even as a comforting dinner option. Whether you’re hosting a weekend brunch or a cozy movie night, these sliders are sure to impress. Plus, their bite-sized portions make them easy to serve and enjoy, allowing your guests to indulge without feeling overly full. The best part? They come together with minimal effort, so you can spend more time enjoying the company of your friends and family rather than stuck in the kitchen.
In this article, we’ll dive deep into the recipe for Melty Ham & Cheese Sliders Delight, exploring the essential ingredients, their significance, and providing a step-by-step guide for preparation. By the end, you’ll be equipped to whip up these delicious sliders in no time!
Understanding the Ingredients
When it comes to crafting the perfect sliders, the quality of your ingredients will directly impact the final result. Each component plays a crucial role in creating a well-balanced flavor and texture that will have your guests raving about your culinary skills. Here’s a rundown of the main ingredients that make up these delightful ham and cheese sliders:
Slider Rolls
The foundation of any great slider is, of course, the rolls. For this recipe, you’ll want to choose soft, slightly sweet slider rolls that can hold up to the fillings without falling apart. Hawaiian rolls are a popular choice due to their fluffy texture and subtle sweetness, but you can also opt for other types of slider bread, such as potato rolls or even whole wheat for a healthier twist. The key is to ensure they’re soft enough to bite into easily while still being sturdy enough to contain your delicious fillings.
Ham
Next up is the star of the show: ham. The type of ham you choose can greatly influence the flavor profile of your sliders. Honey-glazed ham offers a touch of sweetness, while smoked or black forest ham provides a deeper, savory flavor. For the best results, look for high-quality deli ham that’s thinly sliced. This will allow you to layer it evenly across the rolls, ensuring every bite is packed with flavor. You can also mix and match different types of ham for a more complex taste.
Swiss Cheese
No ham and cheese slider would be complete without a generous layer of cheese, and Swiss cheese is the perfect companion to ham. Its mild, nutty flavor complements the savory notes of the ham beautifully, and it melts wonderfully, creating that desirable gooey texture. If you’re looking for a bit more zest, you might also consider adding a slice of cheddar or pepper jack cheese to elevate the flavor profile. The combination of textures and tastes will make your sliders irresistible.
Butter Mixture
The butter mixture is where the magic happens. This simple blend of melted butter, garlic powder, Dijon mustard, and poppy seeds takes your sliders from good to great. The butter adds richness and moisture, while the garlic powder infuses deep flavor. Dijon mustard contributes a pleasant tang that cuts through the richness of the cheese and ham, balancing the overall taste. Poppy seeds add a touch of crunch and visual appeal, making your sliders look as good as they taste.
The Role of Seasonings and Sauces
While the main ingredients are key, don’t underestimate the power of seasonings and sauces in enhancing the flavor of your sliders. A sprinkle of freshly cracked black pepper or a dash of cayenne can add a subtle kick to the overall flavor. Additionally, consider offering your guests a selection of dipping sauces, such as honey mustard or a tangy barbecue sauce, to take the experience to the next level. These simple additions can make your sliders even more dynamic and enjoyable.
Step-by-Step Preparation Guide
Now that you understand the ingredients and their significance, it’s time to dive into the preparation process. Follow this step-by-step guide to create your Melty Ham & Cheese Sliders Delight:
Preheating the Oven
Before you get started with assembling the sliders, it’s crucial to preheat your oven to 350°F (175°C). This temperature is ideal for baking the sliders, allowing the cheese to melt perfectly and the tops to turn golden brown and crispy. Taking this step early on ensures that your sliders will be ready to pop in the oven as soon as you’ve assembled them.
Preparing the Sliders
Begin by carefully slicing your slider rolls in half horizontally. Make sure to keep the rolls connected at the base, creating a “lid” that can be easily lifted off after assembling. This technique not only helps with assembly but also ensures that the sliders stay intact during baking. Arrange the bottom halves of the rolls on a baking sheet lined with parchment paper for easy cleanup.
Layering the Ham and Cheese
Now comes the fun part: layering your ham and cheese! Start by placing a generous layer of ham over the bottom halves of the rolls. Aim for even distribution to ensure that each slider is filled with deliciousness. Next, lay down slices of Swiss cheese over the ham, covering it completely. If you’re using additional cheese, feel free to layer it on top as well. The more cheese, the better!
Creating the Flavorful Butter Mixture
In a small bowl, combine melted butter, garlic powder, Dijon mustard, and poppy seeds. Mix well until everything is thoroughly incorporated. Use a brush to generously coat the top halves of the slider rolls with this savory butter mixture. Not only does this add incredible flavor, but it also promotes browning and a delightful crunch on the surface of the sliders. Once the tops are coated, carefully place them back on top of the assembled ham and cheese layers.
With these initial steps completed, your Melty Ham & Cheese Sliders Delight are almost ready for the oven! In the next section, we will cover the final steps to ensure your sliders come out perfectly baked and bursting with flavor.
Assembling the Sliders: Best Practices for Combining Layers
Creating the perfect Melty Ham & Cheese Sliders starts with thoughtful assembly. Begin by preparing your slider buns, ensuring they are fresh and soft. A great choice is to use Hawaiian rolls for their slightly sweet flavor, but any soft slider bun will work.
Step-by-Step Assembly
1. Cut the Buns: Slice the entire pack of slider buns in half horizontally, keeping them connected. This creates a sturdy base for layering.
2. Spread the Mustard: If you’re using mustard, spread an even layer on the bottom half of the buns. This not only adds flavor but also helps to keep the buns from getting soggy.
3. Layer the Ham: Start with a generous layer of ham. For enhanced flavor, consider using a mix of honey-baked and smoked ham. Ensure the slices cover the entire surface without overlapping too much, which allows for even melting.
4. Add Cheese: Place your cheese slices on top of the ham. Swiss cheese is a classic choice, but feel free to mix it up with cheddar or provolone for a bolder taste.
5. Top it Off: For an extra flavor boost, add another layer of ham before placing the top half of the slider buns. This double-layer approach ensures that each bite is packed with flavor.
6. Finish with the Buns: Carefully place the top half of the slider buns back onto the assembled layers, pressing down gently to secure everything together.
Brushing with the Butter Mixture: Techniques for Optimal Flavor Infusion
One of the keys to achieving that irresistible flavor in Melty Ham & Cheese Sliders is the butter mixture. This not only adds richness but also helps to crisp the tops of the sliders.
How to Create the Butter Mixture
1. Ingredients: In a small bowl, combine melted butter, garlic powder, and a sprinkle of dried parsley or poppy seeds for added texture and flavor.
2. Application: Using a pastry brush, generously apply the butter mixture over the top of the slider buns. Make sure to coat every part, as this will ensure even browning and flavor infusion.
3. Let It Soak: Allow the butter to seep into the buns for a few minutes before baking. This not only enhances the flavor but also helps to keep the buns moist during the baking process.
Baking the Sliders: Timing and Temperature for Golden Perfection
Baking is where the magic happens. The right temperature and timing are crucial to achieving sliders that are crispy on the outside and gooey on the inside.
Baking Steps
1. Preheat the Oven: Set your oven to 350°F (175°C). Preheating ensures even cooking, which is vital for achieving that golden-brown finish.
2. Arrange on Baking Sheet: Place the assembled sliders on a lined baking sheet, ensuring they are close together but not touching. This allows the heat to circulate evenly around each slider.
3. Bake: Place the sheet in the oven and bake for 15-20 minutes. Keep an eye on them; you want the tops to be golden brown and slightly crispy.
4. Final Touch: For an extra melty effect, you can cover the sliders with aluminum foil for the first 10 minutes to keep the heat contained, then uncover for the last 5-10 minutes to achieve that perfect golden finish.
Serving Suggestions and Pairings
Melty Ham & Cheese Sliders are incredibly versatile and ideal for various occasions. Here are some serving suggestions to elevate your meal experience.
Ideal Occasions for Serving Melty Ham & Cheese Sliders
– Game Day: These sliders are perfect for game day gatherings. Their bite-sized nature makes them easy to eat while cheering for your favorite team.
– Parties and Gatherings: Whether it’s a birthday party, holiday get-together, or casual gathering, sliders are always a hit.
– Weeknight Dinners: They are simple to prepare and make for a comforting weeknight dinner option that the whole family will enjoy.
Beverage Pairings That Complement the Sliders
To enhance the overall dining experience, consider pairing your sliders with the following beverages:
– Craft Beer: A light lager or an amber ale pairs wonderfully, balancing the richness of the ham and cheese.
– White Wine: A crisp Sauvignon Blanc can cut through the richness, refreshing your palate with each bite.
– Iced Tea or Lemonade: For a non-alcoholic option, refreshing iced tea or a tart lemonade complements the sliders beautifully.
Side Dishes That Enhance the Meal Experience
Pair your Melty Ham & Cheese Sliders with these delightful sides for a complete meal:
– Coleslaw: The crunch and tanginess of coleslaw provide a great contrast to the softness of the sliders.
– Potato Wedges: Crispy potato wedges with a sprinkle of seasoning make for a hearty side.
– Vegetable Platter: A fresh vegetable platter with dip balances the richness, offering a light and crunchy accompaniment.
Nutritional Information
Understanding the nutritional components of your meal is essential for making informed choices. Here’s a breakdown of the key nutritional elements per serving of Melty Ham & Cheese Sliders:
– Calories: Approximately 300-350 calories per slider, depending on the type of cheese and ham used.
– Protein: Around 15 grams, primarily from the ham and cheese.
– Fat: Approximately 15-20 grams, mainly from the butter and cheese.
– Carbohydrates: Roughly 30 grams, sourced from the slider buns.
Discussion on the Balance of Flavors and Nutrition
These sliders strike a balance between indulgence and nutrition. While they are rich and flavorful, incorporating lean ham and a moderate amount of cheese can offer a protein-packed option. To make them lighter, consider using whole grain sliders and reducing the amount of butter in the mixture.
Variations of the Recipe
One of the best aspects of Melty Ham & Cheese Sliders is their versatility. Here are some variations to cater to different tastes and dietary preferences.
Alternative Meats and Cheeses for Different Flavor Profiles
– Turkey and Gruyere: For a lighter option, try turkey with gruyere cheese for a gourmet twist.
– BBQ Chicken: Use shredded BBQ chicken and pepper jack cheese for a spicy kick.
Suggestions for Adding Vegetables or Other Ingredients
– Spinach or Arugula: Adding a layer of fresh spinach or arugula can introduce a fresh element.
– Roasted Red Peppers: These add sweetness and depth, enhancing the overall flavor.
Creative Twists on the Classic Recipe to Cater to Dietary Preferences
– Vegetarian Version: Substitute ham with grilled vegetables or a plant-based meat alternative, and use vegan cheese to create a satisfying vegetarian slider.
– Gluten-Free Option: Use gluten-free slider buns to cater to gluten-sensitive guests while maintaining the flavors everyone loves.
Conclusion
Melty Ham & Cheese Sliders are the epitome of comfort food, showcasing simplicity and deliciousness. Their easy assembly and baking method make them an accessible choice for any cook, whether you’re an experienced chef or a beginner in the kitchen.
Encouraged by the versatility of this recipe, don’t hesitate to experiment with different ingredients and serving styles. Whether you’re hosting a party, enjoying a family dinner, or simply indulging in a personal treat, these sliders offer a delightful experience. Enjoy the comforting flavors of Melty Ham & Cheese Sliders as a delicious centerpiece for any gathering, ensuring that every bite is a moment of joy.