Introduction
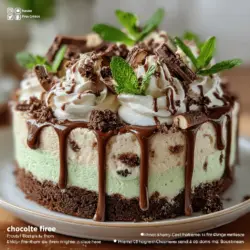
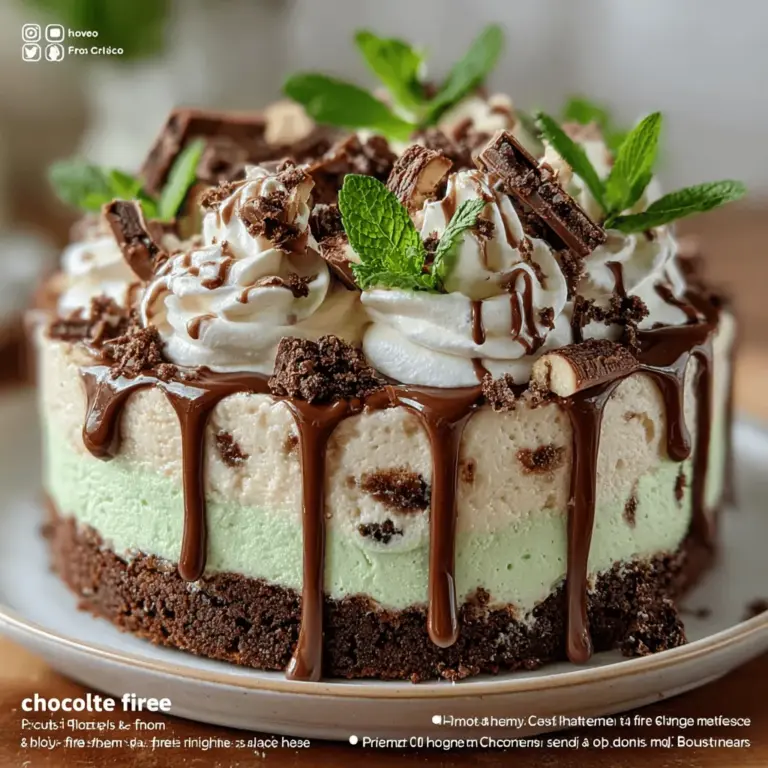
Desserts hold a special place in our hearts and kitchens, offering moments of joy and indulgence. Among the myriad of sweet treats, the Choco-Mint Delight No-Bake Ice Cream Cake stands out as a rich, creamy, and refreshingly delightful option that is perfect for any occasion. Whether you’re hosting a summer gathering, celebrating a birthday, or simply satisfying a sweet tooth, this dessert is a guaranteed crowd-pleaser.
What makes this Choco-Mint Delight even more appealing is its no-bake nature. In a world where time is often limited, this recipe allows you to whip up a delicious dessert without the hassle of turning on the oven. The simplicity of the preparation makes it an ideal choice for warm weather when the last thing you want is to heat up your kitchen.
This cake features a tantalizing combination of chocolate and mint flavors that evoke nostalgia for many. The classic pairing of these two tastes transports you back to childhood treats and invigorating mint chocolate chip ice cream cones enjoyed on hot summer days. The Choco-Mint Delight captures that essence perfectly, delivering a deliciously cool treat that delights the palate with every bite.
Understanding the Ingredients
In creating the Choco-Mint Delight, the selection of ingredients plays a crucial role in the overall flavor, texture, and visual appeal of the cake. Let’s delve into the key components that make this no-bake ice cream cake a standout dessert.
Chocolate Cookie Crumbs
The base of the Choco-Mint Delight is formed by chocolate cookie crumbs, which provide not only a sturdy foundation but also a rich, chocolatey flavor that complements the mint. These cookie crumbs typically come from crushed chocolate sandwich cookies, which add both texture and a hint of sweetness to the crust. When pressed firmly into the cake pan, they create a well-compacted crust that holds its shape, ensuring that each slice of the cake remains intact and easy to serve.
Unsalted Butter
Unsalted butter is another essential ingredient in the crust. By mixing melted butter with the chocolate cookie crumbs, you achieve a binding effect that holds the crumbs together while adding a luxurious richness to the dessert. The unsalted variety is preferred to control the overall saltiness of the cake, allowing the sweet flavors of the chocolate and mint to shine through without being overpowered.
Mint Chocolate Chip Ice Cream
At the heart of the Choco-Mint Delight is mint chocolate chip ice cream, the star that brings the refreshing minty flavor to the forefront. This ice cream is known for its delightful balance of creamy vanilla base infused with cool mint and studded with rich chocolate chips. It’s not only a classic favorite but also essential for achieving that quintessential minty taste that defines this dessert. The combination of the ice cream’s coolness and the rich chocolate crust creates a satisfying contrast that keeps you coming back for more.
Vanilla Ice Cream
To enhance the flavor profile and provide a counterbalance to the mint, vanilla ice cream is also incorporated into the cake. The creamy and sweet nature of vanilla ice cream complements the mint chocolate chip variety, creating a harmonious blend of flavors that is both indulgent and refreshing. The use of two types of ice cream adds depth to the dessert, ensuring that each bite is a perfect marriage of tastes.
Whipped Cream
Whipped cream is a key element in the Choco-Mint Delight, contributing both lightness and a creamy texture that elevates the dessert. It can be folded into the ice cream mixture to create a lighter consistency or used as a topping for decoration. This airy component helps to balance the richness of the chocolate and mint, making every slice feel decadent yet not overly heavy.
Chocolate Syrup
To add sweetness and a touch of visual appeal, chocolate syrup is drizzled throughout the cake. This glossy, rich syrup not only enhances the flavor but also serves as a beautiful garnishing element that draws the eye. The sweet notes of the syrup harmonize with the chocolate cookie crust and mint ice cream, making for a cohesive dessert experience.
Fresh Mint Leaves and Chocolate Shavings
For those looking to elevate the presentation of their Choco-Mint Delight, fresh mint leaves and chocolate shavings serve as optional garnishes. The vibrant green of the mint leaves adds a pop of color, while the chocolate shavings provide an elegant finishing touch. These garnishes not only enhance the visual appeal but also offer a hint of additional flavor, bringing the dessert to life and making it even more inviting.
Step-by-Step Preparation Guide
Now that we’ve explored the foundational ingredients, it’s time to dive into the preparation of the Choco-Mint Delight No-Bake Ice Cream Cake. This stage involves creating a well-compacted crust and layering the ice cream for the perfect dessert experience.
Preparing the Crust
1. Gather Your Ingredients: Begin by gathering all the necessary ingredients for the crust—chocolate cookie crumbs and unsalted butter. You’ll need about 2 cups of chocolate cookie crumbs and ½ cup of unsalted butter.
2. Melt the Butter: In a small saucepan or microwave, melt the unsalted butter until it is completely liquid. Be careful not to overheat it; you want it just melted to ensure it blends smoothly with the cookie crumbs.
3. Combine Crumbs and Butter: In a mixing bowl, combine the chocolate cookie crumbs with the melted butter. Use a spatula to mix thoroughly until all the crumbs are evenly coated with the butter. The mixture should have a slightly wet consistency, similar to wet sand.
4. Press the Mixture into the Pan: Line a springform pan with parchment paper for easy removal. Transfer the cookie crumb mixture into the pan and press it down firmly using the back of a measuring cup or your hands. Ensure that the crust is evenly distributed and that there are no gaps. A well-compacted crust is crucial for the stability of the cake, preventing it from crumbling when sliced.
5. Chill the Crust: Once the crust is pressed into the pan, place it in the freezer for about 15-20 minutes to firm up. This will help it hold its shape when you add the ice cream layers.
With the crust prepared and chilled, you can move on to layering the ice cream and completing this delightful dessert. The subsequent steps will focus on combining the mint chocolate chip and vanilla ice creams, creating an indulgent layer that captures the essence of both flavors. Stay tuned to discover the rest of this easy and satisfying recipe that will surely become a favorite in your dessert repertoire.

Layering the Ice Cream
Achieving a stunning layered look in your Choco-Mint Delight No-Bake Ice Cream Cake is all about technique. To create a smooth transition between flavors, ensure that the first layer is fully set before adding the next. Start by spooning in the mint chocolate chip ice cream, using an offset spatula to spread it evenly across the base. This tool helps create a smooth surface that will support the next layer seamlessly. After the first layer is set in the freezer for at least 30 minutes, proceed with the vanilla layer.
When adding the vanilla layer, make sure to scoop it out of the container and let it sit at room temperature for about 10 minutes. This slight softening will allow you to spread it more easily without disturbing the mint layer beneath. Use the same method with the spatula to ensure even coverage and a professional finish.
Adding the Vanilla Layer
The vanilla layer is essential for balancing the flavors and providing a creamy texture that complements the mint chocolate chip ice cream. For even distribution, drop spoonfuls of the softened vanilla ice cream on top of the mint layer, then gently spread it out. The goal is to avoid mixing the two flavors, which can happen if too much pressure is applied. Carefully add the vanilla layer and allow it to freeze for another 30 minutes. This step is crucial because it will help the layers hold together when you cut into the cake.
For an added touch, consider mixing in some crushed cookies or chocolate chips into the vanilla layer before spreading it out. This will enhance the flavor profile and add a delightful surprise for those enjoying your cake.
Final Whipped Cream Layer
To achieve a professional finish, the final layer of whipped cream is where you can really shine. Use heavy whipping cream for the best results; it whips up beautifully and holds its shape. In a mixing bowl, combine 1 cup of heavy cream with 2 tablespoons of powdered sugar and a teaspoon of vanilla extract. Whip the mixture until stiff peaks form. This means that when you pull the whisk out of the cream, it should stand up without collapsing.
Once whipped, gently spread the cream over the vanilla layer, using a spatula to create a smooth surface. You can also use a piping bag fitted with a star tip for a decorative finish along the edges. This gives your cake a polished look, perfect for impressing guests.
Garnishing the Cake
Garnishing is an excellent opportunity to let your creativity shine. Consider topping your Choco-Mint Delight with shaved chocolate or chocolate curls for a rich, indulgent appearance. Fresh mint leaves can add a pop of color and a refreshing touch. You can also sprinkle mini chocolate chips or crushed mint candies over the top for added texture and flavor.
If you want to elevate the presentation further, consider using a drizzle of chocolate sauce or a homemade mint syrup. This not only enhances the aesthetics but also complements the flavors of the cake beautifully. Remember, the way you garnish can make a big difference in the overall appeal of your dessert.
Freezing Instructions
Adequate freezing time is crucial for achieving the perfect texture in your no-bake ice cream cake. After adding all the layers, cover the cake tightly with plastic wrap or aluminum foil and freeze it for at least 4 hours, preferably overnight. This allows the flavors to meld together and the cake to firm up, making it easier to slice when you’re ready to serve.
It’s important to note that if the cake isn’t frozen long enough, it may be too soft to cut, leading to a messy presentation. Conversely, if frozen for too long, it may become difficult to slice through. A well-chilled cake strikes the right balance, ensuring each slice holds its form while remaining creamy and delicious.
Serving Suggestions
Creative Ways to Present the Cake
When it comes time to serve your Choco-Mint Delight, presentation is key. Carefully remove the cake from the pan by running a knife around the edges and gently lifting it out. You can serve it on a decorative cake stand or a simple platter, depending on your occasion. For an added touch, use a warm knife to slice through the cake, as this will create cleaner cuts.
Ideal Occasions for Serving
This no-bake ice cream cake is perfect for a variety of occasions. Whether it’s a birthday party, a holiday gathering, or a summer barbecue, the Choco-Mint Delight is sure to impress. Its refreshing mint flavor makes it particularly enjoyable during warmer months, while the rich chocolate satisfies those indulgent cravings.
Suggested Pairings with Beverages
Pair your cake with a refreshing beverage for a complete dessert experience. Iced coffee or mint tea can complement the minty notes of the cake beautifully. Alternatively, dessert wines such as a sweet Riesling or a rich port can enhance the chocolate flavors. For a non-alcoholic option, consider serving it with sparkling water infused with lemon or lime to cleanse the palate.
Portioning Tips for an Attractive Serving Display
When portioning the cake, aim for slices that are about 1-2 inches thick. This size allows guests to enjoy the layers without overwhelming them. Use a sharp knife dipped in hot water for clean cuts, and wipe the knife between slices for a polished presentation. For an extra touch, consider serving each slice with a dollop of whipped cream and a sprig of fresh mint on top.
Nutritional Information
For those watching their calorie intake, it’s essential to provide nutritional information for your Choco-Mint Delight. Each serving typically contains around 350 calories, with approximately 25 grams of sugar and 20 grams of fat. Keep in mind that these values can vary based on the specific brands of ice cream and ingredients used.
While this dessert is indulgent, moderation is key. Enjoying a slice as part of a balanced diet allows you to indulge without compromising your health goals. Remember, desserts like this are meant to be enjoyed, and sharing them with loved ones can make the experience even sweeter.
Conclusion
The Choco-Mint Delight No-Bake Ice Cream Cake is not only an easy-to-make dessert but also a delightful treat that can be enjoyed by everyone. With its rich layers and refreshing mint flavor, it’s a perfect choice for any gathering or celebration.
Don’t hesitate to experiment with different ice cream flavors or crust options to make this recipe your own. Whether you choose a cookie crust, a graham cracker base, or even a brownie layer, the possibilities are endless.
As you create and share homemade treats like this one, you’ll find joy in the process and a sense of accomplishment in delighting those you love with your culinary creations. So gather your ingredients, roll up your sleeves, and enjoy the delicious journey of making your Choco-Mint Delight!