Frozen Yogurt Peanut Butter Bites: Step-by-Step Guide

WANT TO SAVE THIS RECIPE?

Frozen Yogurt Peanut Butter Bites: A Deliciously Healthy Treat

In a world where indulgence often collides with health consciousness, Frozen Yogurt Peanut Butter Bites emerge as a delightful compromise. This recipe offers a creamy, flavorful snack that caters to sweet cravings while packing a nutritious punch. Whether you’re looking for a quick afternoon pick-me-up or a satisfying dessert that won’t derail your wellness goals, these frozen bites are a perfect choice. The combination of Greek yogurt and peanut butter creates a rich, satisfying treat that is as easy to make as it is enjoyable to eat.

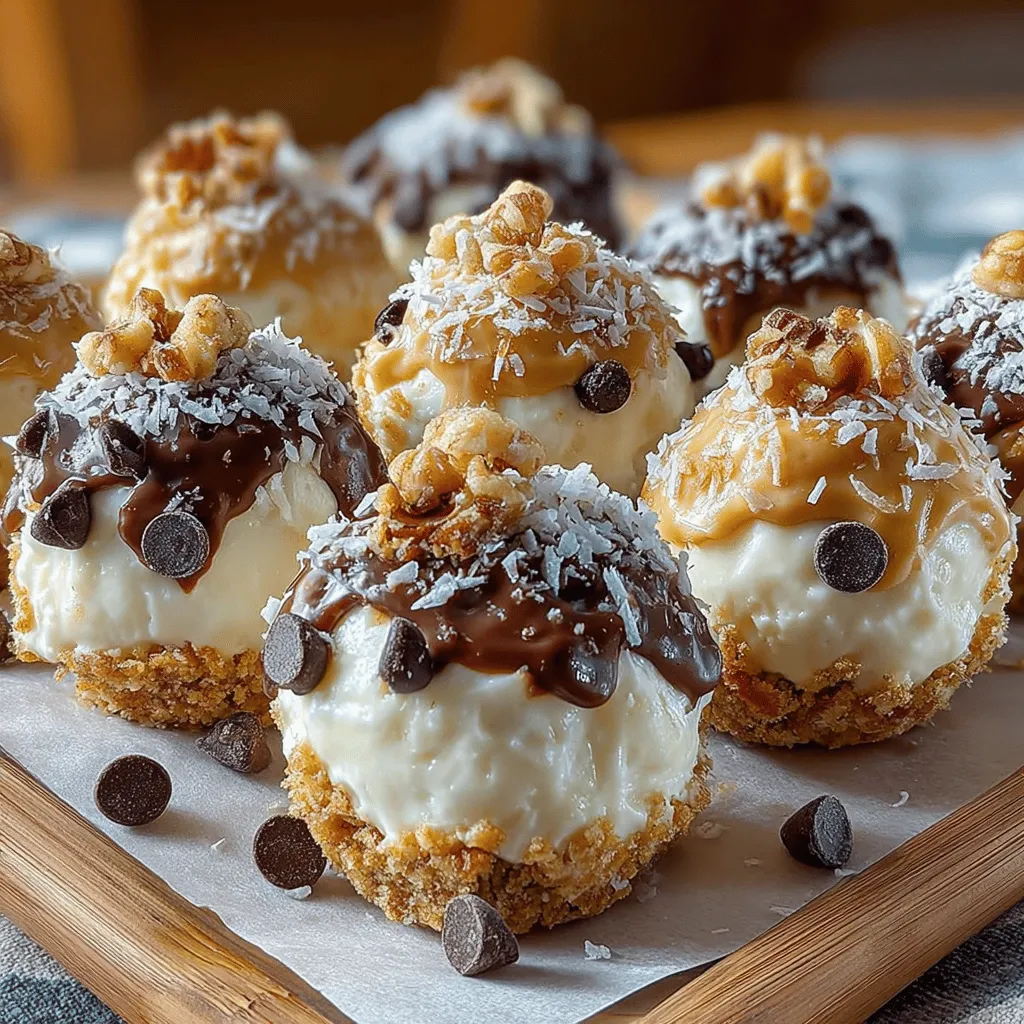
What makes Frozen Yogurt Peanut Butter Bites particularly appealing is not just their taste, but also the wholesome ingredients that make them a guilt-free option. Greek yogurt serves as a base, providing a creamy texture and a host of health benefits. Peanut butter adds an indulgent flavor and essential nutrients, while optional toppings like nuts and coconut flakes elevate the taste and texture even further. This versatility allows for customization based on personal preferences, making it easy to create a version of this treat that suits individual dietary needs.

Understanding the Ingredients

To truly appreciate the magic behind Frozen Yogurt Peanut Butter Bites, it’s essential to explore the ingredients that bring this recipe to life. Each component plays a vital role in not only enhancing flavor but also contributing to the overall nutritional value of the bites.

Creamy Peanut Butter

Peanut butter is often celebrated for its rich flavor and creamy texture, but its nutritional profile is equally impressive. High in protein, this nut butter supports muscle health and keeps you feeling full longer—perfect for snacking. Additionally, the healthy fats found in peanut butter, including monounsaturated and polyunsaturated fats, contribute to heart health when consumed in moderation.

When choosing peanut butter for your recipe, consider the variety available. Natural peanut butter, which contains minimal added ingredients, is usually the healthiest option, as it consists primarily of peanuts and perhaps a pinch of salt. On the other hand, processed peanut butters may contain added sugars and hydrogenated oils, which can diminish their nutritional value. Opting for a natural version will ensure that your Frozen Yogurt Peanut Butter Bites remain as wholesome as possible.

Greek Yogurt

Greek yogurt stands out from regular yogurt in several key ways. The straining process used to make Greek yogurt removes much of the whey, resulting in a thicker texture and a higher protein content. This makes it an excellent choice for those looking to boost their protein intake without consuming excess calories. Additionally, Greek yogurt is a source of probiotics, which are beneficial bacteria that support gut health and digestion.

When selecting Greek yogurt for your Frozen Yogurt Peanut Butter Bites, look for plain varieties without added sugars. This will allow you to control the sweetness of your recipe while maximizing health benefits. The creaminess of Greek yogurt not only enhances the texture of the bites but also helps to balance the richness of the peanut butter.

Sweeteners: Honey and Maple Syrup

To sweeten your Frozen Yogurt Peanut Butter Bites, you’ll want to choose natural sweeteners that enhance flavor without overwhelming the health benefits of the other ingredients. Honey and maple syrup are two popular options, each bringing unique characteristics to the table.

Honey is known for its distinct flavor and is packed with antioxidants. It has natural antibacterial properties and can provide a quick source of energy. However, it’s essential to choose raw or organic honey to maximize its health benefits.

Maple syrup, on the other hand, is a delightful alternative that offers a unique taste profile. It is also rich in minerals such as manganese and zinc. When deciding between honey and maple syrup, consider your dietary preferences—honey is not vegan, while pure maple syrup is.

Both sweeteners can be used in moderation to enhance the flavor of your Frozen Yogurt Peanut Butter Bites while maintaining their healthy profile.

Vanilla Extract

A splash of vanilla extract enhances the overall flavor of the Frozen Yogurt Peanut Butter Bites. It adds warmth and richness, making the bites even more enjoyable. When choosing vanilla extract, it’s essential to opt for pure vanilla extract rather than imitation vanilla. Pure vanilla extract, made from real vanilla beans, provides a depth of flavor that imitation versions simply cannot replicate.

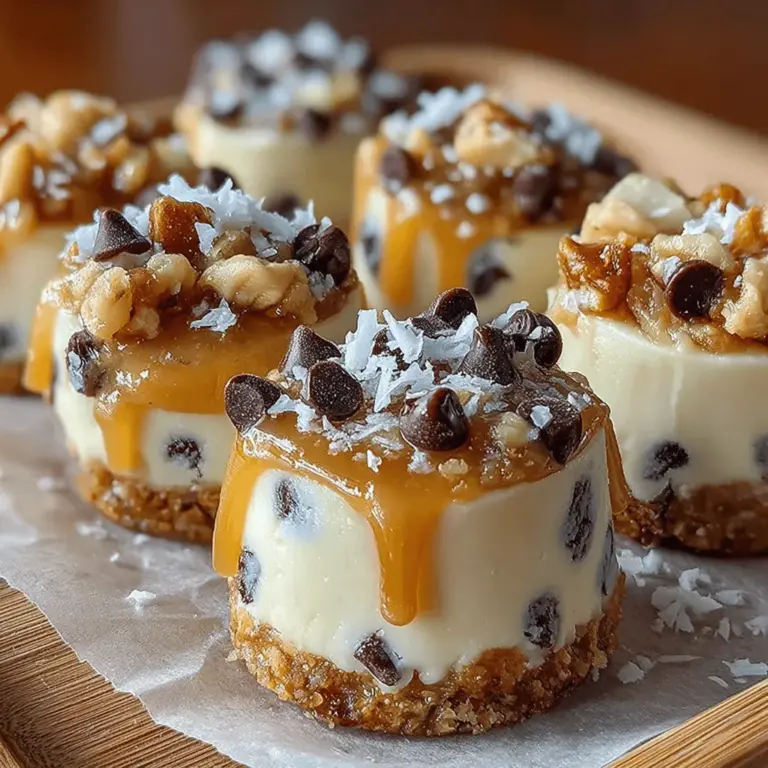
Mini Chocolate Chips and Crushed Nuts

For those who love a little extra texture and sweetness, mini chocolate chips and crushed nuts are fantastic additions to the recipe. Mini chocolate chips can provide a touch of indulgence, allowing you to enjoy the classic flavor combination of chocolate and peanut butter. Dark chocolate chips are an excellent option as they contain less sugar and more antioxidants compared to their milk chocolate counterparts.

Crushed nuts, such as almonds, walnuts, or pecans, not only enhance the texture but also add a nutritional boost. Nuts are packed with healthy fats, protein, and fiber, making them a heart-healthy choice. They can also add a satisfying crunch to your bites, elevating the overall experience.

Optional Toppings: Coconut Flakes

For an added layer of flavor and texture, consider incorporating coconut flakes as an optional topping. Coconut flakes can bring a tropical twist to your Frozen Yogurt Peanut Butter Bites, making them even more delightful. In addition to their unique taste, coconut flakes offer health benefits such as healthy fats and fiber, contributing to a balanced snack.

With a solid understanding of the ingredients involved, it’s time to dive into the preparation of these delicious bites. The initial steps are simple and straightforward, making this recipe accessible for cooks of all skill levels.

Initial Steps to Make Frozen Yogurt Peanut Butter Bites

1. Gather Your Ingredients: Before you begin, assemble all necessary ingredients. You’ll need creamy peanut butter, Greek yogurt, your choice of sweetener (honey or maple syrup), pure vanilla extract, mini chocolate chips, and crushed nuts. Don’t forget any optional toppings you wish to use!

2. Mix the Base: In a mixing bowl, combine Greek yogurt and peanut butter. The ratio can vary based on personal preference, but a common starting point is one cup of Greek yogurt to half a cup of peanut butter. Mix until the ingredients are well-combined and smooth.

3. Sweeten to Taste: Add your chosen sweetener—start with a couple of tablespoons of honey or maple syrup, and adjust based on your sweetness preference. Incorporate the vanilla extract at this stage as well.

4. Fold in Extras: Once your base is sweetened to perfection, gently fold in mini chocolate chips and crushed nuts. This step allows for a bit of customization, so feel free to experiment with different varieties of nuts or even add dried fruits for an extra flavor boost.

5. Portion the Mixture: Using a small scoop or spoon, portion the mixture into mini muffin tins or silicone molds. This will help shape your bites and make them easy to pop out once frozen.

6. Freeze: Place the filled molds in the freezer for at least 2-3 hours, or until the bites are fully set. This freezing step is crucial for achieving that perfect frozen texture.

With these initial steps completed, your Frozen Yogurt Peanut Butter Bites will soon be ready to enjoy. The combination of creamy, nutty flavors with a hint of sweetness is sure to satisfy cravings while keeping your health goals in check.

1. <strong>Gather Your Ingredients</strong>: Before you begin, assemble all necessary ingredients. You’ll need creamy peanut butter, Greek yogurt, your choice of sweetener (honey or maple syrup), pure vanilla extract, mini chocolate chips, and crushed nuts. Don’t forget any optional toppings you wish to use!” /></p>
</p>
<h2>Step-by-Step Preparation of Frozen Yogurt Peanut Butter Bites</h2>
</p>
<h3>Mixing the Base</h3>
</p>
<p>The first step in creating your Frozen Yogurt Peanut Butter Bites is to mix your base ingredients effectively. Start by combining Greek yogurt and creamy peanut butter in a mixing bowl. The ratio usually recommended is about 2 parts yogurt to 1 part peanut butter, but feel free to adjust based on your preference for creaminess and flavor intensity.</p>
</p>
<h4>Importance of Achieving a Smooth Consistency</h4>
</p>
<p>Achieving a smooth consistency is critical for the final texture of your bites. A well-mixed base will ensure that the peanut butter is evenly distributed throughout the yogurt, resulting in a delightful flavor in every bite. Additionally, a smooth mixture allows other ingredients to blend seamlessly, enhancing the overall experience.</p>
</p>
<h4>Tips for Effective Mixing</h4>
</p>
<p>1. <strong>Use Room Temperature Ingredients</strong>: Before starting, allow your peanut butter to sit at room temperature for about 15-20 minutes. This step ensures easier mixing and prevents clumping.</p>
</p>
<p>2. <strong>Use a Whisk or Electric Mixer</strong>: For the best results, use a whisk or an electric mixer. Start at a low speed to combine the ingredients and gradually increase to medium speed until the mixture is creamy and smooth.</p>
</p>
<p>3. <strong>Scrape the Sides</strong>: Don’t forget to scrape down the sides of the bowl with a spatula to incorporate all the ingredients thoroughly. This practice ensures no pockets of peanut butter or yogurt are left unmixed.</p>
</p>
<h3>Folding in Mix-Ins</h3>
</p>
<p>Once the base is perfectly mixed, it’s time to fold in your chosen mix-ins. This step adds texture and flavor contrast to your Frozen Yogurt Peanut Butter Bites.</p>
</p>
<h4>Techniques for Gentle Folding to Maintain Texture</h4>
</p>
<p>When adding the mix-ins, it’s essential to use a folding technique rather than stirring vigorously. Folding involves gently lifting the mixture from the bottom of the bowl and turning it over, which helps maintain the airy texture of the yogurt.</p>
</p>
<p>1. <strong>Add Mix-Ins Gradually</strong>: Introduce your mix-ins a little at a time, allowing the base to incorporate them evenly without losing its fluffiness.</p>
</p>
<p>2. <strong>Use a Silicone Spatula</strong>: A silicone spatula is ideal for this task, as it is flexible and can help you fold without deflating the mixture.</p>
</p>
<h4>Suggestions for Other Mix-Ins</h4>
</p>
<p>While the classic combination of peanut butter and yogurt is delicious, you can customize your bites by adding various mix-ins:</p>
</p>
<p>– <strong>Dried Fruits</strong>: Chopped dried apricots, cranberries, or raisins can add a sweet and chewy element.</p>
<p>– <strong>Seeds</strong>: Chia seeds, sunflower seeds, or flaxseeds contribute a nutritious crunch.</p>
<p>– <strong>Chocolate Chips</strong>: For a sweeter touch, mini chocolate chips or dark chocolate chunks can enhance the dessert-like quality of your bites.</p>
<p>– <strong>Spices</strong>: A sprinkle of cinnamon or nutmeg can elevate the flavor profile.</p>
</p>
<h3>Shaping the Bites</h3>
</p>
<p>Now that your mixture is ready, it’s time to shape the bites. This is where you can get creative with presentation.</p>
</p>
<h4>Different Shapes and Sizes for Presentation</h4>
</p>
<p>You can choose to make your bites in various shapes, such as:</p>
</p>
<p>– <strong>Balls</strong>: Roll the mixture into small balls for easy snacking.</p>
<p>– <strong>Squares or Rectangles</strong>: Press the mixture into a lined baking dish and cut it into squares or rectangles after freezing.</p>
<p>– <strong>Molds</strong>: Use silicone molds for fun shapes, like hearts or stars, which are particularly appealing for kids or special occasions.</p>
</p>
<h4>Importance of Uniformity for Even Freezing</h4>
</p>
<p>Regardless of the shape you choose, consistent sizing is crucial for even freezing. Smaller bites will freeze quicker than larger ones, so aim for uniformity in size to ensure all pieces freeze at the same rate. This practice helps prevent some bites from being rock hard while others remain soft.</p>
</p>
<h3>Freezing Process</h3>
</p>
<p>After shaping, it’s time to freeze your bites.</p>
</p>
<h4>Explanation of Freezing Time and Its Significance</h4>
</p>
<p>To achieve the perfect frozen treat, place your shaped bites on a parchment-lined tray, ensuring they are not touching. This method prevents them from sticking together during the freezing process.</p>
</p>
<p>The bites should freeze for about 2-4 hours, or until they are firm to the touch. The freezing time is essential as it allows the yogurt to set properly, creating a delightful texture that is neither too hard nor too soft.</p>
</p>
<h4>Storing Tips for Long-Term Preservation</h4>
</p>
<p>Once your bites are fully frozen, transfer them to an airtight container or a resealable plastic bag. It’s best to layer parchment paper between layers of bites to prevent sticking. Proper storage can keep them fresh for up to 2 months in the freezer. Always label your container with the date to keep track of freshness.</p>
</p>
<h2>Nutritional Information</h2>
</p>
<p>Understanding the nutritional profile of your Frozen Yogurt Peanut Butter Bites can enhance your enjoyment and help you maintain healthy eating habits.</p>
</p>
<h3>Breakdown of Calories and Macronutrients Per Bite</h3>
</p>
<p>On average, each bite contains approximately:</p>
</p>
<p>– <strong>Calories</strong>: 50-60 calories</p>
<p>– <strong>Protein</strong>: 2-3 grams</p>
<p>– <strong>Carbohydrates</strong>: 5-7 grams</p>
<p>– <strong>Fat</strong>: 2-3 grams</p>
</p>
<p>This breakdown can vary based on the specific ingredients and mix-ins you choose. The Greek yogurt adds a significant protein boost, while the peanut butter contributes healthy fats.</p>
</p>
<h3>Comparison of Frozen Yogurt Peanut Butter Bites to Traditional Desserts</h3>
</p>
<p>Compared to traditional desserts, such as ice cream or cookies, Frozen Yogurt Peanut Butter Bites are a healthier option. Traditional desserts can often pack upwards of 200-300 calories per serving, with high sugar content. In contrast, your homemade bites are lower in calories and sugars, making them a guilt-free treat.</p>
</p>
<h3>Discussion on Portion Control and Serving Size</h3>
</p>
<p>Since these bites are small and satisfying, it’s easier to practice portion control. A serving size of 2-3 bites can satisfy your sweet tooth without leading to overindulgence. Enjoying them in moderation allows you to balance your cravings with healthier choices.</p>
</p>
<h2>Serving Suggestions and Pairings</h2>
</p>
<p>The versatility of Frozen Yogurt Peanut Butter Bites makes them suitable for various occasions and meal types.</p>
</p>
<h3>Ideas for Enjoying the Bites</h3>
</p>
<p>1. <strong>Snacks</strong>: Perfect for a midday snack that delivers both protein and healthy fats.</p>
<p>2. <strong>Desserts</strong>: Serve them as a light dessert after dinner to satisfy your sweet craving without the guilt.</p>
<p>3. <strong>Post-Workout Treats</strong>: The combination of protein and carbs makes these bites an excellent post-workout recovery snack.</p>
</p>
<h3>Pairing Options</h3>
</p>
<p>Consider pairing your Frozen Yogurt Peanut Butter Bites with:</p>
</p>
<p>– <strong>Smoothies</strong>: Blend them into a post-workout smoothie for an extra protein kick.</p>
<p>– <strong>Fruits</strong>: Fresh fruits like bananas, berries, or apples make for a refreshing complement.</p>
<p>– <strong>As Part of a Balanced Meal</strong>: Include them in a balanced meal with whole grains and vegetables for a fun twist.</p>
</p>
<h2>Conclusion</h2>
</p>
<p>Creating Frozen Yogurt Peanut Butter Bites is a simple and rewarding endeavor that results in a delightful and nutritious snack option. Not only are they easy to prepare, but they also offer a healthier alternative to traditional desserts without sacrificing taste.</p>
</p>
<p>These bites provide a perfect balance of protein, healthy fats, and carbohydrates, making them an excellent choice for any time of day. Additionally, the opportunity to experiment with various flavors and ingredients makes them customizable to your preferences.</p>
</p>
<p>So why not get creative in the kitchen? Try different mix-ins and flavors to craft your unique version of Frozen Yogurt Peanut Butter Bites. Embrace the joy of homemade treats that not only satisfy your sweet tooth but also keep your health goals in check. Give this recipe a try, and enjoy the deliciousness that awaits!</p>
</div>

1. Gather Your Ingredients: Before you begin, assemble all necessary ingredients. You’ll need creamy peanut butter, Greek yogurt, your choice of sweetener (honey or maple syrup), pure vanilla extract, mini chocolate chips, and crushed nuts. Don’t forget any optional toppings you wish to use!

Frozen Yogurt Peanut Butter Bites

Satisfy your sweet cravings with these Frozen Yogurt Peanut Butter Bites—a delicious and healthy treat! Made with creamy Greek yogurt and rich peanut butter, these bites are perfect for a post-workout snack or a guilt-free dessert. Customize them with toppings like nuts or chocolate chips for extra flavor. Easy to prepare and packed with nutrients, these bites are sure to be a hit in your home! Enjoy a nutritious indulgence that fits your wellness goals.

Ingredients
  

1 cup creamy peanut butter

1 cup Greek yogurt (plain or vanilla)

2 tablespoons honey (or maple syrup for vegan option)

1 teaspoon vanilla extract

1/2 cup mini chocolate chips

1/4 cup crushed nuts (almonds, walnuts, or peanuts)

Pinch of sea salt

Optional: 1/4 cup coconut flakes for topping

Instructions
 

In a mixing bowl, combine the creamy peanut butter, Greek yogurt, honey, vanilla extract, and a pinch of sea salt. Mix until the mixture is well combined and smooth.

    Gently fold in the mini chocolate chips and crushed nuts, ensuring they are evenly distributed throughout the mixture.

      Line a baking sheet with parchment paper to prevent sticking.

        Using a small scoop or tablespoon, drop spoonfuls of the peanut butter yogurt mixture onto the parchment-lined baking sheet. You can shape them into rounded bites or squares as desired.

          If using, sprinkle coconut flakes over the top of each bite for added flavor and texture.

            Place the baking sheet in the freezer and freeze for about 2 hours, or until the bites are solid.

              Once frozen, transfer the bites into an airtight container or resealable bag for easy storage. They can be kept frozen for up to a month.

                When ready to enjoy, simply remove the desired amount of bites from the freezer and let sit for a couple of minutes to soften slightly before indulging.

                  Prep Time, Total Time, Servings: 15 minutes | 2 hours | 12-16 bites

                    WANT TO SAVE THIS RECIPE?

                    Leave a Comment

                    Recipe Rating


                    Sharing is Caring

                    Help spread the word. You're awesome for doing it!