Imagine the first bite of a cool, chocolate‑coated treat that instantly awakens your palate with the bright zing of kiwi. Chocolate Kiwi Delight Pops bring that moment to your breakfast table, turning a simple morning routine into a mini celebration.
What makes these pops truly special is the marriage of silky dark chocolate with a tangy kiwi‑fruit puree, frozen into bite‑size pops that melt just enough to release a burst of flavor. The contrast of smooth chocolate and juicy fruit creates a refreshing experience unlike any other brunch dessert.
These pops are perfect for families with kids, brunch‑loving friends, or anyone who craves a light yet indulgent start to the day. Serve them at weekend brunches, holiday breakfasts, or as a playful after‑lunch treat.
The process is straightforward: blend kiwi with a touch of sweetener, pipe the mixture onto sticks, dip each pop in tempered chocolate, and freeze until firm. In under an hour you’ll have a tray of gorgeous, ready‑to‑enjoy delights.
Why You'll Love This Recipe
Bright & Refreshing: The natural acidity of kiwi cuts through the richness of chocolate, delivering a balanced bite that feels light enough for breakfast yet satisfying.
Kid‑Approved Fun: The pop‑stick format turns dessert into a playful activity, encouraging kids to eat fruit while enjoying a chocolate coating.
Make‑Ahead Friendly: Once frozen, the pops keep well, allowing you to prepare a batch ahead of time and simply pull them out when guests arrive.
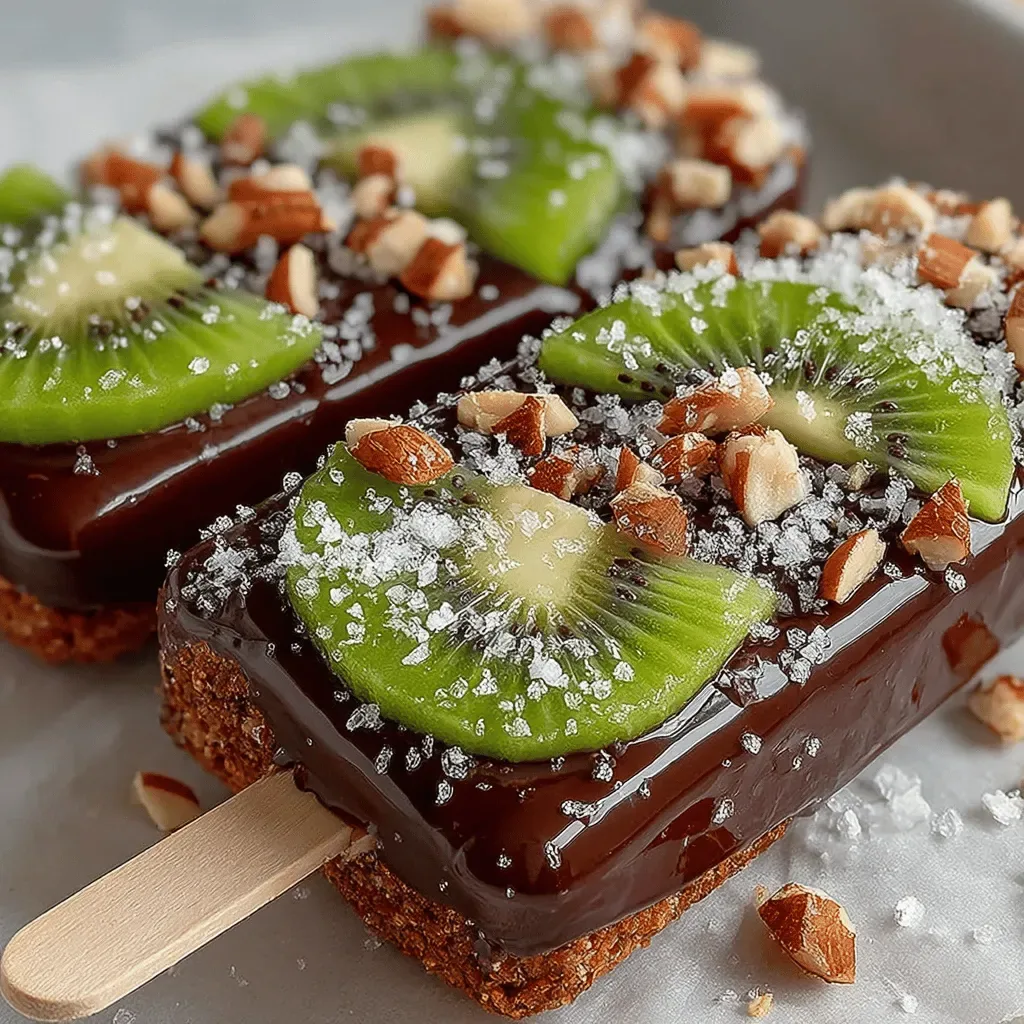
Elegant Presentation: The glossy dark chocolate shell and vibrant green interior create a striking visual that elevates any brunch spread.
Ingredients
The success of these pops hinges on a few key components. Fresh kiwi provides a naturally sweet‑tart base, while high‑quality dark chocolate offers depth and a glossy finish. A light sweetener balances the fruit’s acidity, and a pinch of sea salt amplifies both chocolate and fruit flavors. The optional garnish of toasted coconut adds texture and a tropical hint.
Kiwi Puree
- 3 ripe kiwis, peeled and diced
- 2 tablespoons honey or agave syrup
- ½ teaspoon fresh lemon juice
- Pinch of sea salt
Chocolate Coating
- 200 g dark chocolate (70 % cacao), chopped
- 1 tablespoon coconut oil
- ¼ teaspoon vanilla extract
Garnish (Optional)
- 2 tablespoons toasted coconut flakes
- Extra sea salt for sprinkling
Together these ingredients create a harmonious flavor profile: the kiwi puree stays bright and slightly tart, the chocolate adds richness without overwhelming sweetness, and the tiny salt crystals highlight each component. The coconut oil ensures the chocolate stays glossy and snap‑ready after freezing, while the optional coconut garnish adds a subtle crunch that contrasts the smooth interior.
Step-by-Step Instructions
Preparing the Kiwi Puree
In a food processor, combine the diced kiwi, honey (or agave), lemon juice, and a pinch of sea salt. Blend until the mixture is completely smooth, pausing to scrape down the sides as needed. The lemon juice preserves the vibrant green color while adding a subtle brightness that balances the sweetener.
Forming the Pops
- Pipe the Puree. Transfer the kiwi puree to a piping bag fitted with a wide tip. Position a silicone mold or a shallow tray lined with parchment, insert wooden popsicle sticks, and pipe ½‑inch circles of puree, leaving a small well in the center for the chocolate to cling.
- Freeze the Base. Place the tray in the freezer for about 45 minutes, or until the kiwi circles are firm to the touch. This step prevents the puree from melting when dipped in warm chocolate.
Tempering the Chocolate
- Melt & Combine. In a heat‑proof bowl set over a pot of simmering water (double‑boiler), melt the dark chocolate and coconut oil together, stirring constantly. Once smooth, remove from heat and stir in vanilla extract. The coconut oil lowers the melting point, giving a glossy finish that stays firm when frozen.
- Dip the Pops. Retrieve the frozen kiwi bases. Holding each stick, dip the kiwi circle into the chocolate, allowing excess to drip back into the bowl. For an even coat, rotate the pop gently. Immediately sprinkle with toasted coconut flakes and a tiny pinch of sea salt if desired.
- Final Freeze. Return the dipped pops to the parchment‑lined tray and place back in the freezer for at least 1 hour, or until the chocolate shell is completely set. This ensures a crisp snap when bitten.
Serving & Storage
When ready to serve, run the tray under warm water for a few seconds to loosen the sticks, then gently pull each pop. Serve immediately for the best texture, or keep frozen in an airtight container for up to three days. A quick drizzle of extra melted chocolate adds a decorative touch for special occasions.
Tips & Tricks
Perfecting the Recipe
Use Ripe Kiwi. Only fully ripe kiwis will blend into a smooth puree without gritty texture, delivering the best flavor and color.
Chill All Tools. Keep your piping bag and mixing bowl in the fridge for a few minutes; cold tools help maintain the puree’s firmness before freezing.
Don’t Over‑Heat Chocolate. Keep the chocolate temperature below 115 °F (46 °C) to avoid burning and to preserve its glossy finish.
Tap Excess Chocolate. After dipping, gently tap the stick against the side of the bowl to remove drips and achieve an even coating.
Flavor Enhancements
Add a splash of orange liqueur to the chocolate for a citrus note, or swirl in a teaspoon of raspberry puree for a fruity ribbon. A dusting of powdered matcha on the chocolate shell adds an earthy contrast and visual pop.
Common Mistakes to Avoid
Avoid using over‑ripe kiwis that become watery; this can cause the pops to lose shape during freezing. Also, never dip the pops into hot chocolate—excess heat melts the frozen kiwi base, resulting in a soggy interior.
Pro Tips
Layered Dipping. Dip the kiwi half‑way, chill for 10 minutes, then dip again for a thicker shell that cracks satisfyingly.
Use a Silicone Mat. A non‑stick silicone mat prevents the chocolate from sticking to the tray, making removal effortless.
Quick Release. Run the bottom of the tray under warm water for 5‑seconds before serving; the sticks will slide out without breaking the pops.
Seasonal Twist. Substitute mango or passion fruit for kiwi to create a tropical version that still pairs beautifully with dark chocolate.
Variations
Ingredient Swaps
Swap dark chocolate for white chocolate to let the kiwi’s green shine, or use milk chocolate for a sweeter profile. Replace kiwi with frozen berries (strawberry, raspberry) for a different tartness. For a nutty twist, fold finely chopped pistachios into the chocolate coating before it sets.
Dietary Adjustments
Choose a vegan dark chocolate that contains no dairy and replace honey with maple syrup for a fully plant‑based version. Use a sugar‑free sweetener such as erythritol in the kiwi puree to keep carbs low, making the pops suitable for keto or diabetic-friendly breakfasts.
Serving Suggestions
Arrange the pops on a chilled platter alongside fresh fruit salad and a dollop of Greek yogurt for a balanced brunch. Pair with sparkling water infused with mint for a refreshing beverage, or serve as a palate‑cleansing bite between savory breakfast items like avocado toast.
Storage Info
Leftover Storage
Allow the pops to come to room temperature, then place them in a single layer inside an airtight container. Store in the freezer for up to 3 days; stacking them with parchment sheets prevents sticking. For longer storage, wrap each pop individually in plastic wrap before freezing to preserve the chocolate sheen.
Reheating Instructions
If you prefer a softer texture, let the pops sit at room temperature for 5‑7 minutes before serving. To gently melt the chocolate for drizzling, place the pops on a plate and microwave for 10‑15 seconds on low power, watching closely to avoid melting the kiwi interior.
Frequently Asked Questions
Chocolate Kiwi Delight Pops bring a burst of bright, refreshing flavor to any breakfast or brunch table, and the step‑by‑step guide ensures you’ll nail the perfect texture every time. Feel free to experiment with fruit swaps, chocolate varieties, or decorative toppings to make the recipe truly yours. Serve them chilled, share the joy, and enjoy a delightful start to your day!