Introduction
When it comes to desserts that combine the irresistible flavors of peanut butter and chocolate, few creations can rival the allure of a rich, creamy pie. Peanut butter and chocolate are a match made in culinary heaven, celebrated for their ability to complement one another perfectly. The sweet and savory notes of peanut butter harmonize beautifully with the deep, rich undertones of chocolate, creating a dessert experience that is both comforting and indulgent.
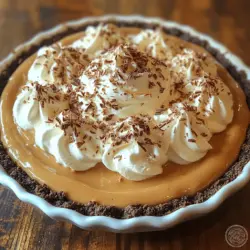
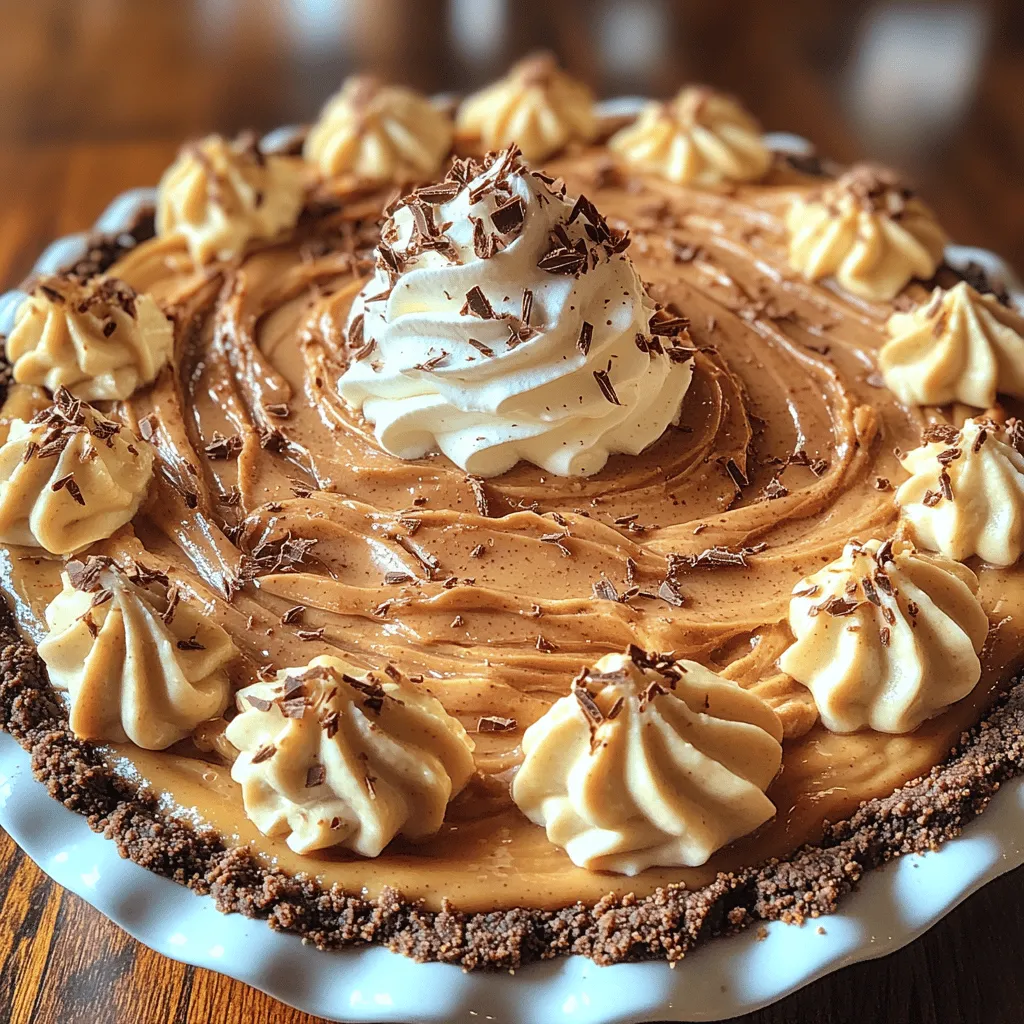
Enter the Decadent Peanut Butter Pie with Oreo Crust—a delightful treat that is perfect for any occasion, from family gatherings to dinner parties or simply as a sweet reward after a long day. This pie is not only a feast for the taste buds but also remarkably easy to prepare, making it accessible for both novice bakers and seasoned chefs alike. The combination of a crunchy Oreo crust and a velvety peanut butter filling ensures that every bite is a satisfying experience, promising to be a crowd-pleaser at any gathering.
In this article, we will guide you through the process of creating this decadent dessert, starting with an overview of essential ingredients, followed by tips for crafting the perfect crust and creamy filling. Whether you’re a peanut butter aficionado or simply looking for a new dessert to impress your friends, this recipe is sure to become a favorite.
Understanding the Ingredients
Key Ingredients and Their Role
To achieve the ultimate peanut butter pie experience, understanding the role of each ingredient is crucial. Here’s a breakdown of the key components that make this pie so special:
1. Oreo Cookies: The foundation of our pie is the Oreo cookie crust. Crunchy and chocolatey, Oreos add a delightful texture and flavor that complements the creamy filling. Their unique taste provides a rich contrast to the sweet and savory notes of the peanut butter filling.
2. Creamy Peanut Butter: As the star of our pie, creamy peanut butter is essential for achieving that signature flavor. It provides richness and depth to the filling, making each slice a luscious indulgence. When selecting peanut butter, opt for a high-quality brand for the best results.
3. Heavy Whipping Cream: This ingredient is key to creating a light and airy texture in the peanut butter filling. Whipping the cream adds volume and makes the filling smooth and luscious, balancing out the denser peanut butter.
4. Cream Cheese: Used to enhance both flavor and creaminess, softened cream cheese adds a tangy richness to the filling. It helps to create a stable structure, ensuring that the pie sets beautifully without becoming too dense.
5. Powdered Sugar: This ingredient sweetens the filling and helps to stabilize it. Unlike granulated sugar, powdered sugar dissolves quickly, resulting in a smoother texture and a perfect balance of sweetness.
By understanding the purpose of each ingredient, you can appreciate how they work together to create a harmonious dessert.
Creating the Perfect Oreo Crust
The crust is a crucial component of any pie, and in this recipe, the Oreo crust serves as the perfect base for the creamy peanut butter filling. To create this delectable crust, follow these detailed steps:
Step 1: Crushing the Cookies
Begin by gathering 24 Oreo cookies (you can also use a few more for decoration if desired). Place the cookies in a food processor and pulse until they form fine crumbs. If you don’t have a food processor, you can place the cookies in a zip-top bag and crush them with a rolling pin until they reach a fine consistency. The key is to ensure that there are no large chunks, as these can affect the texture and integrity of your crust.
Step 2: Mixing with Butter
Once you have your fine cookie crumbs, transfer them to a mixing bowl. Melt ½ cup of unsalted butter in the microwave or on the stovetop until completely liquid. Pour the melted butter over the Oreo crumbs and mix thoroughly until the crumbs are evenly coated. The mixture should resemble wet sand, which will help it hold together when pressed into the pie pan.
Step 3: Pressing into the Pie Pan
Next, take a 9-inch pie pan and begin pressing the cookie mixture into the bottom and up the sides of the pan. Use the bottom of a measuring cup or your fingers to compact the crumbs firmly. It’s essential to press evenly to create a stable crust that won’t crumble when serving. Make sure the crust is about ¼ inch thick to provide enough structure to hold the filling.
Step 4: Baking the Crust
Preheat your oven to 350°F (175°C). Once your crust is pressed into the pie pan, place it in the preheated oven and bake for about 10 minutes. This step is crucial as it helps to set the crust and enhances the flavor of the Oreos. Keep an eye on it to ensure it doesn’t burn; you want it to be firm but not overly dark.
Step 5: Cooling the Crust
After baking, remove the crust from the oven and allow it to cool completely in the pan. This cooling process is vital to avoid a soggy base when you add the filling. Let it sit at room temperature for about 30 minutes or until it’s cool to the touch. If you’re in a hurry, you can place it in the refrigerator to speed up the cooling process.
Crafting the Creamy Peanut Butter Filling
Once your Oreo crust is ready, it’s time to prepare the creamy peanut butter filling. This step is relatively straightforward and involves a few simple ingredients. Here’s a step-by-step guide to crafting the perfect filling:
Step 1: Softening the Cream Cheese
Before you begin mixing, ensure that your 8 oz. package of cream cheese is softened. Leaving it out at room temperature for about 30 minutes or microwaving it for a few seconds will make it easier to blend smoothly into the filling.
Step 2: Mixing the Ingredients
In a large mixing bowl, combine the softened cream cheese and 1 cup of creamy peanut butter. Using an electric mixer, beat the two together on medium speed until they are well combined and smooth. This process should take about 1-2 minutes.
Step 3: Adding Whipping Cream
Next, add 1 cup of heavy whipping cream to the mixture. Continue to mix on medium speed until the ingredients are fully incorporated. You’ll notice the mixture start to thicken as you combine the ingredients.
Step 4: Sweetening the Filling
Gradually add 1 cup of powdered sugar to the peanut butter mixture. Mix on low speed to avoid a sugar cloud, then increase to medium speed until everything is well blended. The filling should be creamy, thick, and easy to spread.
Step 5: Final Whip
For the best texture, increase the mixer speed to high and beat the filling for an additional 1-2 minutes until it’s light and fluffy. This step is essential for incorporating air into the mixture, giving it a delightful lightness.
With the filling prepared and the crust cooled, you’re ready to assemble your Decadent Peanut Butter Pie! This indulgent dessert is sure to impress your family and guests, making it a perfect addition to any occasion. Stay tuned for the next part where we will guide you through assembling the pie and adding those final touches to make it truly special.
Techniques for Achieving a Smooth Peanut Butter Mixture
Creating the perfect peanut butter filling for your decadent pie is all about technique. To ensure a smooth and creamy mixture, start with room temperature ingredients. This allows the peanut butter to blend seamlessly with the cream cheese, sugar, and vanilla extract. If your peanut butter is too thick, consider warming it slightly in the microwave for about 15 seconds. This will soften it, making it easier to incorporate into your filling.
When mixing the ingredients, use a hand mixer or a stand mixer fitted with a paddle attachment. Begin at a low speed to prevent splattering, gradually increasing to medium speed until the mixture is well combined. Scraping down the sides of the mixing bowl periodically ensures that all ingredients are fully incorporated, yielding a smooth and luscious peanut butter mixture.
How to Properly Whip Cream to Achieve the Right Texture and Volume
Whipping cream is an art that can significantly affect the final texture of your pie. Start by using cold heavy cream, as it whips better when cold. Pour the cream into a clean mixing bowl and begin whisking at low speed. Once the cream starts to thicken, increase the speed to medium-high. Look for soft peaks to form—this means the cream will hold its shape but is still creamy and not overly stiff.
Be careful not to over-whip the cream. If you whip past the soft peak stage to stiff peaks, the cream can become grainy and may even turn into butter! Stop whipping as soon as you reach soft peaks, which is essential for a light and airy filling.
The Art of Folding Whipped Cream into the Peanut Butter Mixture
Folding is a crucial technique to incorporate whipped cream into your peanut butter mixture without deflating it. To fold, use a spatula and gently cut through the center of the mixture, bringing the spatula up and over the mixture. Rotate the bowl a quarter turn with each fold, effectively combining the two mixtures while retaining the airiness of the whipped cream.
Begin by adding a small portion of the whipped cream to lighten the peanut butter mixture. This initial step helps make the folding process easier. Once combined, gently fold in the remaining whipped cream until just incorporated. This technique ensures your pie filling is fluffy and light, creating a delightful texture when served.
Assembling and Chilling the Pie
Now that you have your smooth peanut butter filling, it’s time to assemble the pie. Start by pouring the peanut butter mixture into the prepared Oreo crust. Using a spatula, spread the filling evenly to the edges of the crust, smoothing the top. This ensures an even distribution of filling, making for a visually appealing presentation.
For an extra touch of elegance, consider decorating the pie with dollops of whipped cream around the edges. You can also drizzle chocolate sauce on top or sprinkle crushed Oreos for added texture and visual appeal. Feel free to get creative with the garnishes—chocolate shavings, chopped peanuts, or even mini peanut butter cups can enhance the overall look and taste.
Chilling the pie is a critical step that cannot be overlooked. Cover the assembled pie with plastic wrap and refrigerate it for at least four hours, although overnight is preferable. Chilling allows the filling to set properly and develops the flavors, making each slice a creamy, decadent treat.
Serving Suggestions
When it’s time to serve your pie, presentation is key. Slice the pie into wedges using a sharp knife, dipping the blade in warm water between cuts for cleaner slices. Serve each slice on a chilled plate to keep the pie cool. For an extra special touch, accompany the pie with a dollop of freshly whipped cream and a sprinkle of crushed Oreos.
Pair your Decadent Peanut Butter Pie with beverages that complement its rich flavors. A rich cup of coffee or a glass of cold milk can be perfect companions. For adult gatherings, consider serving the pie with a dessert wine or a rich stout beer.
This pie is versatile enough for various occasions, whether it’s a birthday party, holiday gathering, or just a casual dessert on a weeknight. Its indulgent flavors appeal to both children and adults, making it a hit at any event.
Nutritional Information
While this Decadent Peanut Butter Pie is indulgent, it’s essential to be mindful of portion sizes if you’re watching your caloric intake. Each slice of pie contains approximately 350-400 calories, depending on the thickness of your slice and the specific ingredients used.
The pie does provide some nutritional benefits, including protein from the peanut butter and healthy fats. However, it’s best enjoyed as an occasional treat rather than a daily indulgence. Consider serving smaller portions or pairing it with fresh fruit to add a touch of freshness and nutrition to your dessert experience.
Conclusion
Making and enjoying a Decadent Peanut Butter Pie with Oreo Crust is a joyous experience that combines rich flavors with a delightful texture. The process of crafting this pie—from the smooth peanut butter filling to the crunchy Oreo crust—is a rewarding one that culminates in a dessert that is sure to please.
Encourage your creativity by exploring variations of this recipe. You might try adding a layer of chocolate ganache, incorporating different nut butters, or even experimenting with flavored whipped cream. The possibilities are endless, allowing you to adapt the recipe to suit your taste.
Ultimately, pies like this one hold an enduring appeal, often bringing people together to share in the joy of good food. Whether enjoyed at a festive gathering or a quiet dinner at home, this pie is a testament to the simple pleasure that dessert can bring. So gather your ingredients, unleash your inner pastry chef, and indulge in this delightful creation!