Introduction
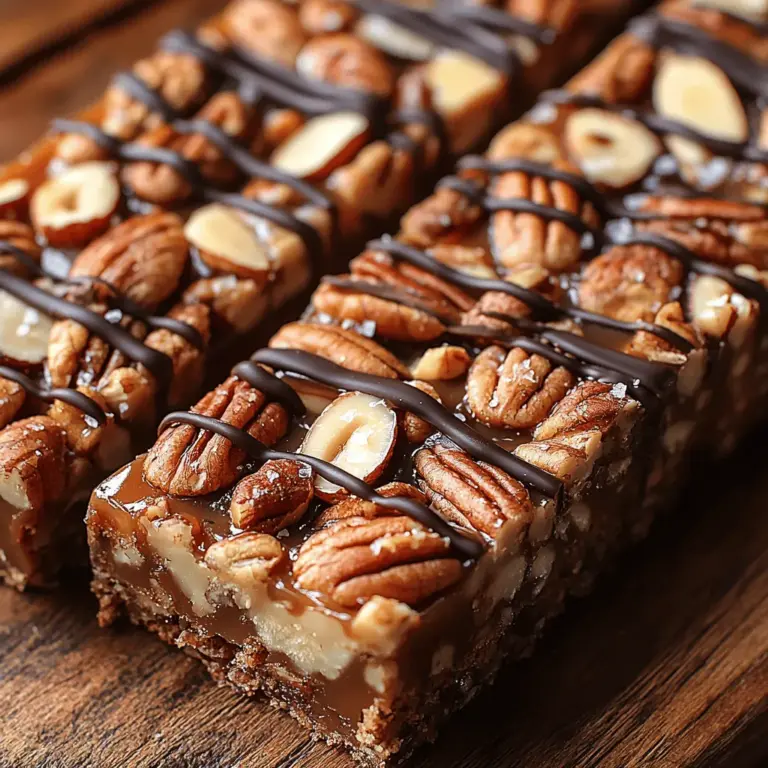
Imagine a dessert that tantalizes your taste buds with a delightful combination of sweet, crunchy, and slightly salty flavors—all wrapped up in a beautiful, golden-brown package. This is the essence of decadence embodied in praline crunch. With its rich layers of flavor and texture, praline crunch is not just a treat for the palate; it’s an experience that elevates any occasion, from festive celebrations to casual gatherings.
Desserts are often about balance—combining different textures and flavors to create something truly memorable. The crispy crunch of nuts, the creamy sweetness of caramel, and the indulgent richness of chocolate come together in a symphony of taste that is hard to resist. This praline crunch recipe is not only easy to make but also promises to impress friends and family alike, making it the perfect addition to your dessert repertoire.
Understanding Praline Crunch
Before diving into the recipe, let’s take a moment to understand what praline is and the unique flavors and textures that praline crunch offers.
Definition and Origin of Praline
Praline, a confection made from nuts and sugar, has a rich history that traces back to 17th-century France. Traditionally, pralines were made with almonds or hazelnuts coated in caramelized sugar. Over the years, variations of praline have emerged across different cultures, with each region adding its unique twist. In the United States, particularly in New Orleans, pralines are often made with pecans and have a softer, creamier texture, making them different from their European counterparts.
Texture and Flavor Profile of Praline Crunch
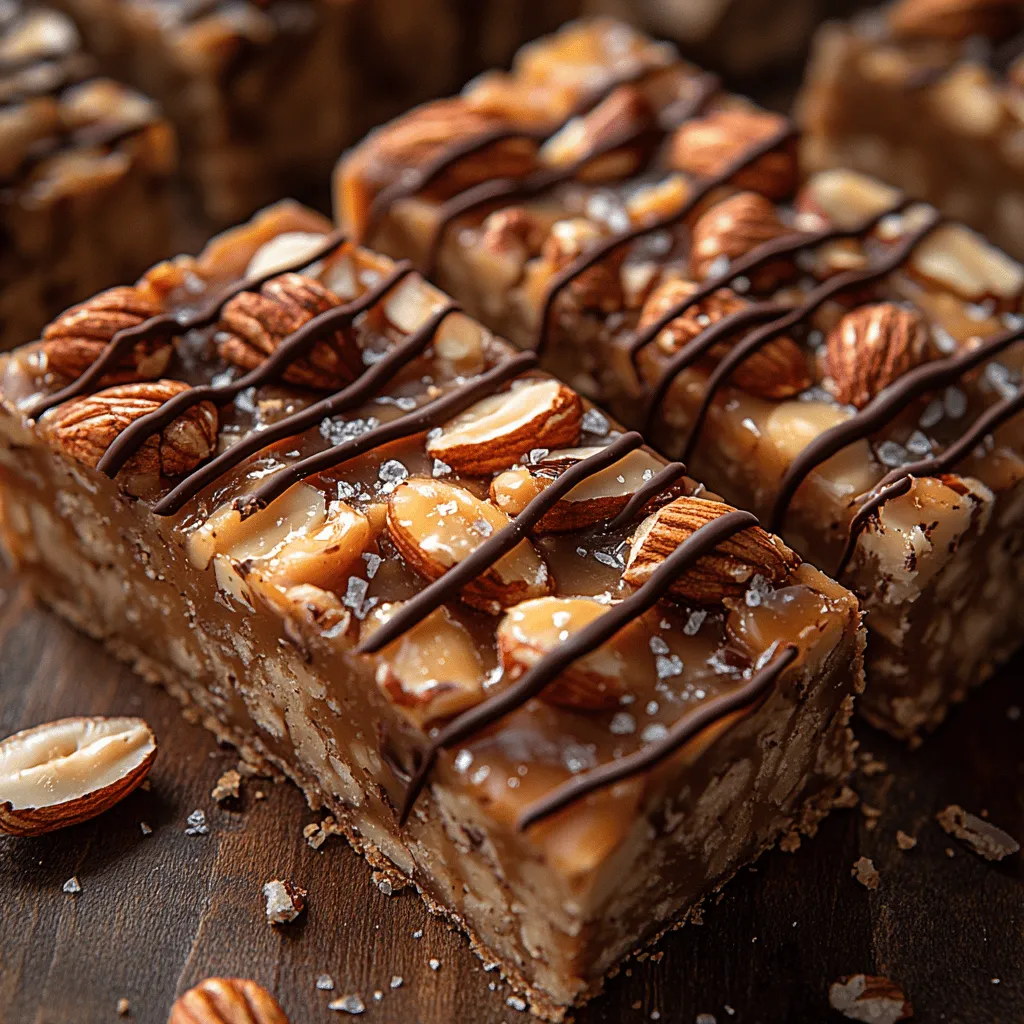
Praline crunch combines the best of both worlds—crunchy nuts and smooth caramel. The crispiness of toasted nuts mingles with the gooey sweetness of caramelized sugar, creating a delightful contrast. When chocolate is added, the richness deepens, while a sprinkle of sea salt enhances the overall flavor, making each bite a harmonious blend of sweet and savory.
Popularity of Praline Treats in Different Cuisines
Praline treats enjoy popularity around the globe, each culture showcasing its interpretation. In France, pralines are often incorporated into desserts like tarts and pastries, while in the southern United States, they are enjoyed as a standalone sweet treat. In Belgium, praline is commonly found in chocolates, showcasing the versatility of this delightful confection. The universal love for praline demonstrates its timeless appeal and ability to transcend cultural boundaries.
Ingredients Breakdown
To create the perfect decadent praline crunch, it is essential to use high-quality ingredients that complement each other beautifully. Here’s a detailed breakdown of each ingredient used in the recipe:
1. Pecans: These nuts are not only rich in flavor but also packed with nutritional benefits. Pecans are a great source of healthy fats, fiber, and antioxidants. Their buttery, slightly sweet flavor makes them a perfect base for praline crunch.
2. Almonds: Almonds add a delightful crunch and further enhance the health aspects of this recipe. Packed with protein, vitamin E, and magnesium, they contribute to the overall texture and flavor profile, making each bite satisfying.
3. Granulated Sugar: The backbone of any praline recipe, granulated sugar plays a crucial role in sweetness and caramelization. As sugar melts and browns, it creates the signature rich flavor that defines praline.
4. Unsalted Butter: Butter is essential for adding richness and a smooth mouthfeel to the praline mixture. Using unsalted butter allows you to control the saltiness of the final product, ensuring a perfectly balanced flavor.
5. Heavy Cream: This ingredient brings a luxurious creaminess to the praline crunch. The heavy cream helps create a velvety texture, enriching the overall experience and making the dessert feel indulgent.
6. Vanilla Extract: A splash of vanilla extract enhances the flavor complexity of the praline crunch, adding warmth and depth to the sweetness. Always opt for pure vanilla extract for the best results.
7. Sea Salt: A pinch of sea salt is crucial for balancing the sweetness of the sugar and enhancing the flavors of the nuts and chocolate. The slight saltiness elevates the dessert, making it even more enjoyable.
8. Chocolate Chips: Choosing between dark or semi-sweet chocolate chips depends on your preference for sweetness. Dark chocolate provides a richer flavor, while semi-sweet chocolate brings a more balanced sweetness to the mix.
9. Cayenne Pepper: While optional, a dash of cayenne pepper adds an exciting twist, introducing a hint of heat that contrasts beautifully with the sweetness of the praline. It’s a subtle way to elevate the flavor profile and surprise your guests.
10. Tips on Sourcing High-Quality Ingredients: When it comes to making praline crunch, the quality of your ingredients matters. Look for fresh nuts, pure vanilla extract, and high-quality chocolate to ensure the best flavor. Local farmers’ markets or specialty food stores can be great sources for these ingredients.
Step-by-Step Instructions
Now that we have a solid understanding of the ingredients, let’s move on to the step-by-step instructions for making decadent praline crunch. This section will guide you through each phase of the process, ensuring that you achieve the perfect crunch.
Preparing the Baking Dish
Begin by preparing your baking dish. Line a rimmed baking sheet with parchment paper to prevent the praline from sticking. This step is crucial for easy removal once the praline has cooled. Ensure that the parchment paper extends over the edges of the pan, allowing you to lift the praline out effortlessly.
Importance of Oven Temperature and Lining Methods
Preheat your oven to 350°F (175°C). The right temperature is vital for toasting the nuts, which enhances their flavor and contributes to the overall taste of the praline crunch. While the oven is heating, check that your parchment paper is smooth and properly positioned in the baking dish for even coating.
Toasting the Nuts
Toasting the nuts is a key step that should not be overlooked. Spread the pecans and almonds evenly on a separate baking sheet and place them in the preheated oven. Toast the nuts for about 8-10 minutes, making sure to stir them halfway through to ensure even toasting.
The Science Behind Toasting Nuts and Enhancing Flavor
Toasting nuts releases their natural oils, intensifying their flavor and creating a delightful crunch. The Maillard reaction, a chemical reaction between amino acids and reducing sugars, occurs during the toasting process, resulting in a deeper, nuttier flavor. Keep a close eye on the nuts, as they can go from perfectly toasted to burnt in a matter of minutes. Once fragrant and golden brown, remove the nuts from the oven and set them aside to cool slightly.
Making the Praline Mixture
In a large saucepan, combine the granulated sugar, unsalted butter, and heavy cream over medium heat. Stir the mixture until the sugar has completely dissolved, and bring it to a gentle boil.
Key Techniques for Achieving the Perfect Consistency
As the mixture begins to boil, reduce the heat to medium-low and continue to cook, stirring constantly. It’s important to keep stirring to prevent the sugar from crystallizing, which can ruin the smooth texture of your praline. Use a candy thermometer to monitor the temperature; you’re aiming for a soft ball stage at about 240°F (115°C).
Importance of Constant Stirring and Temperature Control
Monitoring the temperature and stirring constantly are crucial for achieving the desired consistency. If the mixture starts to bubble too vigorously, reduce the heat to maintain a gentle simmer. Once the temperature reaches the desired level, remove the saucepan from the heat. The mixture should be thick and glossy, with a beautiful golden hue.
Adding Flavorings
At this stage, add the vanilla extract and sea salt to the praline mixture. Stir well to ensure that the flavors are evenly distributed throughout.
Impact of Vanilla and Salt on Overall Taste
The addition of vanilla enhances the caramel flavor, while the sea salt provides a necessary contrast, highlighting the sweetness. If you’re feeling adventurous, you can also sprinkle in a dash of cayenne pepper for an unexpected kick that will surprise your taste buds.
Next Steps
With the praline mixture ready, you’re just a few steps away from creating your decadent praline crunch. Follow the upcoming instructions to combine the toasted nuts and chocolate chips, and watch as your simple ingredients transform into a luxurious treat that is sure to impress.
Stay tuned for the next part of the article, where we will delve into the final steps of the praline crunch recipe, including cooling, cutting, and serving suggestions that will make your dessert the star of any occasion.
Combining with Nuts
To elevate your Decadent Praline Crunch, the choice of nuts plays a crucial role. You can use a variety of nuts, such as pecans, walnuts, or almonds, depending on your preference. For the best results, here’s how to prepare your nuts:
1. Roasting: Consider lightly roasting the nuts before mixing them into the praline. This process enhances their flavor and adds a delightful crunch. Simply spread the nuts on a baking sheet and toast them in a preheated oven at 350°F (175°C) for about 8–10 minutes, or until they are fragrant and golden. Keep an eye on them to avoid burning.
2. Chopping: Once roasted and cooled, chop the nuts into smaller pieces. This not only helps with even distribution in your mixture but also creates a more appealing texture. Aim for a rough chop to ensure some larger pieces remain for that satisfying crunch.
Techniques for Ensuring Even Coating
Achieving an even coating of the caramel over your nuts is essential for a well-balanced flavor and texture. Here are some techniques to ensure that every nut is coated perfectly:
– Use a Large Bowl: After combining the sugar mixture with the nuts, transfer them to a large mixing bowl. This gives you enough space to toss the nuts thoroughly without spilling.
– Toss Gently: Using a spatula or a wooden spoon, gently fold the nuts into the caramel mixture. Be careful not to crush the nuts; you want to maintain their integrity for that satisfying crunch.
– Work Quickly: The caramel will start to harden as it cools, so it’s important to work quickly. Ensure that you coat the nuts as soon as the caramel is ready for the best results.
Spreading in the Pan
Once your nuts are evenly coated in the caramel, the next step is to spread the mixture into the pan:
1. Prepare the Pan: Line a baking pan with parchment paper, allowing some overhang. This will make it easier to lift the praline crunch out once it’s set. You can use a 9×13-inch pan for this recipe.
2. Transfer and Spread: Carefully pour the coated nut mixture into the prepared pan. Use a spatula to spread it evenly across the bottom, ensuring that the mixture fills the corners and edges.
Tips for Creating an Even Layer
Creating an even layer of praline crunch is essential for consistent texture and flavor throughout. Here are some practical tips:
– Press Firmly: After spreading the mixture in the pan, use the back of a spatula or a piece of parchment paper to press down firmly. This compacts the mixture, ensuring that it holds together once cooled.
– Level the Surface: Take a minute to smooth out the top with your spatula to create a uniform surface. This not only looks better but also allows for even cutting later on.
Baking Process
Baking the praline crunch is a crucial step in achieving that perfect texture:
1. Preheat the Oven: Ensure that your oven is preheated to 350°F (175°C) before placing the pan inside.
2. Bake: Place the pan in the oven and bake for about 15–20 minutes. Keep an eye on it; you want it to turn a deep golden color, indicating that the sugars have caramelized properly.
Monitoring Time and Color for Optimal Results
Monitoring the baking time and color is vital to avoid burning:
– Check Early: Start checking the mixture at the 15-minute mark. The edges will cook faster than the center, so look for a uniform golden hue.
– Don’t Overbake: If the praline crunch is overcooked, it can become hard and brittle. You want a slight softness in the center when you remove it from the oven, as it will continue to set as it cools.
Cooling the Mixture
Cooling is a crucial step for developing the texture of your praline crunch:
1. Remove from Oven: Once baked to perfection, take the pan out of the oven and let it cool in the pan for about 10 minutes. This allows the caramel to set slightly before cutting.
2. Transfer to a Wire Rack: After the initial cooling, lift the parchment paper to transfer the entire slab to a wire rack. This will help cool it completely and prevent sogginess from steam.
Importance of Cooling for Texture Development
Cooling allows the caramel to harden and the nuts to adhere properly, giving you that signature crunch. If you attempt to cut the praline while it’s still warm, it may fall apart and lose its shape.
Melting Chocolate
While the praline crunch is cooling, you can prepare the chocolate drizzle:
1. Choose Quality Chocolate: Opt for high-quality chocolate for melting. Dark, milk, or even white chocolate can complement the praline crunch beautifully.
2. Chop for Even Melting: Chop the chocolate into small, uniform pieces to ensure it melts evenly.
Best Practices for Melting Chocolate Without Burning
Melting chocolate can be tricky, but following these practices will yield the best results:
– Double Boiler Method: Place a heatproof bowl over a pot of simmering water. This indirect heat will melt the chocolate gently, reducing the risk of burning.
– Microwave Method: Alternatively, you can melt chocolate in the microwave in short bursts of 20-30 seconds, stirring in between until smooth.
Drizzling Technique
Drizzling chocolate over your cooled praline crunch adds a beautiful finish:
– Using a Fork: Dip a fork into the melted chocolate and drizzle it over the cooled praline crunch. This creates a rustic look and enhances visual appeal.
– Piping Bag Method: For a more controlled drizzle, transfer melted chocolate to a piping bag and cut a small hole at the tip. This allows for precision in your design.
Chilling and Setting
After drizzling, chilling is essential for setting the chocolate:
– Chill in the Refrigerator: Place the praline crunch in the fridge for about 30 minutes. This helps the chocolate to harden and sets the whole mixture.
Why Chilling is Crucial for the Final Texture
Chilling not only sets the chocolate but also allows the flavors to meld together, enhancing the overall taste of your Decadent Praline Crunch. The result is a treat that is crunchy, sweet, and utterly irresistible.
Cutting and Serving
Once set, it’s time to cut and serve your praline crunch:
1. Removing from the Pan: Lift the praline crunch out of the pan using the parchment paper overhang. Place it on a cutting board.
2. Cutting: Use a sharp knife to cut the mixture into squares or rectangles. For clean edges, run the knife under hot water and dry it before each cut.
Best Practices for Cutting and Presentation
– Presentation: Arrange the cut pieces on a decorative platter and consider garnishing with extra chopped nuts or a dusting of powdered sugar for an elegant touch.
– Layering: For a more indulgent presentation, serve the praline crunch layered between sheets of parchment in a gift box or as a part of a dessert platter.
Serving Suggestions
To elevate your praline crunch experience, consider these pairing ideas:
– Coffee Pairing: The rich, caramel flavors of the praline crunch complement a cup of coffee beautifully. Whether you prefer espresso or a creamy latte, this combination is sure to please.
– Ice Cream Delight: Serve praline crunch as a topping for vanilla ice cream. The warm caramel and crunchy texture create an exquisite dessert that is hard to resist.
– In Desserts: Incorporate the praline crunch into other desserts, such as cakes or cheesecakes, for added texture and flavor.
Storage and Shelf-life
To maintain the freshness of your Decadent Praline Crunch, proper storage is key:
– Proper Storage Methods: Store the praline crunch in an airtight container at room temperature. If you live in a humid climate, consider refrigerating it to prevent it from becoming sticky.
– Shelf-life: When stored correctly, the praline crunch can last for up to two weeks. However, you may notice a decline in crunchiness as time passes.
– Signs of Spoilage: Check for any signs of spoilage, such as an off smell or a change in texture. If the praline crunch feels soft or sticky, it’s best to discard it.
Variations and Customizations
To make this recipe your own, consider the following variations and customizations:
– Alternative Nuts and Flavorings: Experiment with different nuts such as cashews or macadamia nuts. You can also add spices like cinnamon or nutmeg for an extra layer of flavor.
– Gluten-Free or Dairy-Free Adaptations: Substitute traditional ingredients with gluten-free alternatives or use dairy-free chocolate to cater to dietary restrictions.
– Seasonal Variations: During the fall, consider adding pumpkin spice or maple extract to your praline crunch. In summer, a sprinkle of sea salt can enhance the flavor profile.
Nutritional Information
Understanding the nutritional content of your Decadent Praline Crunch can help you enjoy it responsibly:
– Breakdown of Calories and Macronutrients: Each serving of praline crunch contains approximately 180 calories, with 10 grams of fat, 22 grams of carbohydrates, and 3 grams of protein. These values may vary based on the type of nuts and chocolate used.
– Health Considerations and Moderation Tips: While delicious, praline crunch is high in sugar and calories. Enjoy this treat in moderation, and consider pairing it with healthier snacks to balance your diet.
Conclusion
The Decadent Praline Crunch is not only a delightful indulgence but also a versatile treat that can be customized to suit your taste. Whether enjoyed on its own, as a topping, or incorporated into other desserts, this recipe invites you to experiment and make it your own. So gather your ingredients, follow the steps, and create your own batch of this crunchy, caramel-infused delight. Enjoy sharing this treat with family and friends, and celebrate the joy of homemade confections.
