Introduction
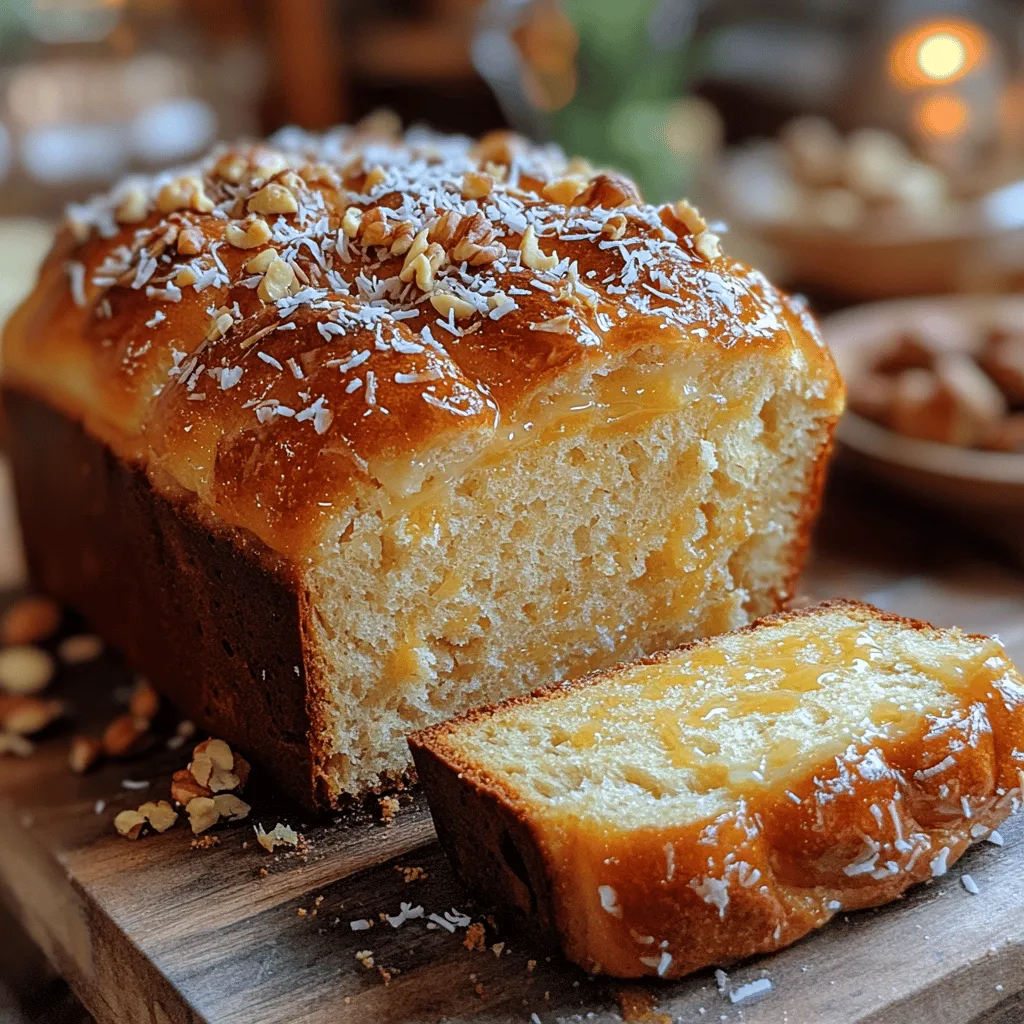
Sweet Condensed Milk Bread is an enchanting treat that has captured the hearts and palates of many around the world. With its unique sweetness and irresistibly soft texture, this bread is much more than just a baked good; it is an experience. Imagine waking up to the aroma of freshly baked bread that not only fills your kitchen but also tantalizes your senses. Whether enjoyed as a delectable breakfast, a delightful snack, or a rich dessert, Sweet Condensed Milk Bread is versatile enough to satisfy any craving.
The use of sweetened condensed milk in this recipe is what sets it apart from traditional bread, imparting a unique flavor and moistness that is hard to resist. In this article, we will embark on a detailed exploration of how to create this delightful bread, diving into its background, essential ingredients, and step-by-step instructions to ensure your baking success. Get ready to learn the secrets behind this sweet treat!
Understanding Sweet Condensed Milk Bread
Definition and Characteristics
Sweet Condensed Milk Bread is a soft, sweet bread that incorporates sweetened condensed milk into its dough, resulting in a soft crumb and a delicate sweetness. This bread is not only fluffy but also has a slightly chewy crust, making it an appealing option for various occasions. The sweetness from the condensed milk offers a unique flavor profile that sets it apart from regular bread, making it a comforting treat for both young and old.
Historical Context and Cultural Significance
Sweet breads have a rich history and are found in many cultures around the globe. In many Asian countries, for example, sweetened condensed milk is a staple ingredient in desserts and snacks, leading to the creation of various sweet breads and buns. Countries like Brazil, Vietnam, and the Philippines have their own interpretations of sweet bread, often characterized by the addition of local flavors and ingredients. The use of sweetened condensed milk in bread-making is a testament to the versatility of this ingredient and its ability to enhance the flavor and texture of baked goods.
In many households, sweet bread is often associated with family gatherings, celebrations, and special occasions, making it a cherished recipe passed down through generations. Whether it be a festive holiday or a simple gathering, Sweet Condensed Milk Bread brings people together, evoking feelings of warmth and nostalgia.
Overview of the Ingredients
To achieve the desired flavor and texture of Sweet Condensed Milk Bread, several key ingredients play crucial roles. Each ingredient contributes to the overall makeup of the bread, ensuring a delightful taste and an appealing texture. Here’s a closer look at what goes into this delicious treat:
Key Ingredients and Their Benefits
All-Purpose Flour
All-purpose flour is the backbone of any bread recipe. It provides the necessary gluten structure that allows the bread to rise and develop its characteristic texture. When combined with water and kneaded, the proteins in the flour form gluten, which gives the bread its strength and elasticity. For Sweet Condensed Milk Bread, using high-quality all-purpose flour ensures a soft, fluffy loaf with a tender crumb.
Sweetened Condensed Milk
The star ingredient of this recipe, sweetened condensed milk, is a rich, creamy milk product with a high sugar content. It not only adds sweetness to the bread but also contributes to its moistness and texture. The sugars in the condensed milk help to enhance the browning of the crust during baking, creating a beautiful golden finish. Additionally, the fat content in sweetened condensed milk enriches the flavor, making every bite a delight.
Warm Milk
Warm milk is essential in the bread-making process, particularly for activating yeast. The warmth of the milk helps to dissolve the yeast, allowing it to start fermenting and producing carbon dioxide, which in turn causes the dough to rise. Moreover, warm milk contributes to the overall texture of the dough, making it softer and more pliable.
Unsalted Butter
Butter is a key ingredient that enhances the richness and flavor of Sweet Condensed Milk Bread. It adds moisture and contributes to the tender crumb of the bread. Using unsalted butter allows for better control of the salt levels in the recipe, ensuring that the flavors remain balanced.
Active Dry Yeast
Yeast is a living organism that plays a crucial role in bread-making by fermenting sugars and producing carbon dioxide gas. This gas causes the dough to rise and develop its airy structure. Active dry yeast is a convenient form of yeast that must be activated in warm liquid before use. It is important to ensure that the yeast is fresh and properly activated to achieve the best rise and texture in your bread.
Granulated Sugar
Sugar not only serves to sweeten the bread but also acts as food for the yeast, aiding in its activation. The sugar helps to create a tender crumb and contributes to the browning of the crust, enhancing the overall appearance of the bread. Granulated sugar can be adjusted according to personal taste preferences, allowing for a customized level of sweetness.
Salt
Salt is an essential ingredient in any bread recipe, as it enhances the overall flavor and balances sweetness. In addition to its flavor-enhancing properties, salt also strengthens gluten structure, helping to improve the texture of the bread. It is important to use the right amount of salt, as too much can inhibit yeast activity, while too little can lead to bland-tasting bread.
Egg
Eggs are often included in bread recipes for their binding properties, contributing to the overall structure and stability of the dough. They also add richness and moisture, resulting in a tender crumb. The addition of eggs can enhance the color of the bread, creating a beautiful golden hue.
Vanilla Extract
While optional, vanilla extract can elevate the flavor profile of Sweet Condensed Milk Bread, adding a warm, aromatic note that complements the sweetness of the condensed milk. It enhances the overall taste, making the bread even more appealing.
Optional Add-Ins
Consider incorporating optional add-ins such as shredded coconut or nuts for added texture and flavor variations. These ingredients can provide a delightful crunch and unique twist to the classic recipe, allowing for personal creativity in the kitchen.
Step-by-Step Instructions for Making Sweet Condensed Milk Bread
Now that you are familiar with the key ingredients and their importance, let’s dive into the step-by-step instructions for making your own Sweet Condensed Milk Bread. The process is straightforward and rewarding, with each step building upon the last to create a delicious final product.
Activating the Yeast
The first crucial step in making Sweet Condensed Milk Bread is activating the yeast. This process is vital for successful fermentation and rising. Here’s how to do it:
1. Gather Your Ingredients: Start by measuring out the warm milk, ensuring that it is between 100°F to 110°F (37°C to 43°C). If the milk is too hot, it can kill the yeast; too cold, and it won’t activate properly.
2. Combine Yeast and Sugar: In a small bowl, combine the warm milk with about 1 tablespoon of the granulated sugar. Stir in the active dry yeast and let it sit for about 5 to 10 minutes. This resting period allows the yeast to become frothy and bubbly, indicating that it is alive and ready for use.
3. Check for Activation: After 10 minutes, check the mixture. It should be frothy and have increased in volume. This indicates that your yeast is active and ready to be incorporated into the dough.
As we proceed with the subsequent steps, we will explore how to combine the activated yeast with the rest of the ingredients to create a beautiful Sweet Condensed Milk Bread. Stay tuned for the next part, where we will detail the mixing, kneading, and rising processes that will lead you to freshly baked bread that is simply irresistible.

Mixing Wet Ingredients
To start off your Sweet Condensed Milk Bread, begin by mixing the wet ingredients. This step is crucial for achieving a smooth batter that will contribute to the bread’s rich texture. In a medium-sized bowl, combine the sweetened condensed milk, warm water, and yeast. It’s important to ensure that the water is warm, not hot, as excessive heat can kill the yeast, preventing your dough from rising. Stir gently with a whisk until the yeast is fully dissolved. Allow this mixture to sit for about 5 to 10 minutes until it becomes frothy. This frothiness indicates that the yeast is active and ready to help your bread rise.
Next, add in the melted butter, eggs, and vanilla extract to the yeast mixture. Use a whisk or a hand mixer on low speed to achieve a well-blended mixture. The goal here is to create a smooth, consistent wet mixture that will integrate seamlessly with the dry ingredients later on. Pay attention to the consistency; it should be creamy and homogenous, without any lumps.
Combining Dry Ingredients
In a separate large mixing bowl, combine your dry ingredients: all-purpose flour, sugar, and salt. It’s essential to measure your flour accurately; too much flour can lead to a dense loaf. A kitchen scale can be particularly helpful here, as it provides the most accurate measurements. Whisk the dry ingredients together thoroughly to ensure even distribution of the salt and sugar.
Once combined, create a well in the center of the dry ingredients. This will allow you to gradually introduce the wet mixture without creating lumps. Slowly pour the wet ingredients into the well of the dry ingredients, using a spatula or wooden spoon to gently incorporate them. Start from the edges of the well and work your way inward, folding the flour into the liquid. Continue this process until no dry flour remains visible, but avoid overmixing, as this can lead to a tougher texture.
Kneading the Dough
After combining the wet and dry ingredients, it’s time to knead the dough. Transfer it to a lightly floured work surface. Kneading is vital for developing gluten, which gives bread its structure and chew. Begin by pressing the dough with the palms of your hands, then fold it over itself and repeat the process. Aim to knead for about 8 to 10 minutes until the dough becomes smooth and elastic.
To determine if your dough is ready, perform the “windowpane test.” Take a small piece of dough and stretch it gently. If it stretches into a thin, translucent membrane without tearing, it’s ready for the first rise. If it breaks easily, continue kneading for a few more minutes.
First Rise
Once the dough is kneaded to perfection, place it in a lightly greased bowl, turning it to coat all sides with oil. Cover the bowl with a clean kitchen towel or plastic wrap to retain moisture. The ideal environment for rising is a warm, draft-free place. Factors like temperature and humidity can significantly influence the rising process; a warm kitchen will speed things up, while cooler conditions will slow it down. Let the dough rise for about 1 to 2 hours, or until it has doubled in size.
If your kitchen is cold, you can create a warm environment by placing the bowl in the oven (turned off) with the light on. This gentle warmth can help activate the yeast effectively.
Shaping the Dough
After the first rise, it’s time to shape your dough. Gently punch down the dough to release the air. Turn it out onto a lightly floured surface and divide it into two equal portions if you plan on making two loaves or rolls. For loaves, shape each portion into a rectangle by flattening it with your hands. Then, roll the dough tightly from one end to the other, pinching the seams closed to ensure a secure shape.
For rolls, divide the dough into smaller portions, typically about 8 to 12 pieces, and shape each piece into a small ball. Place the shaped loaves or rolls into greased baking pans, ensuring there’s enough space between them to allow for rising.
Second Rise
The second rise is just as crucial as the first. Cover the shaped dough with a clean kitchen towel and let them rise again for about 30 to 60 minutes, or until they have puffed up significantly. This proofing phase is essential for achieving a light and airy texture.
During this time, ensure your dough is kept in a warm environment. If you notice that the dough isn’t rising as much as you’d like, check the temperature of your kitchen and consider moving the dough to a warmer spot.
Baking the Bread
Once the dough has risen beautifully, it’s time to bake. Preheat your oven to 350°F (175°C). Before placing the bread in the oven, you can brush the tops with an egg wash (a mixture of beaten egg and water) for a glossy finish, although this is optional. Bake the bread for 25 to 30 minutes or until they are golden brown and sound hollow when tapped on the bottom.
To accurately check for doneness, you can also use an instant-read thermometer; the internal temperature should reach around 190°F (88°C). Remove the bread from the oven and let it cool in the pans for about 10 minutes before transferring it to a wire rack to cool completely.
Cooling and Serving
Proper cooling is essential for the best texture. Allow the bread to cool completely on a wire rack before slicing. This prevents the bread from becoming gummy or soggy. Once cooled, slice the bread using a serrated knife for clean edges.
Sweet Condensed Milk Bread is versatile and can be enjoyed in various ways. Serve it plain, toasted with butter, or slathered with your favorite jam. It also pairs wonderfully with fresh fruits or spreads, making it a delightful addition to breakfast or brunch.
Tips for Perfecting Your Sweet Condensed Milk Bread
While making Sweet Condensed Milk Bread is generally straightforward, there are common pitfalls to avoid. Here are some tips to ensure your baking adventure is a success:
– Avoid Over-Kneading: While kneading is essential, overdoing it can lead to tough bread. Stop once it reaches the right elasticity.
– Pay Attention to Yeast: Ensure your yeast is fresh. Expired yeast can lead to a failed rise.
– Be Patient: Bread-making requires time, especially during the rising phases. Rushing these steps can compromise the final product.
– Ingredient Substitutions: For a dairy-free option, consider using coconut milk or almond milk in place of sweetened condensed milk. You can also substitute the butter with a vegan alternative, ensuring you maintain similar proportions.
Creative Serving Suggestions
Sweet Condensed Milk Bread is not just a treat on its own; it can be transformed into several delightful dishes:
– Toasted with Butter and Jam: Simply toast slices and spread with butter and your favorite jam or preserves for a comforting breakfast.
– Paired with Fresh Fruits or Spreads: Serve alongside fresh fruits or gourmet spreads like Nutella, peanut butter, or cream cheese for a delightful snack or dessert.
– Used in French Toast or Bread Pudding: This bread makes an excellent base for French toast or can be cubed for a rich bread pudding.
– Beverage Pairings: Complement your Sweet Condensed Milk Bread with a steaming cup of coffee or tea. The sweetness of the bread balances perfectly with a bitter beverage.
Storing and Freezing Sweet Condensed Milk Bread
To maintain the freshness of your Sweet Condensed Milk Bread, follow these best practices:
– Storage: Store the bread in an airtight container or wrap it tightly in plastic wrap. It can be kept at room temperature for up to 3 days. If you live in a humid environment, consider refrigerating it to prevent mold growth.
– Freezing: For longer storage, you can freeze the bread. Wrap it tightly in plastic wrap and then place it in a freezer bag. It can be frozen for up to 3 months. When ready to enjoy, thaw it at room temperature and reheat in the oven for a few minutes to restore its texture.
Conclusion
Sweet Condensed Milk Bread is a delightful addition to any baking repertoire, offering a unique sweetness and soft, fluffy texture that’s hard to resist. This recipe not only allows you to indulge in the joys of homemade bread but also provides a canvas for creativity in the kitchen. Whether you enjoy it toasted, as part of a decadent dessert, or simply on its own, this bread is sure to become a favorite.
Don’t hesitate to experiment with this versatile recipe, tailoring it to suit your tastes. The joy of bread-making lies in its ability to bring people together, creating warm memories around the kitchen table. So gather your ingredients, embrace the process, and enjoy the delicious rewards of your efforts!

