Introduction
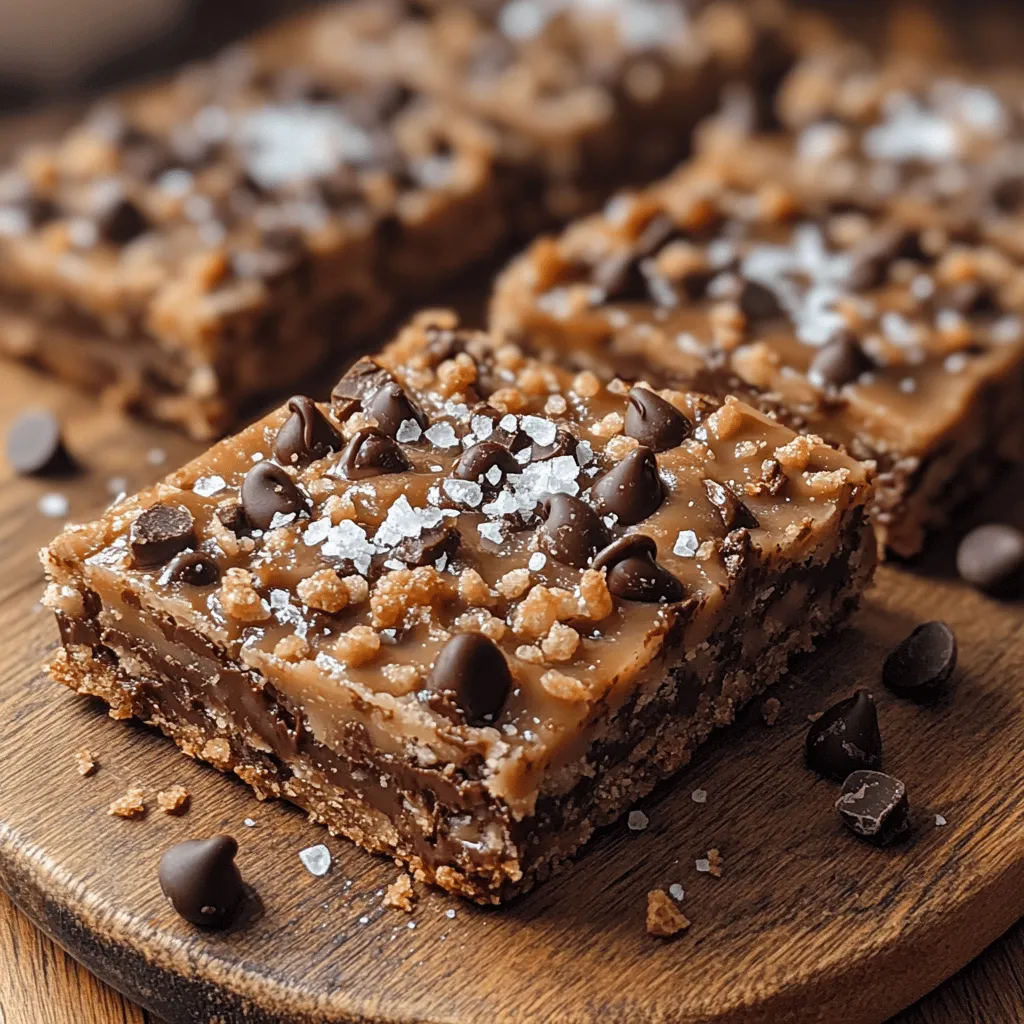
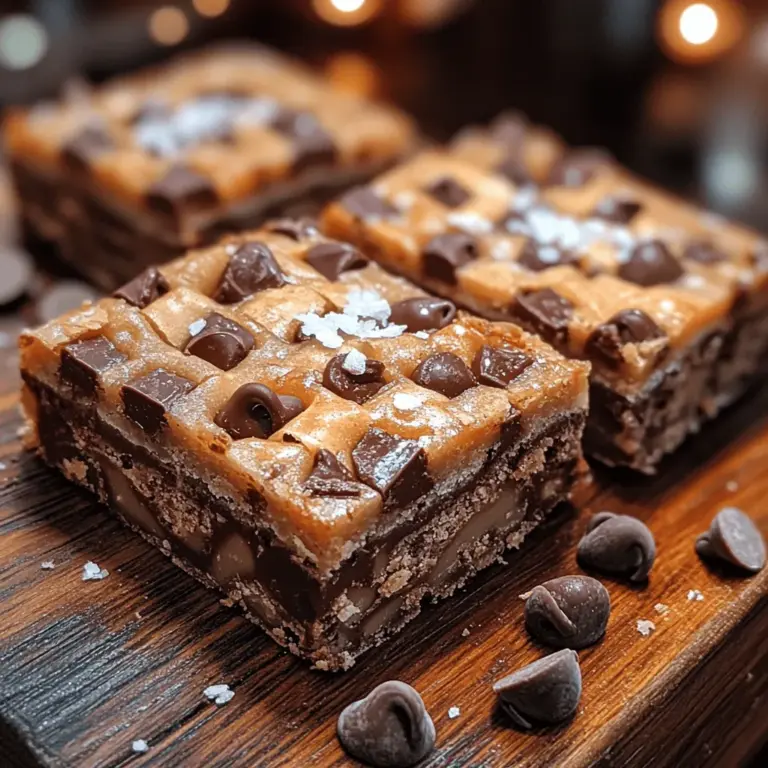
Toffee Crunch Chocolate Bars are a dessert that captures the hearts of chocolate lovers everywhere. With their rich and indulgent flavors, these bars seamlessly combine the silky smoothness of chocolate, the sweet crunch of toffee bits, and a buttery base that melts in your mouth. Whether you’re preparing for a holiday gathering, a birthday celebration, or just an everyday treat, these chocolate bars are sure to impress. They are not only a favorite among seasoned bakers but also an excellent choice for novices looking to elevate their baking game. The recipe’s straightforward steps make it accessible, allowing anyone to create a delightful dessert that satisfies cravings and brings joy to any occasion.
The allure of Toffee Crunch Chocolate Bars lies in their versatility. They can be served warm, with the chocolate still gooey, or cooled for a firmer texture that’s easy to slice and share. Pair them with a scoop of vanilla ice cream for an indulgent dessert, or enjoy them on their own with a cup of coffee. No matter how you choose to serve them, these bars are a guaranteed crowd-pleaser.
Understanding the Ingredients
To create the perfect Toffee Crunch Chocolate Bars, it’s essential to understand the role of each ingredient in the recipe. Here’s a detailed breakdown of the primary components:
Unsalted Butter
Unsalted butter is a crucial ingredient in this recipe, impacting both the texture and flavor of the bars. The butter adds richness, contributing to the melt-in-your-mouth quality that defines these treats. By using unsalted butter, you have better control over the overall saltiness of the dessert, allowing you to adjust flavors according to your preference. Make sure the butter is at room temperature for optimal creaming with the sugars.
Brown Sugar vs. Granulated Sugar
In this recipe, the combination of brown sugar and granulated sugar is key to achieving the perfect balance of flavor and texture. Brown sugar, with its molasses content, adds moisture and a subtle caramel flavor that pairs beautifully with the chocolate and toffee. On the other hand, granulated sugar provides structure and sweetness. The interplay between these two types of sugar helps create a bar that is both chewy and soft, with a delightful crunch from the toffee bits.
All-Purpose Flour
All-purpose flour serves as the foundation of the bars, providing the necessary structure and density. It acts as the binding agent that holds everything together. When measuring flour, it’s crucial to do so accurately to avoid a dense or crumbly texture. Using a light hand while mixing in the flour will ensure that the bars maintain a tender crumb, rather than becoming tough.
Semisweet Chocolate Chips
Semisweet chocolate chips are the star of the show in Toffee Crunch Chocolate Bars. With their rich flavor and melting properties, they create a luscious chocolate experience. The chips add to the overall sweetness while also providing a deep, satisfying chocolate taste. When folding them into the batter, be sure to use high-quality chocolate chips for the best results.
Toffee Bits
Toffee bits are what truly elevate these chocolate bars, adding a satisfying crunch and a burst of caramel sweetness. They easily incorporate into the batter, ensuring that every bite is packed with flavor. For an extra indulgent treat, consider using larger chunks of toffee or different flavored varieties, such as chocolate-covered toffee.
Optional Nuts
While not necessary for the recipe, adding nuts can enhance the flavor and texture of the bars. Chopped pecans or walnuts can provide a delightful crunch that complements the soft chocolate and toffee. If you’re a fan of nutty flavors, feel free to experiment with different varieties to find your perfect combination.
Sea Salt
A sprinkle of sea salt at the end is the finishing touch that brings all the flavors together. The salt balances the sweetness and enhances the chocolate and toffee notes, creating a more complex and satisfying flavor profile. It’s a small addition that makes a significant difference in the overall taste of the bars.
Preparation Steps Explained
Now that you understand the ingredients, let’s dive into the preparation steps that will lead you to your own batch of Toffee Crunch Chocolate Bars:
Preheating the Oven
The first step in any baking endeavor is preheating the oven. This is crucial for ensuring even baking, which is essential for achieving the perfect texture. Set your oven to 350°F (175°C) and allow it to preheat fully before placing your baking pan inside. A properly heated oven helps the bars rise and bake evenly, creating a delightful consistency throughout.
Creaming Butter and Sugars
Once your oven is preheated, it’s time to cream the unsalted butter with both the brown sugar and granulated sugar. This step is vital for incorporating air into the mixture, which contributes to the lightness of the bars. Using a stand mixer or hand mixer, beat the butter and sugars together on medium speed until the mixture is light and fluffy. This process usually takes about 3-5 minutes. Make sure to scrape down the sides of the bowl to ensure everything is well combined.
Incorporating Dry Ingredients
After creaming the butter and sugars, it’s time to incorporate the dry ingredients. In a separate bowl, whisk together the all-purpose flour, baking powder, and a pinch of salt. Gradually add this dry mixture to the butter and sugar mixture. To maintain a tender crumb, mix on low speed until just combined. Avoid over-mixing, as this can lead to tough bars. The goal is to keep the batter airy while ensuring all the flour is incorporated.
Folding in Chocolate and Toffee
Next, you’ll want to fold in the semisweet chocolate chips and toffee bits. Using a spatula, gently fold the chocolate and toffee into the batter until they are evenly distributed. This technique helps prevent over-mixing and ensures that the chocolate and toffee are well incorporated without deflating the batter. You want to see bits of chocolate and toffee throughout the mixture for that perfect bite.
Preparing the Baking Pan
To prepare for baking, line a 9×13-inch baking pan with parchment paper. This step is crucial as it makes for easy removal of the bars once they’re baked. The parchment paper also helps to prevent sticking, ensuring that your bars maintain their shape. Lightly grease the parchment paper with cooking spray or a little butter for added assurance.
With the preparation steps complete, you’re ready to pour the batter into the prepared baking pan and bake your Toffee Crunch Chocolate Bars to perfection. Stay tuned for the next part of this exciting recipe, where we will cover the baking times, cooling process, and tips for serving these delightful treats!

Spreading the Batter: Techniques for an Even Bake
Once your batter is mixed, it’s crucial to spread it evenly in the baking pan. Start by pouring the batter into the prepared pan, ensuring you have a generous amount in the center. Using a spatula, gently push the batter towards the edges. To achieve an even layer, consider using a technique called the “spatula swirl.” This involves placing the spatula at a 45-degree angle and gently moving it back and forth across the surface of the batter. This motion helps distribute the batter evenly without overworking it, which can sometimes lead to dense bars.
For an extra touch, you can lightly tap the pan on the counter a few times. This allows any air bubbles to escape and encourages the batter to settle uniformly, which is essential for a consistent bake. Finally, make sure the top of the batter is level before placing it in the oven. A well-spread batter contributes significantly to the overall appearance and texture of your Toffee Crunch Chocolate Bars.
Baking the Bars: Key Indicators for Doneness
Baking is both an art and a science, and knowing when your bars are perfectly baked is crucial for achieving the best results. Generally, Toffee Crunch Chocolate Bars will take about 25 to 30 minutes at 350°F (175°C). However, there are several indicators to watch for to ensure doneness:
1. Color: The edges of the bars should be golden brown, while the center will retain a slightly softer appearance. The top should not look wet or shiny.
2. Touch: Gently press the center of the bars with your fingertip. If it springs back quickly, they are likely done. If your finger leaves an indentation, they need more time.
3. Toothpick Test: Insert a toothpick into the center of the bars. It should come out with a few moist crumbs attached, indicating that they are baked through but still moist.
Once baked, remove the bars from the oven and allow them to cool slightly in the pan before moving them to a wire rack. This cooling time helps set the bars and makes slicing easier later on.
Adding Sea Salt: The Science Behind Balancing Sweetness with Saltiness
One of the most delightful aspects of Toffee Crunch Chocolate Bars is the balance of flavors, and adding sea salt at this stage enhances that experience. The contrast between the sweetness of the chocolate and the salty notes of the sea salt creates a sophisticated flavor profile that elevates your bars.
When sprinkling sea salt, opt for flaky sea salt, which provides a delightful crunch and bursts of flavor. It’s best to add the salt just after removing the bars from the oven while they’re still warm. This allows the salt to adhere well and dissolve slightly, infusing the bars with that unmistakable savory-sweet balance. The key is moderation; a light sprinkle will enhance the flavors without overpowering the sweetness of the chocolate and toffee.
Cooling and Slicing: Best Practices for Achieving Clean Cuts
Cooling your Toffee Crunch Chocolate Bars properly is essential for achieving clean slices. After removing the bars from the oven, let them cool in the pan for about 10-15 minutes. This short resting period allows them to set without becoming overly hard. Once they are cool enough to handle but still warm, you can transfer them to a wire rack to cool completely.
For slicing, it is best to use a sharp knife to avoid crumbling the edges. If you want to ensure even cleaner cuts, consider chilling the bars in the refrigerator for about 30 minutes. This not only firms them up but also makes slicing much easier. When cutting, use a sawing motion rather than applying downward pressure, which can cause the bars to break apart. Aim for uniform squares or rectangles, depending on your preference, and enjoy the delightful layers of chocolate and toffee in each piece.
Serving Suggestions
When it comes to serving your Toffee Crunch Chocolate Bars, the options are nearly endless. Here are some delightful ideas to elevate your dessert experience:
– Pairing with Ice Cream: Serve the bars warm with a scoop of vanilla or caramel ice cream. The melting ice cream complements the rich chocolate and crunchy toffee perfectly, creating a delightful contrast in temperatures and textures.
– Whipped Cream: A dollop of freshly whipped cream lightly sweetened with vanilla can add a light, airy element to the richness of the bars. For a fun twist, consider adding a dash of cocoa powder to the whipped cream for a chocolatey accent.
– Fresh Fruit: Slices of fresh strawberries, raspberries, or bananas can brighten up the plate and add a refreshing contrast to the sweet bars. The acidity from the fruit balances the richness beautifully.
When serving for gatherings, consider presentation tips such as placing the bars on a decorative platter or cutting them into bite-sized pieces for easy sharing. You might also garnish the platter with sprigs of mint or a drizzle of chocolate sauce for a visually stunning display.
Storage and Shelf Life
To maintain the freshness of your Toffee Crunch Chocolate Bars, proper storage is essential. Here are some guidelines:
1. Room Temperature: If you plan to consume the bars within a few days, simply store them in an airtight container at room temperature. This will keep them soft and chewy.
2. Refrigeration: For longer storage, especially in warmer months, place the bars in the refrigerator. They will stay fresh for about a week. Ensure they are in an airtight container to prevent them from absorbing odors from other foods.
3. Freezing: For extended storage, you can freeze the bars. Wrap them individually in plastic wrap and then place them in a freezer-safe bag or container. They can last up to three months in the freezer. When ready to eat, simply thaw them at room temperature for a few hours.
Factors that affect freshness over time include exposure to air, humidity, and temperature fluctuations. To keep the texture intact, make sure to keep them sealed tightly and away from direct sunlight.
Nutritional Information
Understanding the nutritional content of your Toffee Crunch Chocolate Bars can help you enjoy them mindfully. Here’s an overview of the nutritional information per serving (based on a serving size of one bar, assuming 16 bars in total):
– Calories: Approximately 210 calories
– Fat: 10g (Saturated Fat: 6g)
– Carbohydrates: 30g (Sugars: 20g)
– Protein: 2g
– Fiber: 1g
For those with dietary preferences, there are modifications you can consider. If you’re looking for a gluten-free option, substitute regular flour with a gluten-free blend. Additionally, you can use dairy-free chocolate for a vegan version, ensuring to check the toffee ingredients for any dairy content.
Why You’ll Love This Recipe
Toffee Crunch Chocolate Bars are not just a treat; they are an experience. The balance of flavors is what makes this recipe truly special. Each bite offers a delightful combination of sweet, salty, and buttery notes that dance on your palate. The texture is equally appealing, providing a satisfying crunch on the outside while remaining chewy and indulgent on the inside.
These bars are versatile enough to be enjoyed on various occasions, whether it’s a holiday gathering, a birthday party, or simply as a decadent treat after dinner. Their rich flavor profile makes them appealing to both children and adults alike, ensuring they will be a hit at any gathering.
Conclusion
In conclusion, Toffee Crunch Chocolate Bars are a must-try recipe for anyone who loves sweet treats with a sophisticated twist. With their perfect balance of flavors, delightful textures, and easy preparation, these bars are sure to impress family and friends. Remember to enjoy the baking process, savor the aromas that fill your kitchen, and share your delicious creation with loved ones. Whether served warm with ice cream or enjoyed as a snack throughout the week, these bars will become a cherished favorite in your dessert repertoire. Happy baking!

